BA
Baluu
Docs
    • Can I Email Attendees for a Specific Event?
    • How can I view my Guestlists and check attendance?
    • Recording Online Events
    • I'm changing my Business address
    • Business Community Guidelines
    • How to get more bookings for online events
    • The Dos and Don'ts for online events
    • Adding Notes to a Customer Booking
    • How can I cancel my events in bulk?
    • Using the Description Toolbar in Event Basic Details and Emails
    • How to run a test booking on Baluu
    • How to close your Baluu account
    • How do I delete an instructor/team member?
    • How do I set a minimum age for my event?
    • How to Export Customer Data
    • What video conference platform can I use to host my online events?
    • Can I resend any auto-emails to my customers?
    • Is Baluu GDPR Compliant?
    • How do I add a new event location?
    • How to Hide, Archive or Delete an Event
    • How to Extend Gift Card Expiry Dates?
    • How to Edit Customer Details
    • Invoice Management: Marking as Paid and Cancelling Invoices
    • How to Add a Mandatory Tick Box for Terms & Conditions
    • Why Customers Encounter Errors When Trying to Cancel or Reschedule Events
    • How to Change Your Payout Schedule
    • Where to View Your Bookings and Estimated Earnings
    • How to Change Your Baluu Booking Website Link?
    • How to Update Event Availability?
    • Adding new time slots to existing by appointment availability
    • Time Off (For Appointment-Based Sessions)
    • How to Redeem a Gift Card or Discount Code: Step-by-Step Guide
    • Adding new time slots to existing by appointment availability
    • How to Manually Add an Attendee to a Session in Baluu
    • How do I redeem a gift voucher/gift card?
    • Adding Analytics and Tracking Code
    • How to add or remove guests from a booking
    • How to Review Emails Sent to Your Customers
    • Duplicate Listing
    • How to Manage Notifications in Baluu
    • How to Enable Google and Apple Pay?
    • Search Help
    • Reminders
    • How to Create Bundles V2
    • Setting How Far in Advance Customers Can Book
    • How to Cancel a Booking and Issue a Refund
    • How to Create an Online Event on Baluu
    • How to Use Your Bundle (Customer Guide)
    • How to Update Your Subscription Plan
    • How to Email All Your Customers
    • Introducing the New Basket Function
    • Multi-Date Selection: Allow Customers to Book Multiple Dates in One Purchase
    • How to Change the Email Address Customers Reply To
    • Understanding Min / Max Selection for Add-on Groups
    • Managing Reviews in Baluu
    • Managing Membership Members
    • How to Manually Add a Booking Using a Customer’s Bundle or Membership
    • How to Show Exact Spaces Remaining on Your Class
    • How to Change Payment Details for Private Payments and Invoices?
    • How to Change Ticket Prices for Future Fixed-Date Sessions Without Affecting Existing Dates
    • How to Merge Two Customer Accounts
    • Late Booking Tolerance
    • How to Update the Date, Time or Location of an Existing Term
    • Private Payments/Invoices
    • Rescheduling Bookings
    • How does the Waiting List feature work?
    • How to reschedule my customers from one listing to another
    • How do I refund a customer for a term?
    • Can I refund a customer for a bundle?
    • Can I reduce a customer's bundle?
    • Stripe Connect
    • VAT Reporting and Sales Reports
    • My discount code is not working
    • Add or Edit a Product Delivery Option
    • Using Discount Codes for Offline Payments

Private Payments/Invoices

How to invoice your customers for a bespoke event or product.

Creating a private invoice to send to a customer for an event you have planned just for them or their group is easy. Just follow these steps.

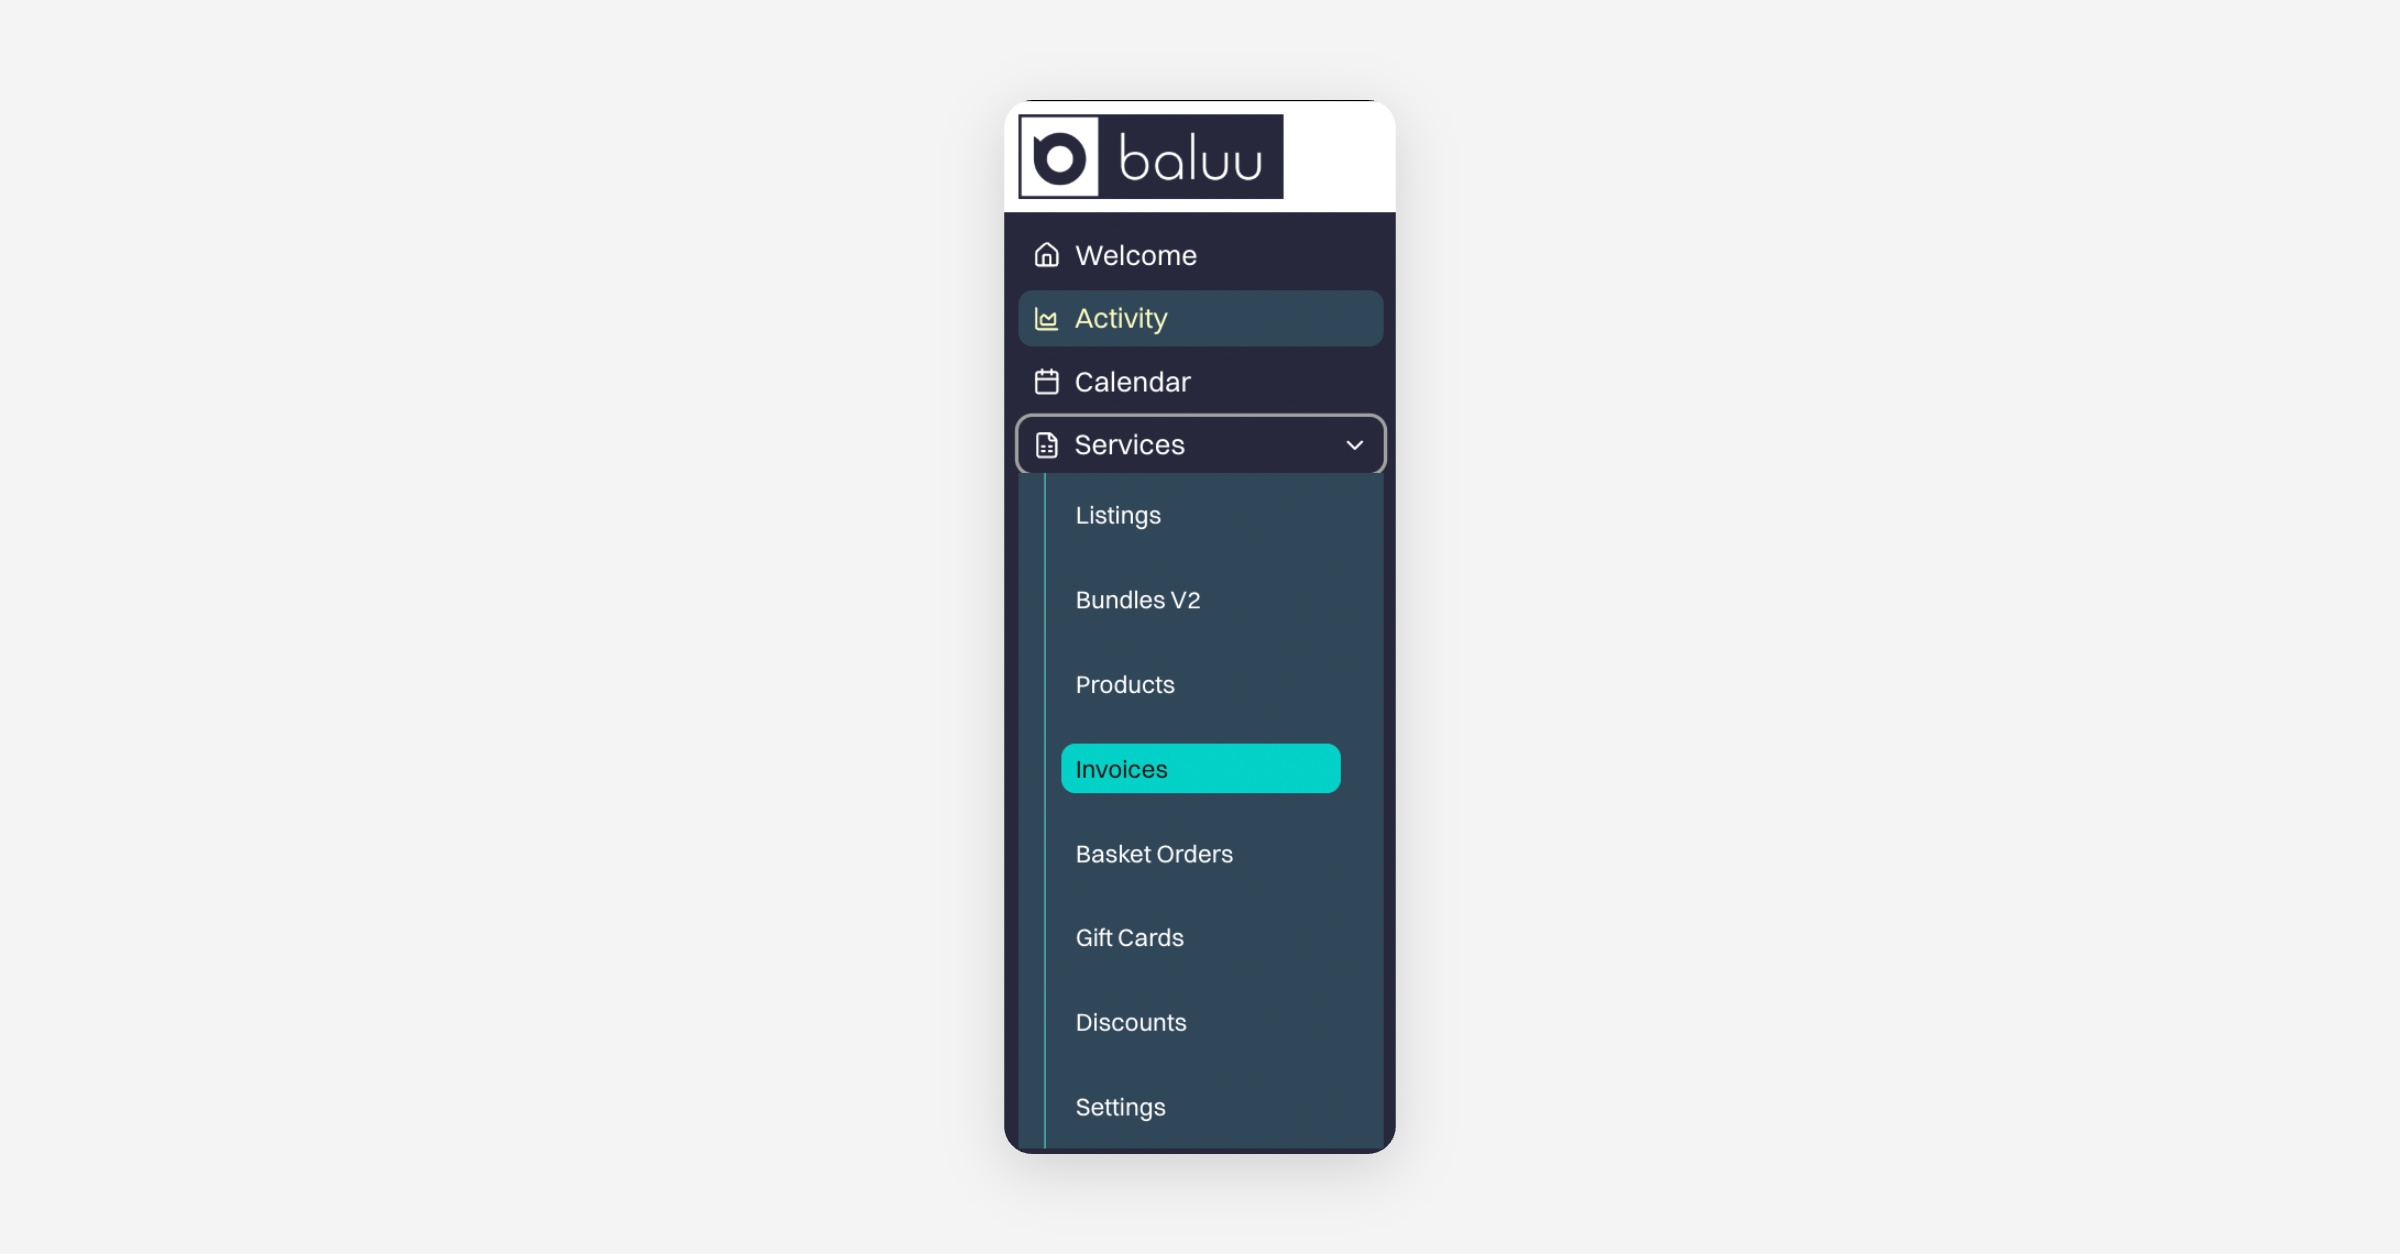
From your Dashboard, head to the 'Services' tab, then select 'Invoices'.
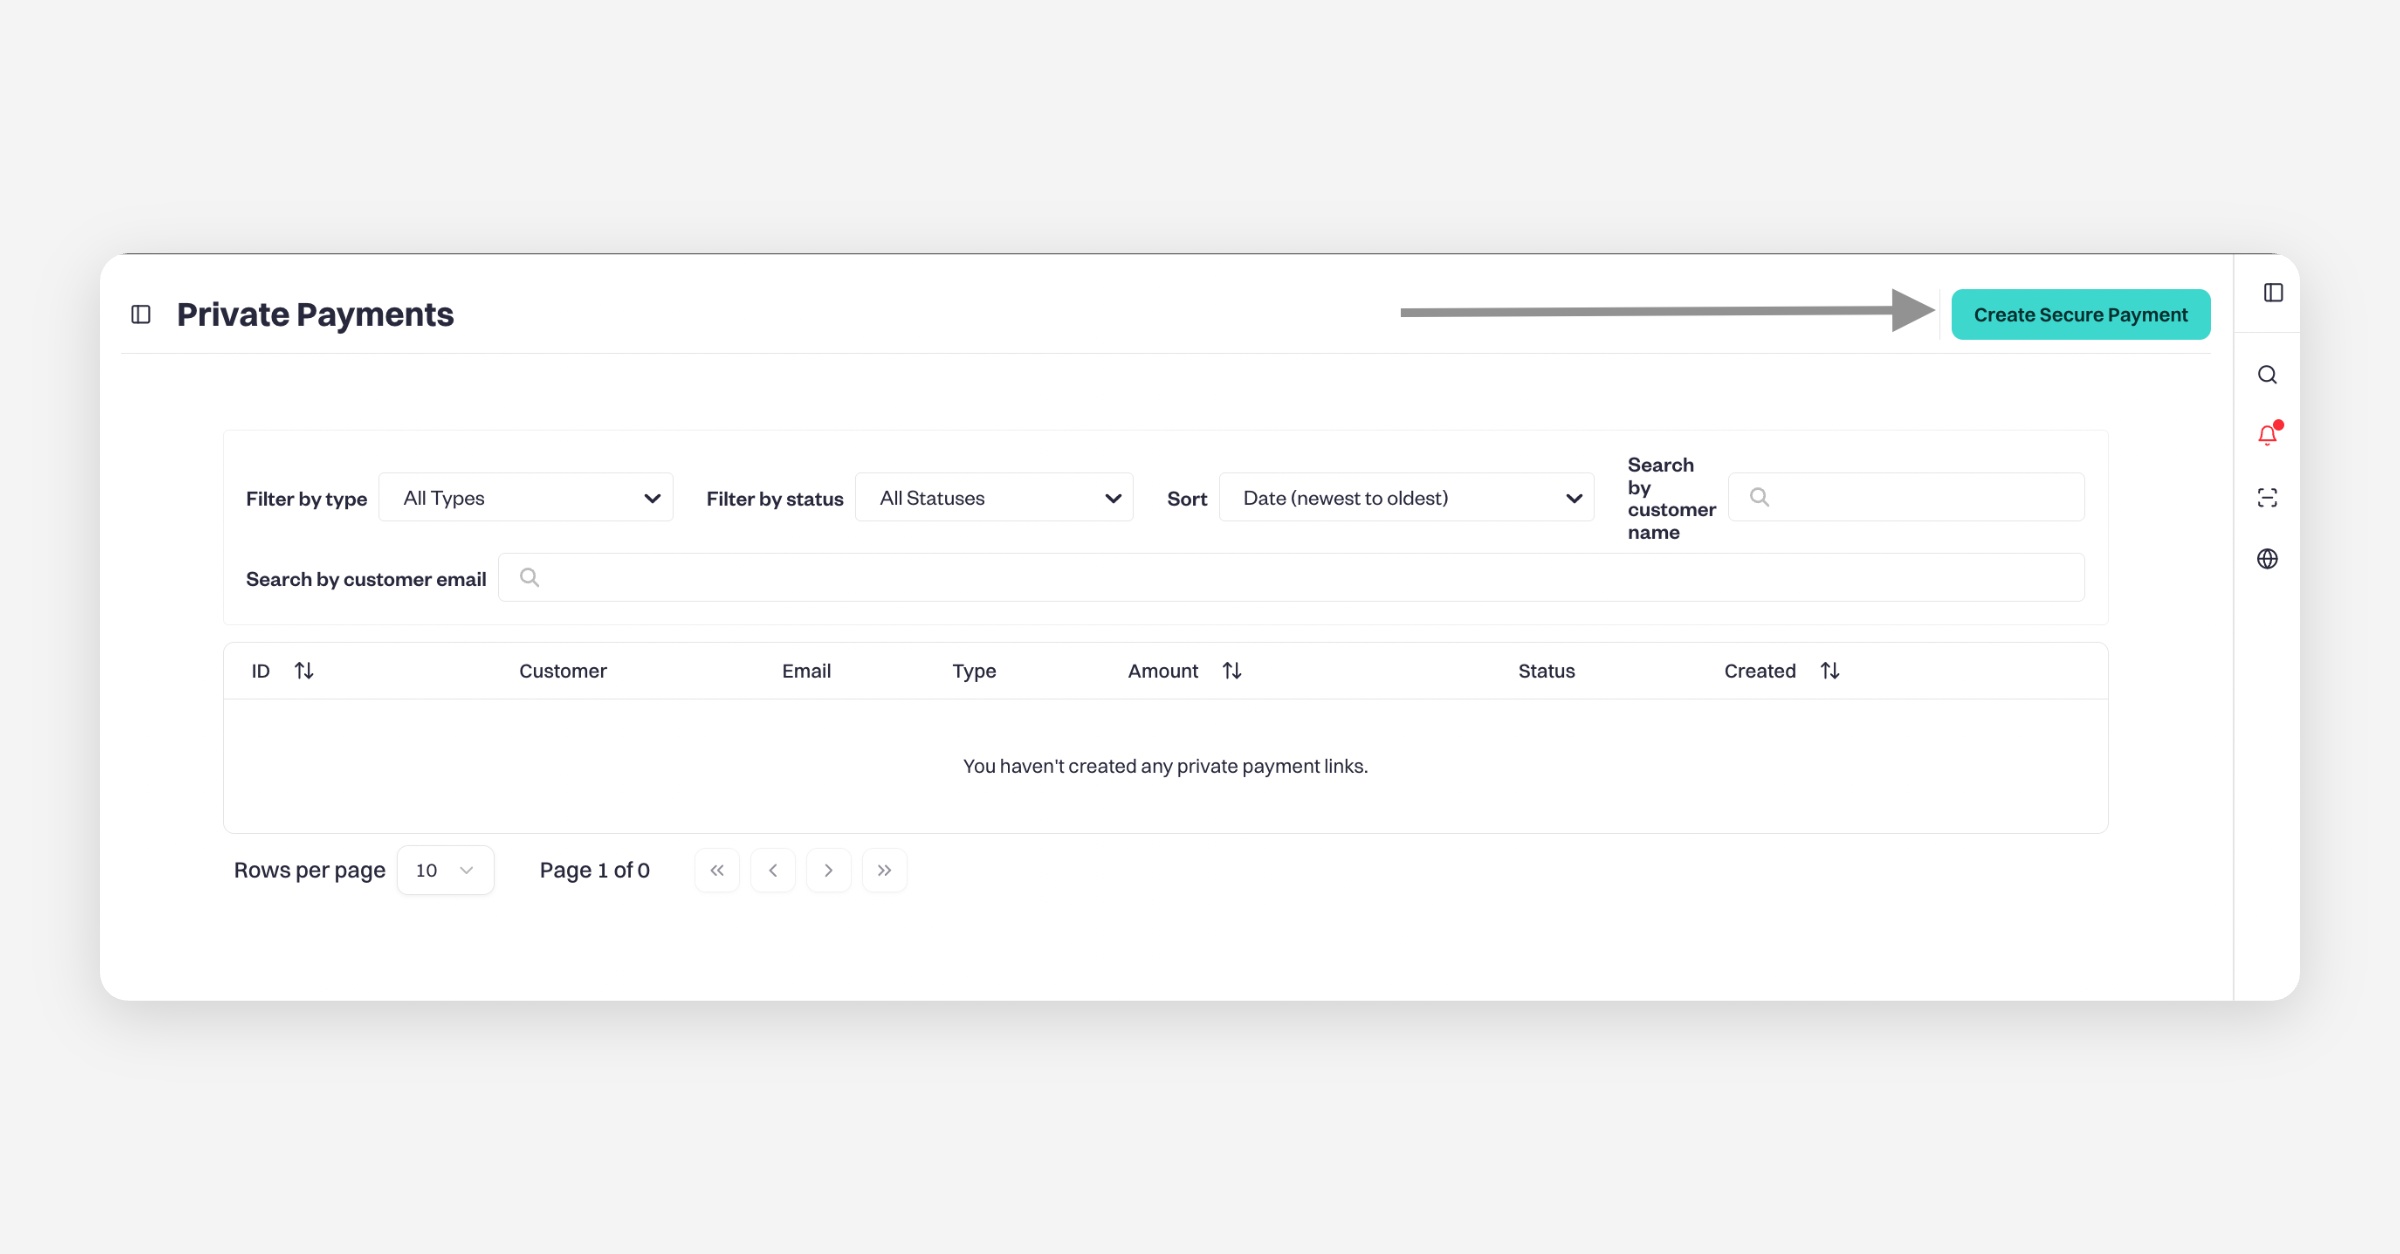
Click Create Secure Payment
Choose whether you need an invoice for a dated event or for a product.
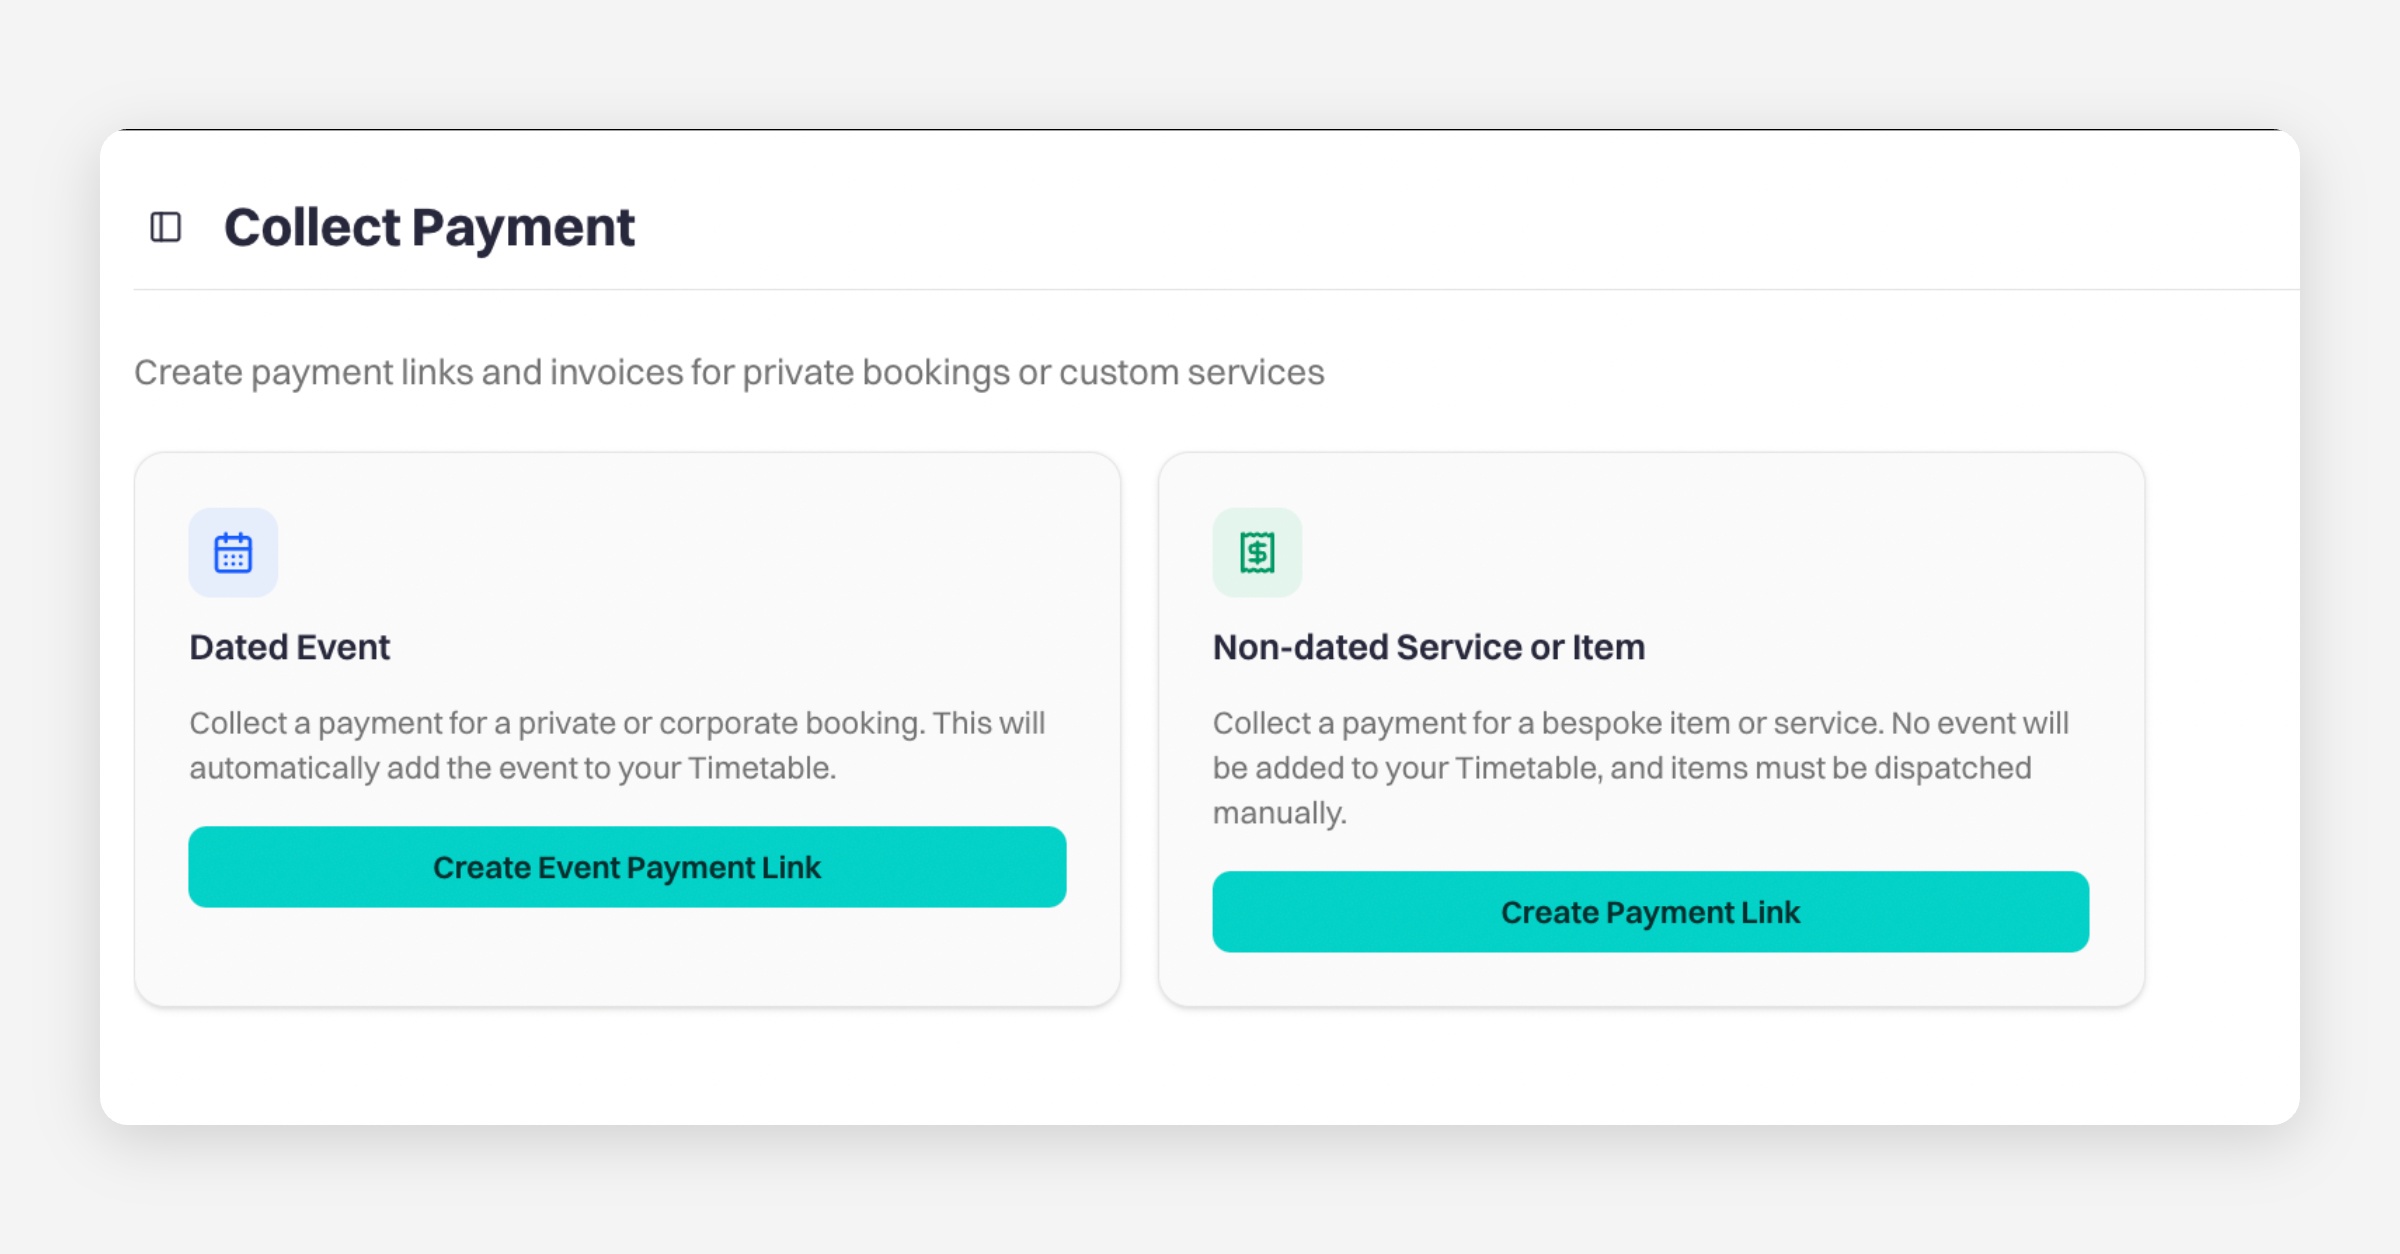
If you choose Dated Event, it will be added to your Calendar. A non-dated Service or Item, on the other hand, will not be added to your Calendar or purchased Items, so make sure to manually record this.

Dated Event:

You will be able to see a form to fill out.

Fill out the customer's details, then the price for the whole event. Choose the due date for the entire payment, and whether you want the customer to be able to pay in instalments.

Finally, input the event details, including when, where, and what they will be doing. The more information, the better.
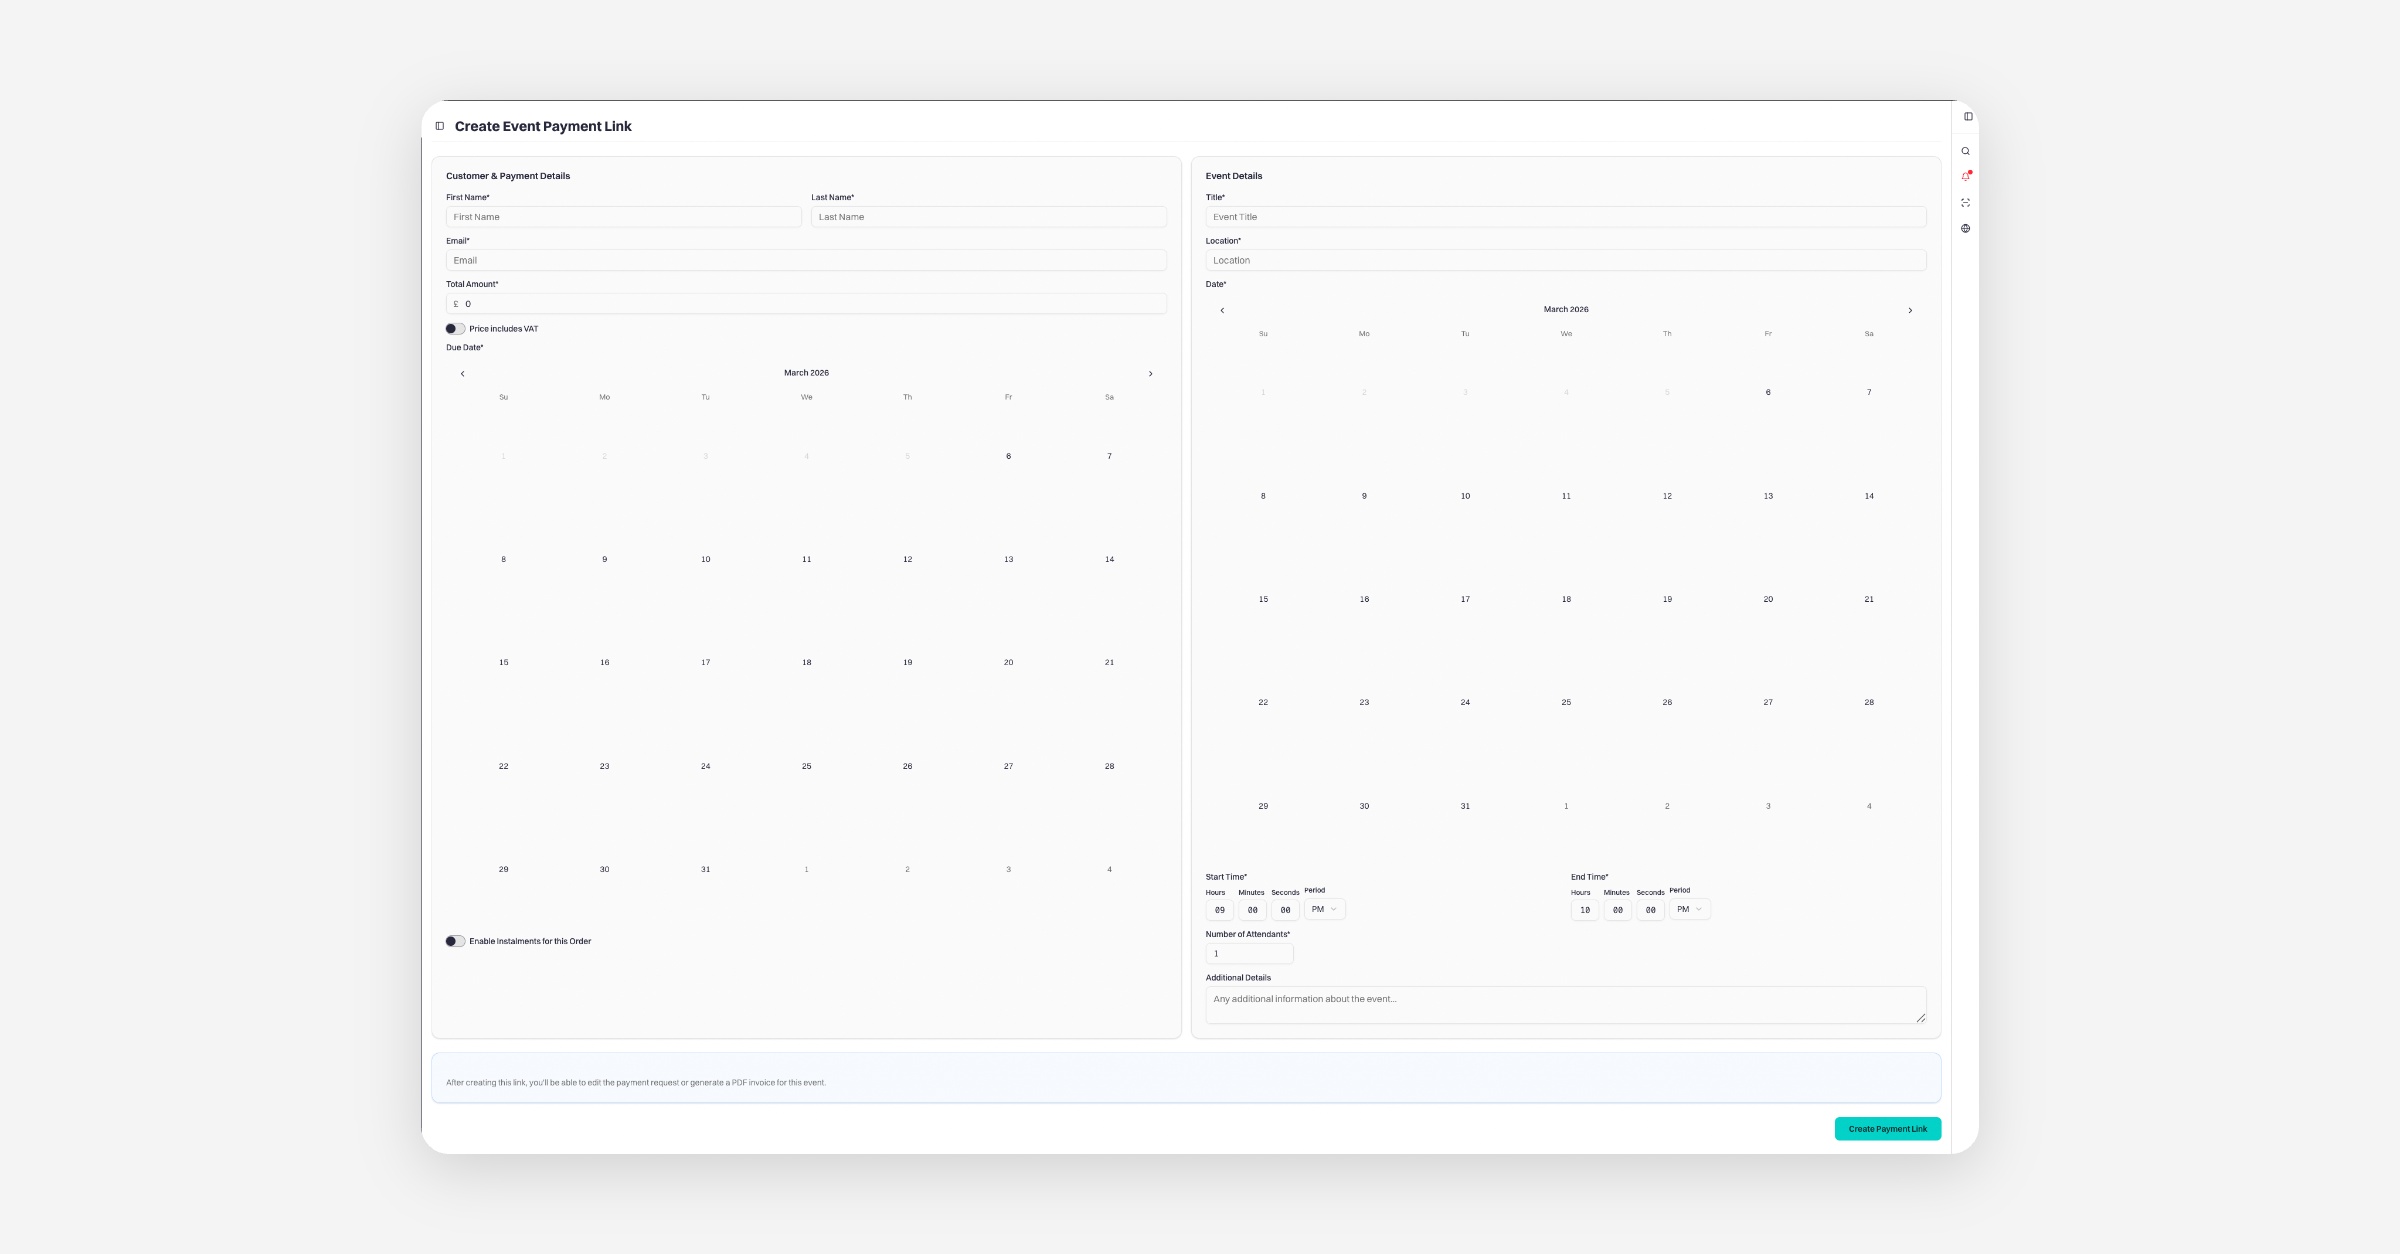
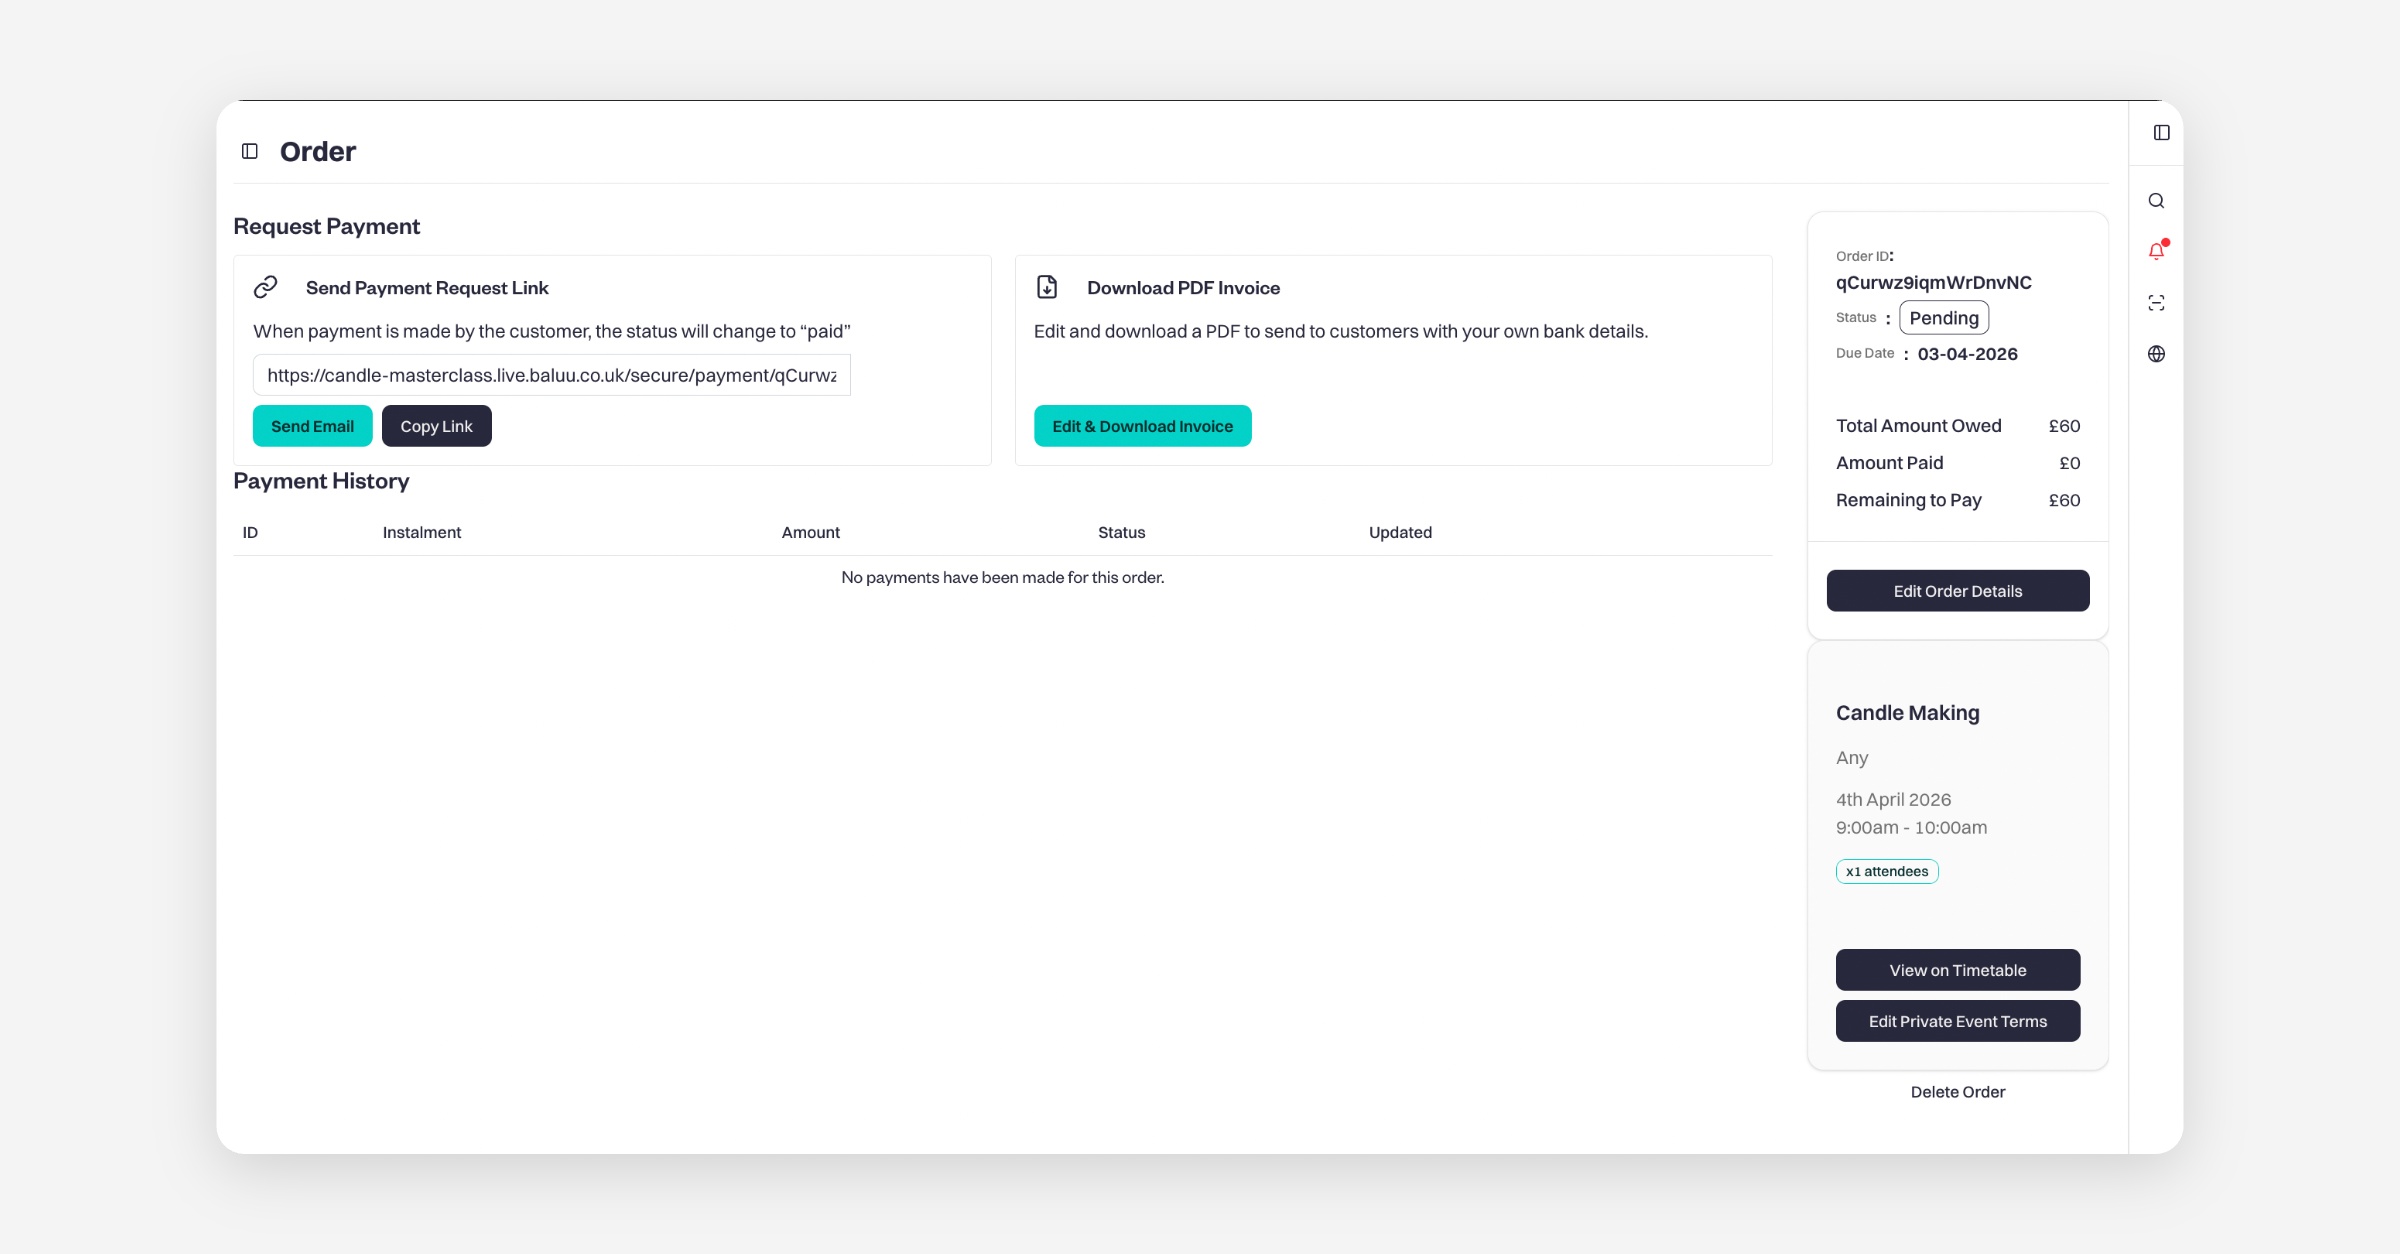
Make sure to press 'Create Link.' You'll now see the information screen for this payment. As below, there is the option to add instalments, if you ticked this on the previous screen, send links to the payment, and see and edit the invoice itself.
Adding an instalment looks like this.
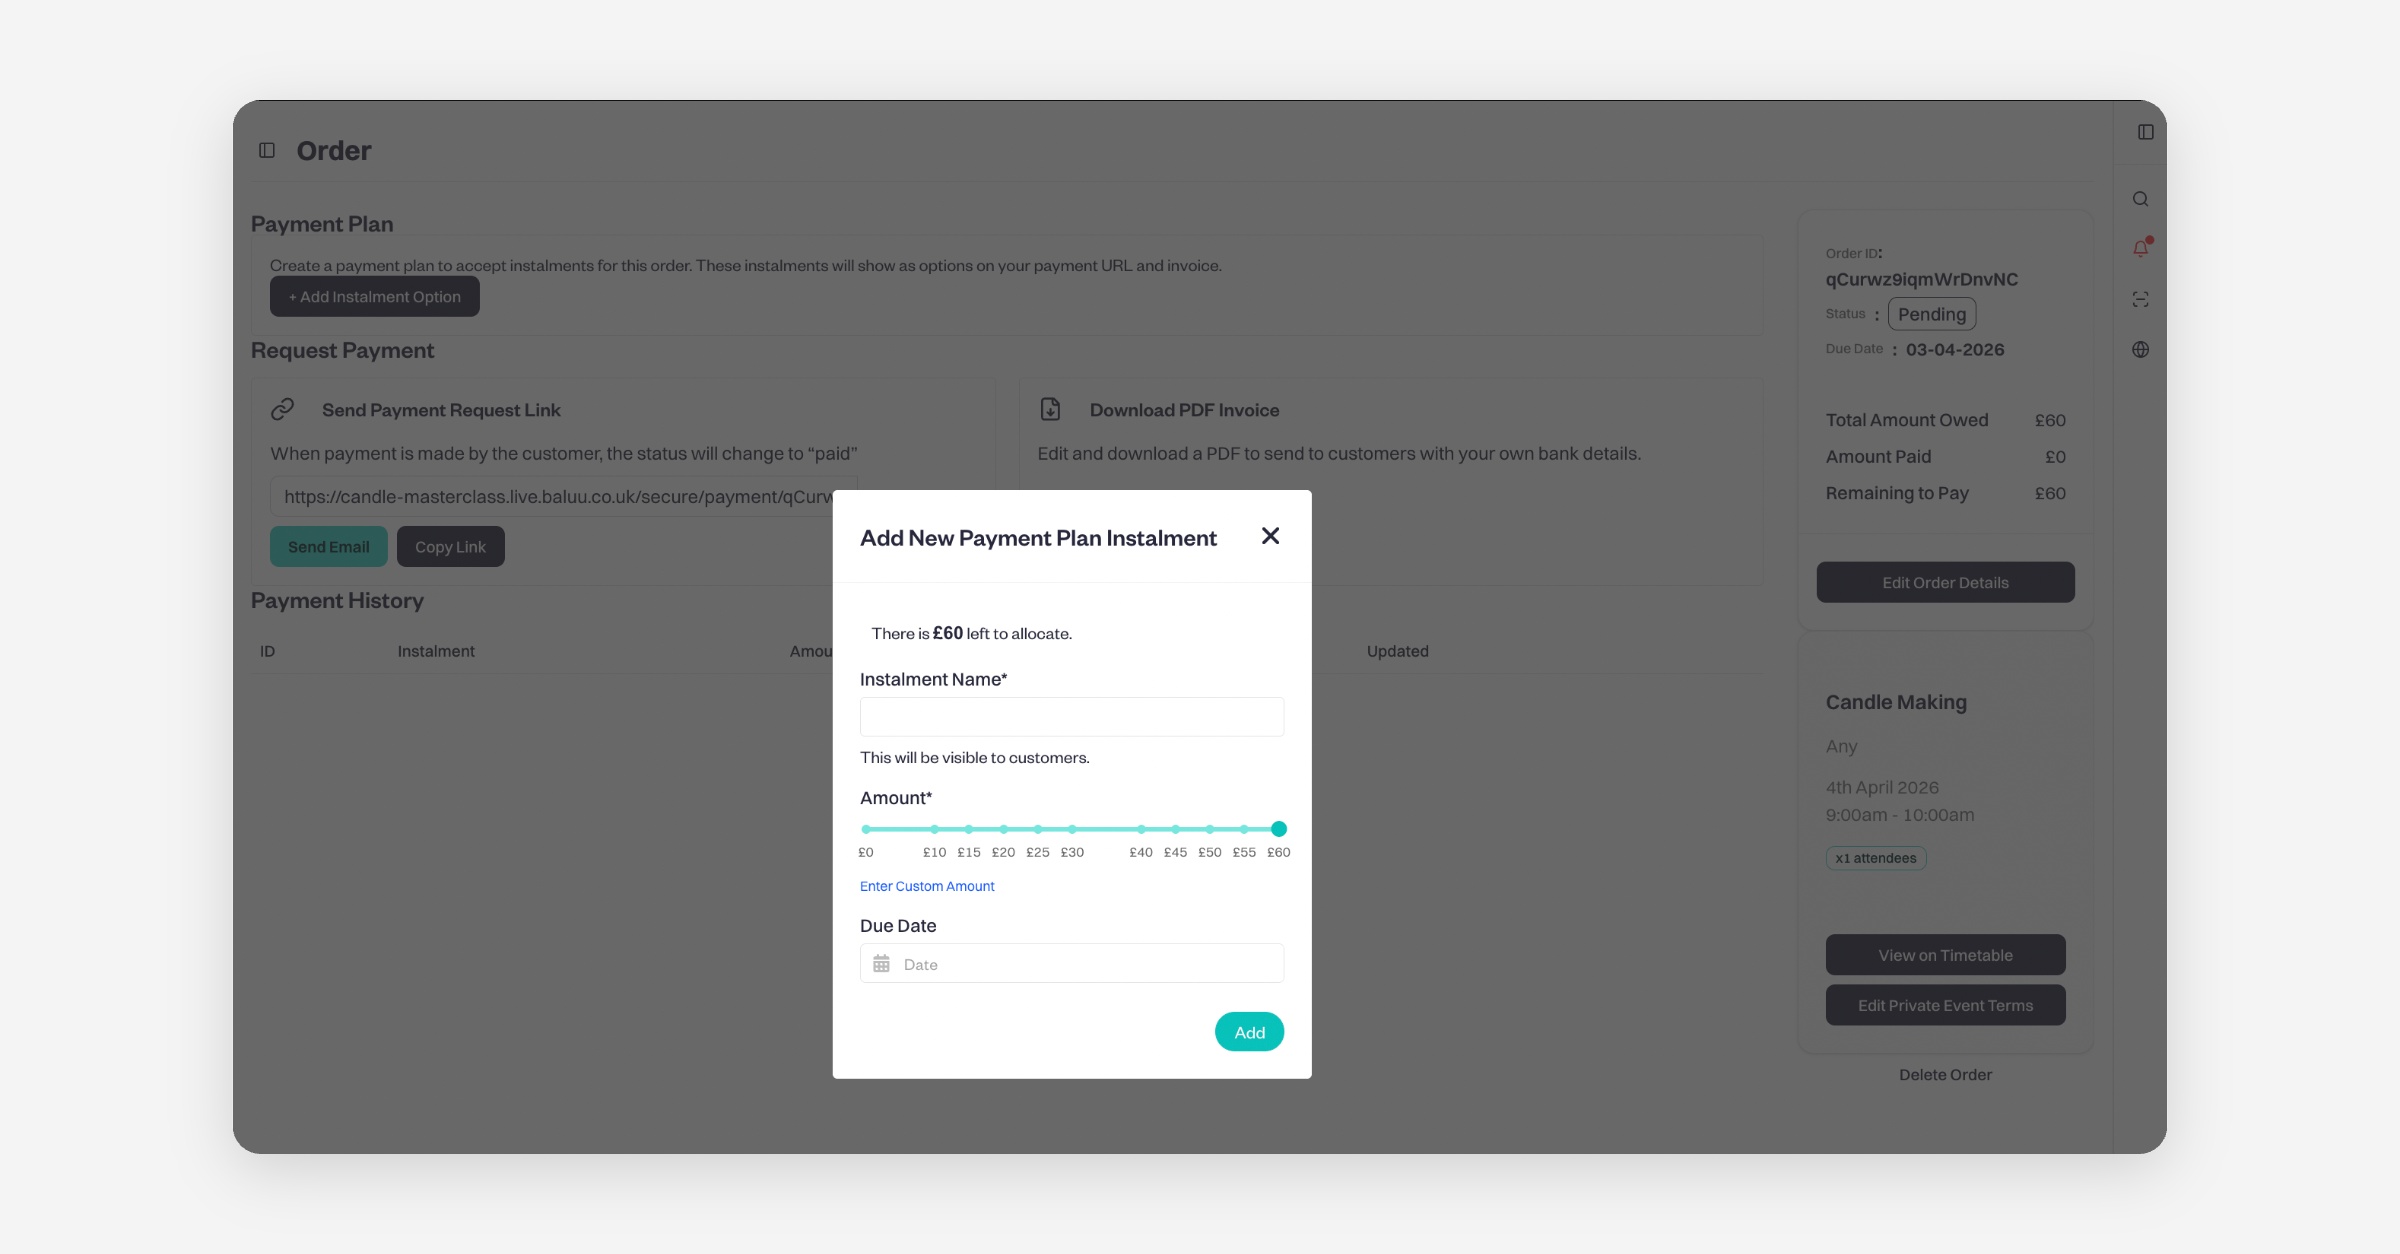
They can be really useful for particularly large payments, or as deposits!

Make sure to press 'Add'.

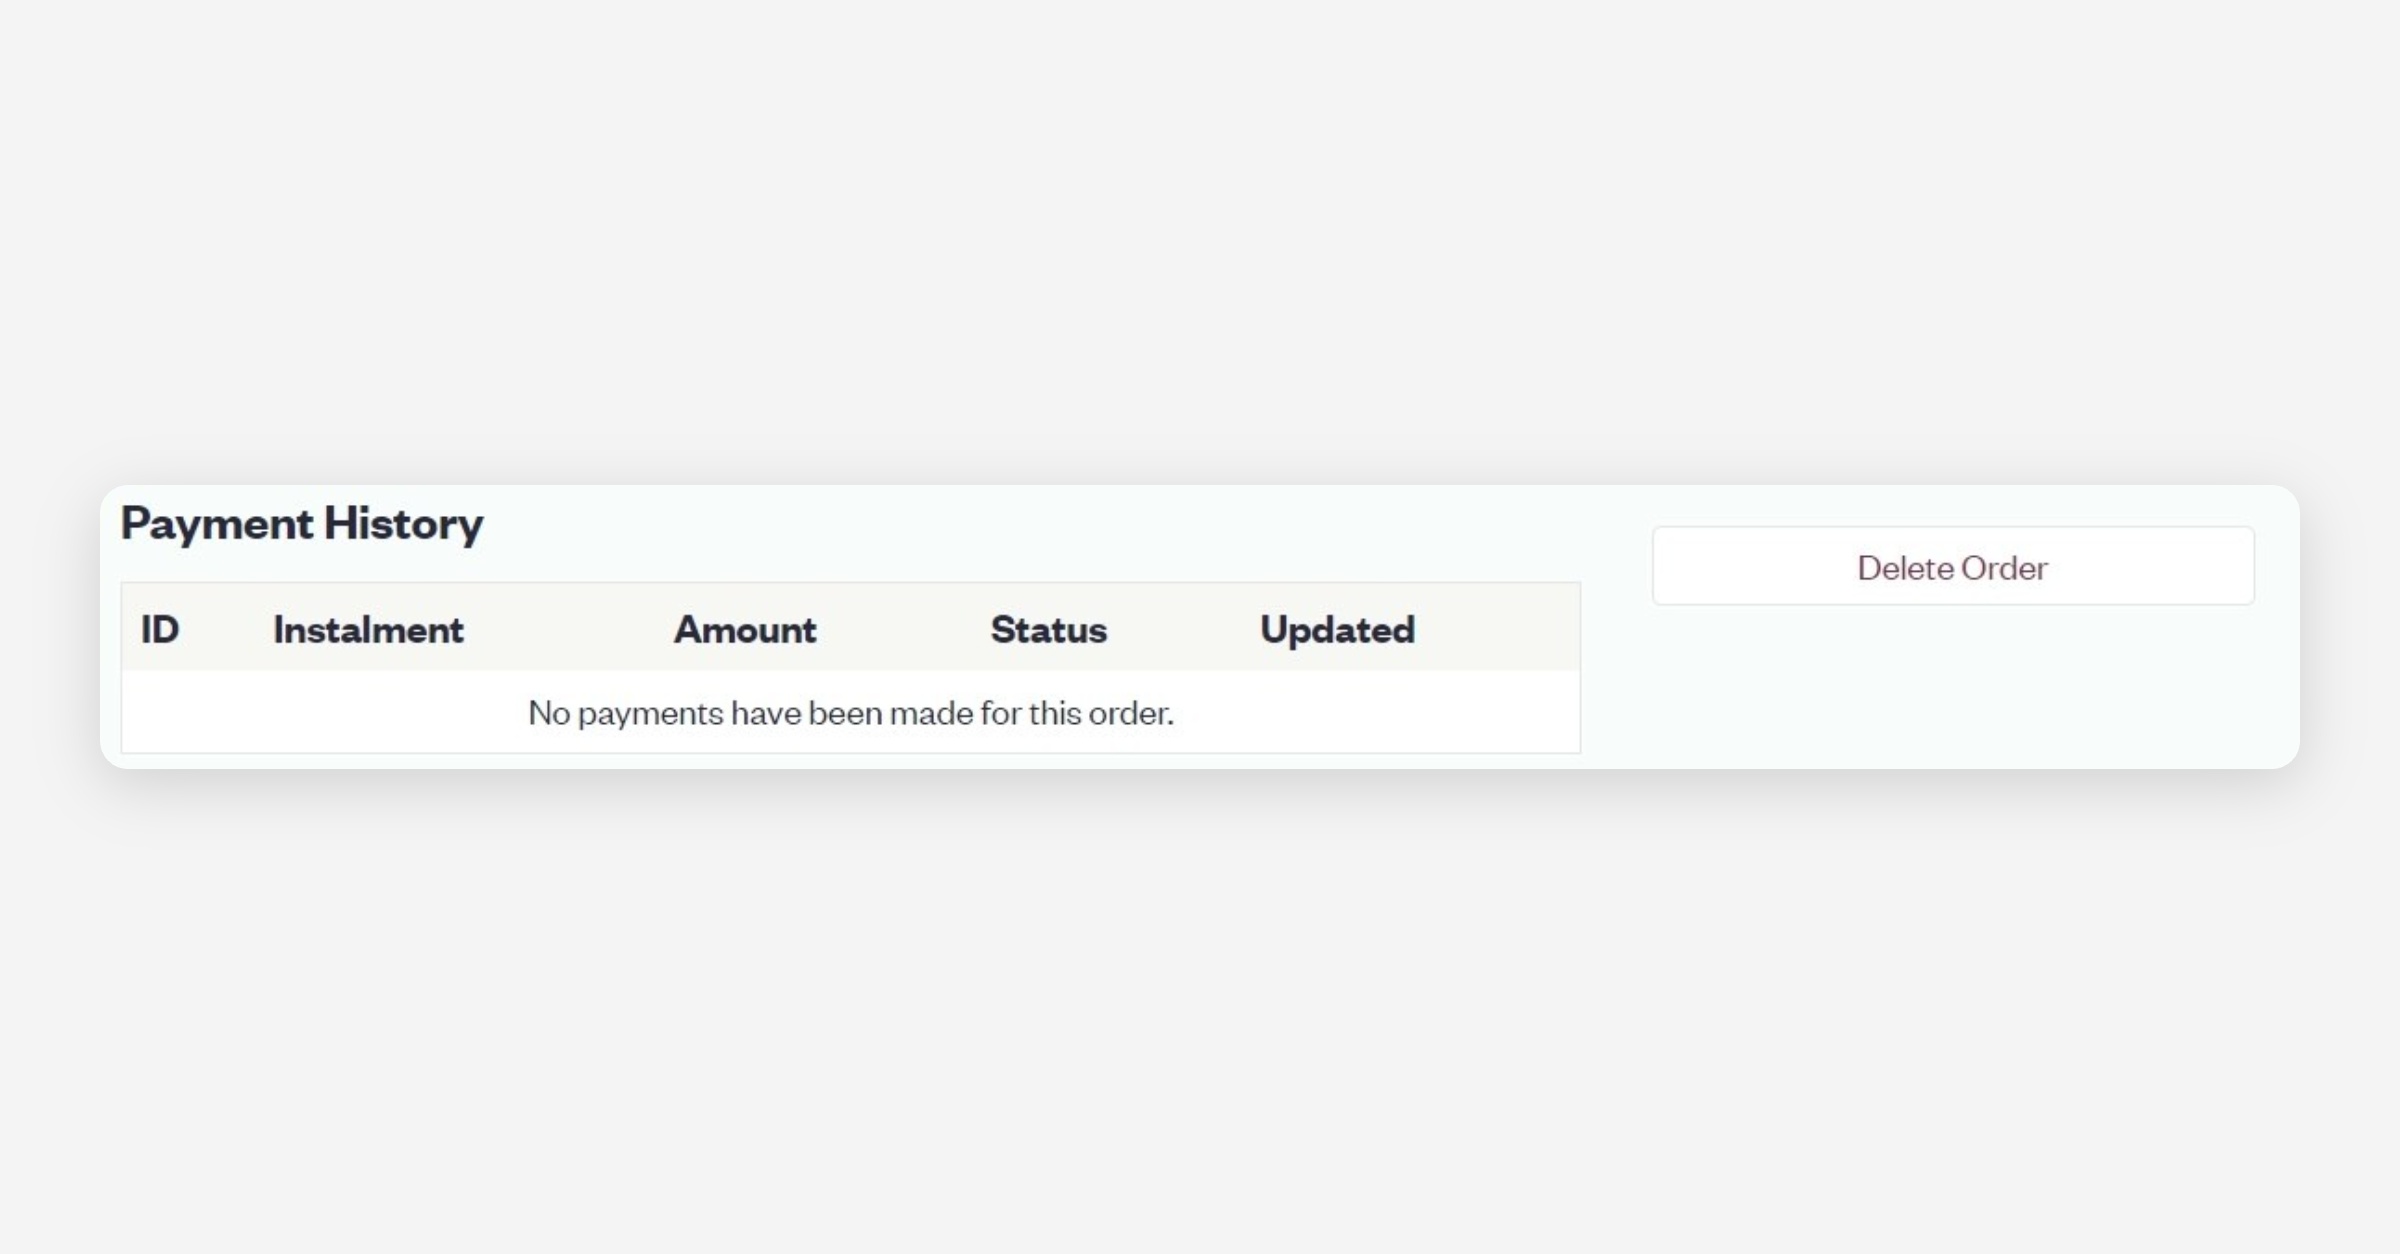
At the bottom of the previous screen, you can also see any payment history and the option to delete the order.
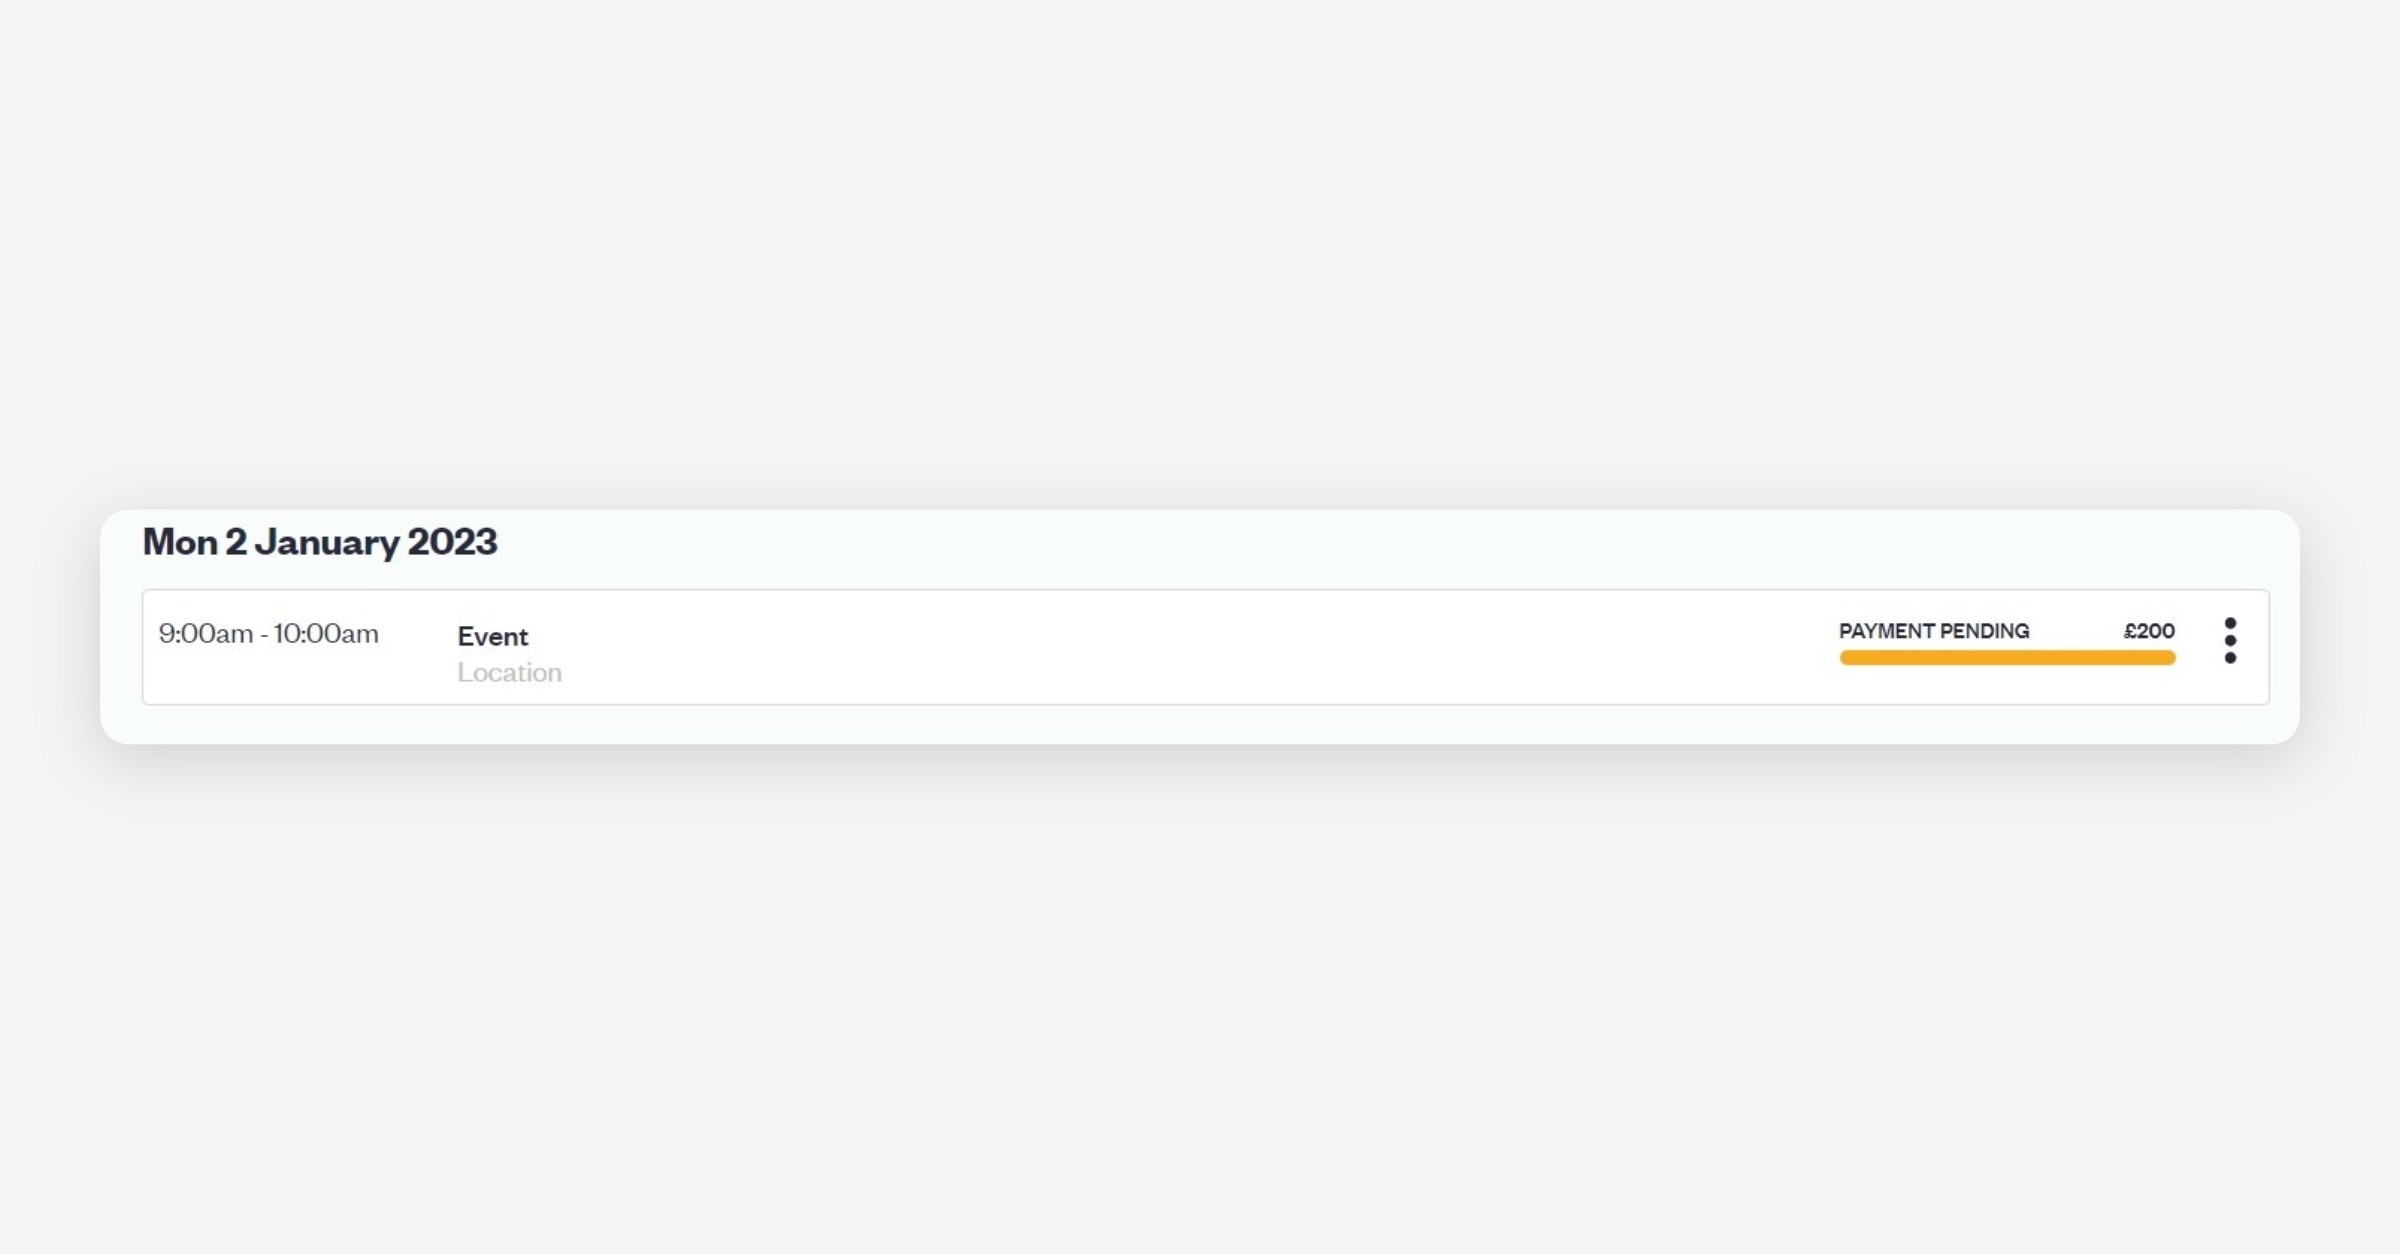
This event will be added to your Calendar; appearing as below.
Non-dated service or item:

The process is exactly the same for an item, only this box is different, where you can input details of the service or item.
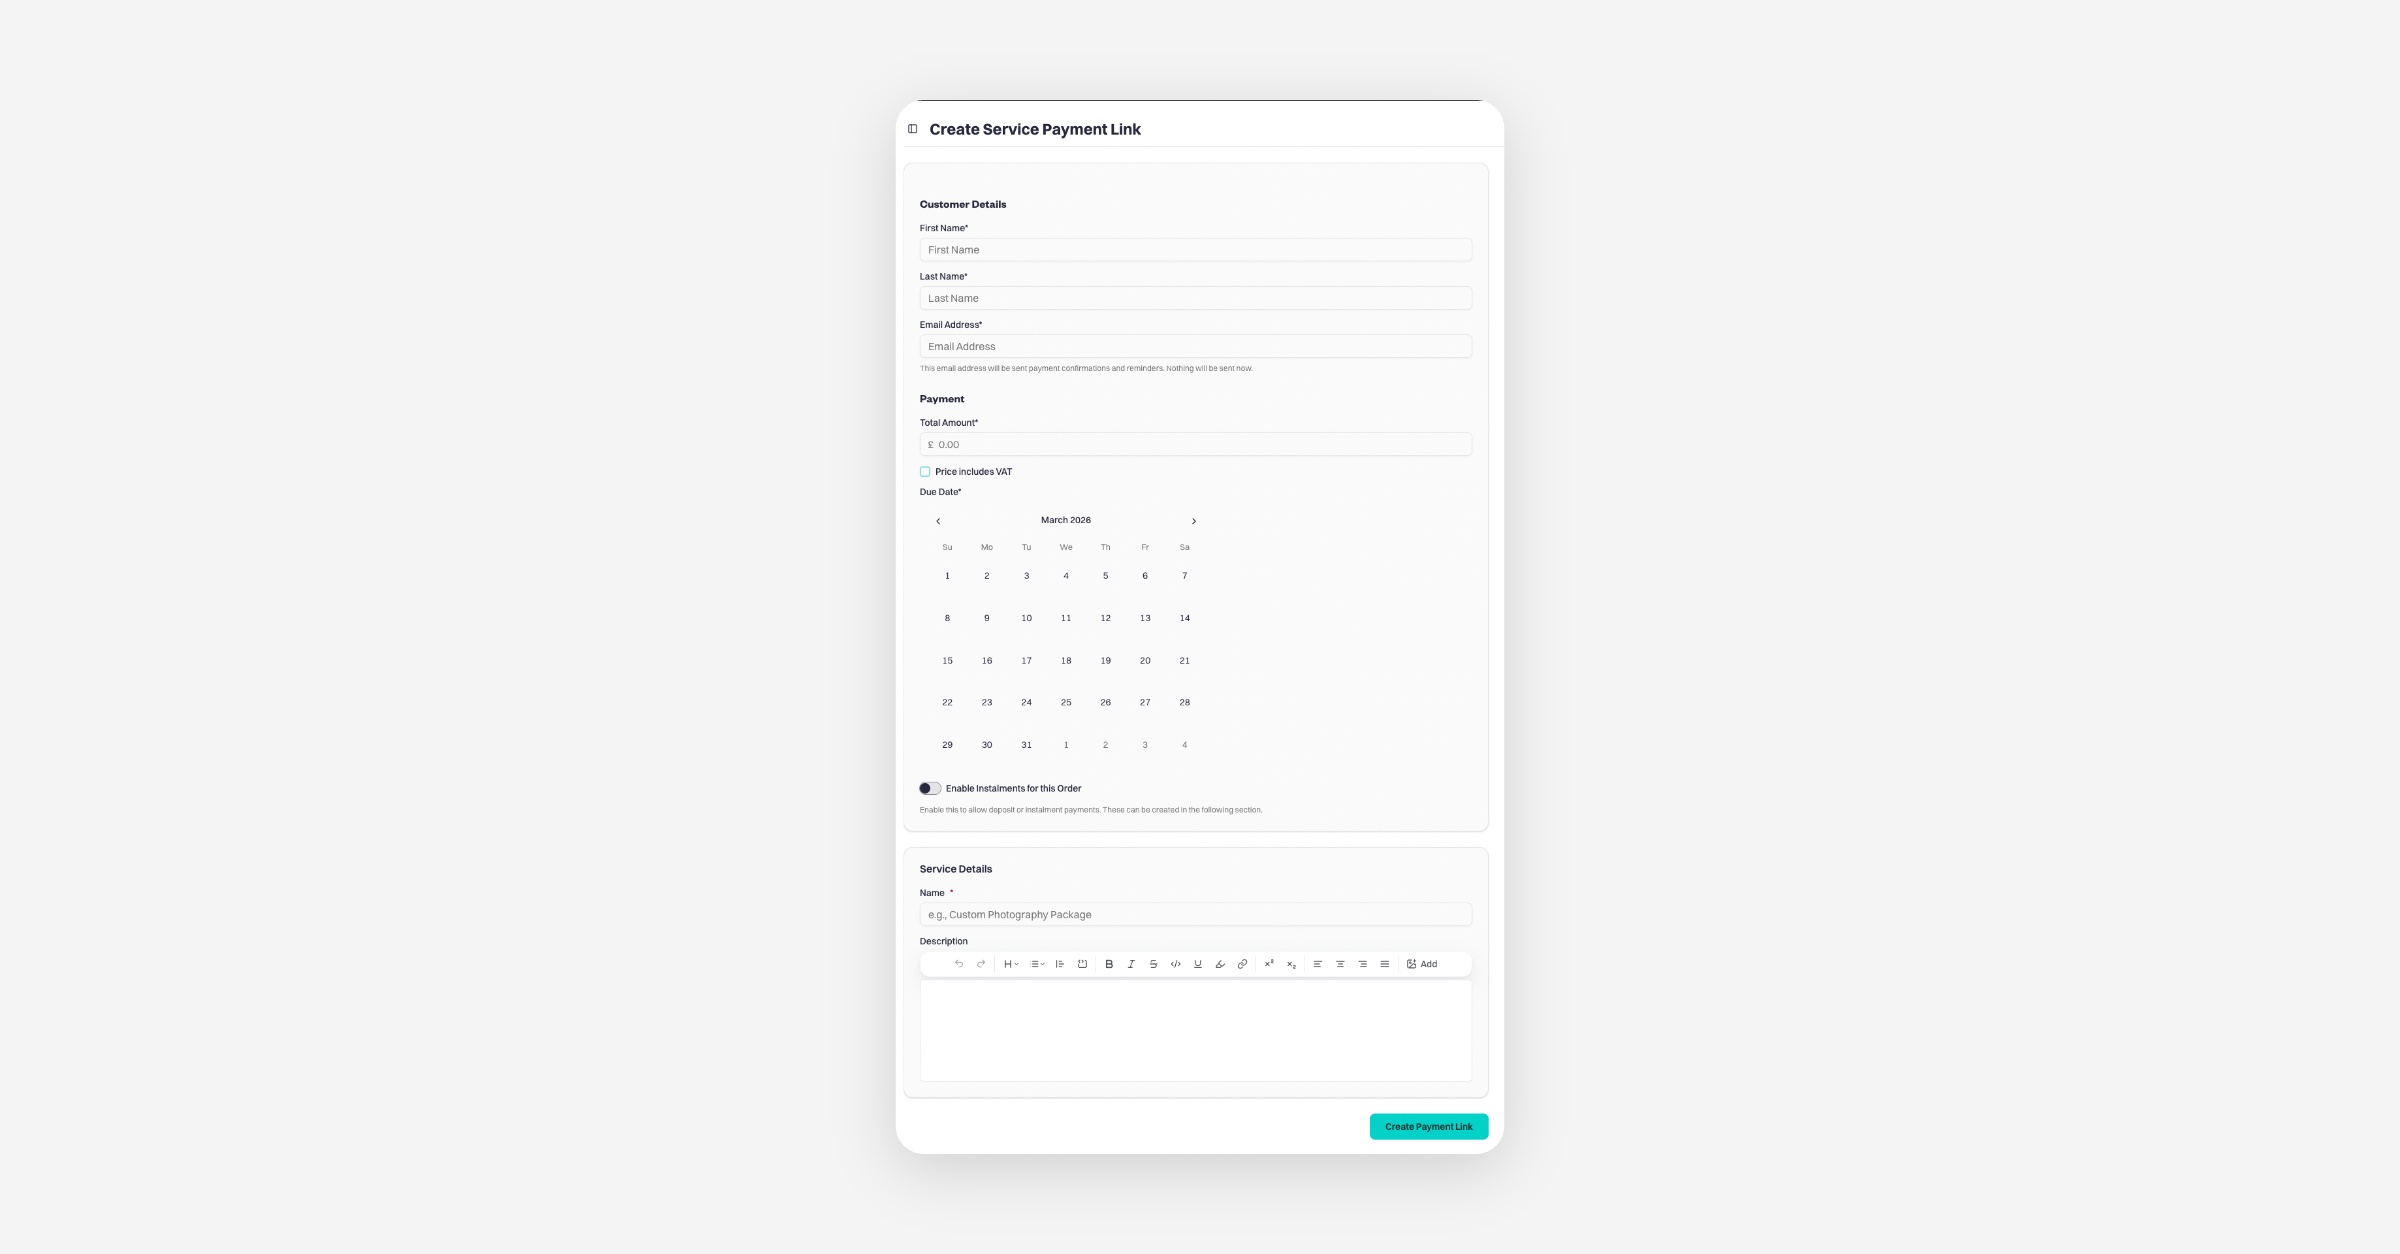
Remember, this does not get added to your Purchased Items, so remember to sort out shipping and other considerations manually!


Managing Orders & Sending Payment Links

Once you create an invoice, it will appear in your Private Payments list. You can use filters to quickly find a specific order.

Click on the order to open it. From this page, you’ll be able to:

  • Edit Order Details – update customer information, pricing, or session details

  • Mark as Paid – manually update the payment status

  • Update date, time, or location – adjust booking details if needed

  • Assign Instructor – link the order to a team member

  • Edit Notes / Terms – customise internal notes or private event terms

  • Delete Order – remove the order if it’s no longer needed
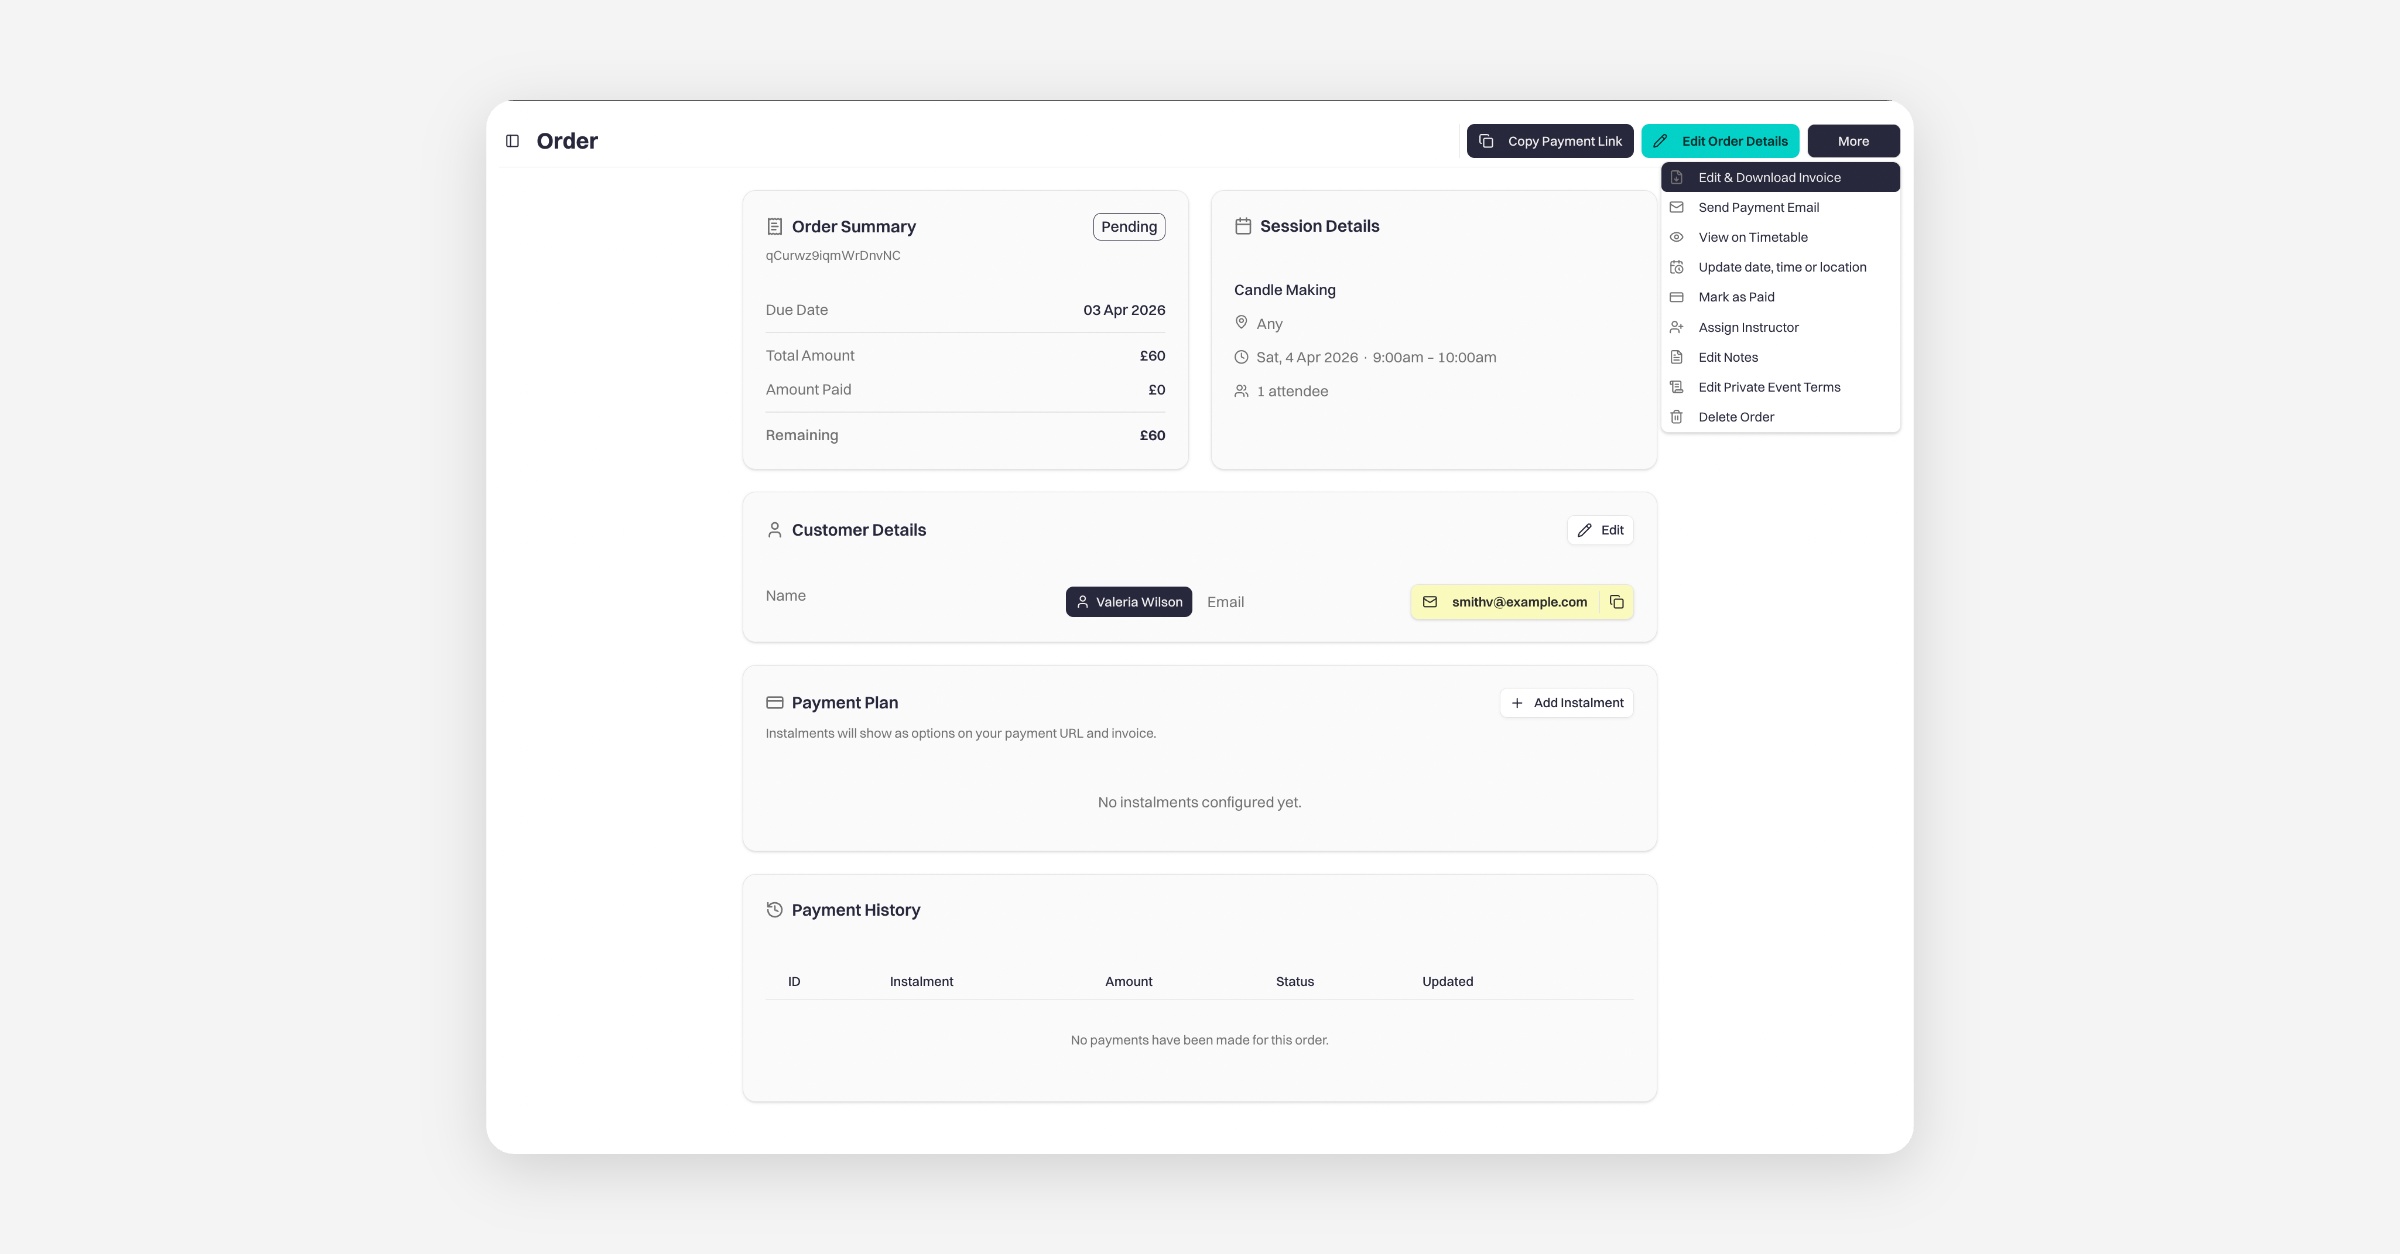
These tools allow you to stay flexible and keep everything accurate without needing to recreate the booking.

Sending a payment link to your customer

If your customer asks how to pay, you can quickly send them a direct payment link:

  1. Open the order

  2. Click Copy Payment Link (top right)

  3. Paste and send the link to your customer via email or message

This link takes them directly to a secure payment page where they can complete the payment online.
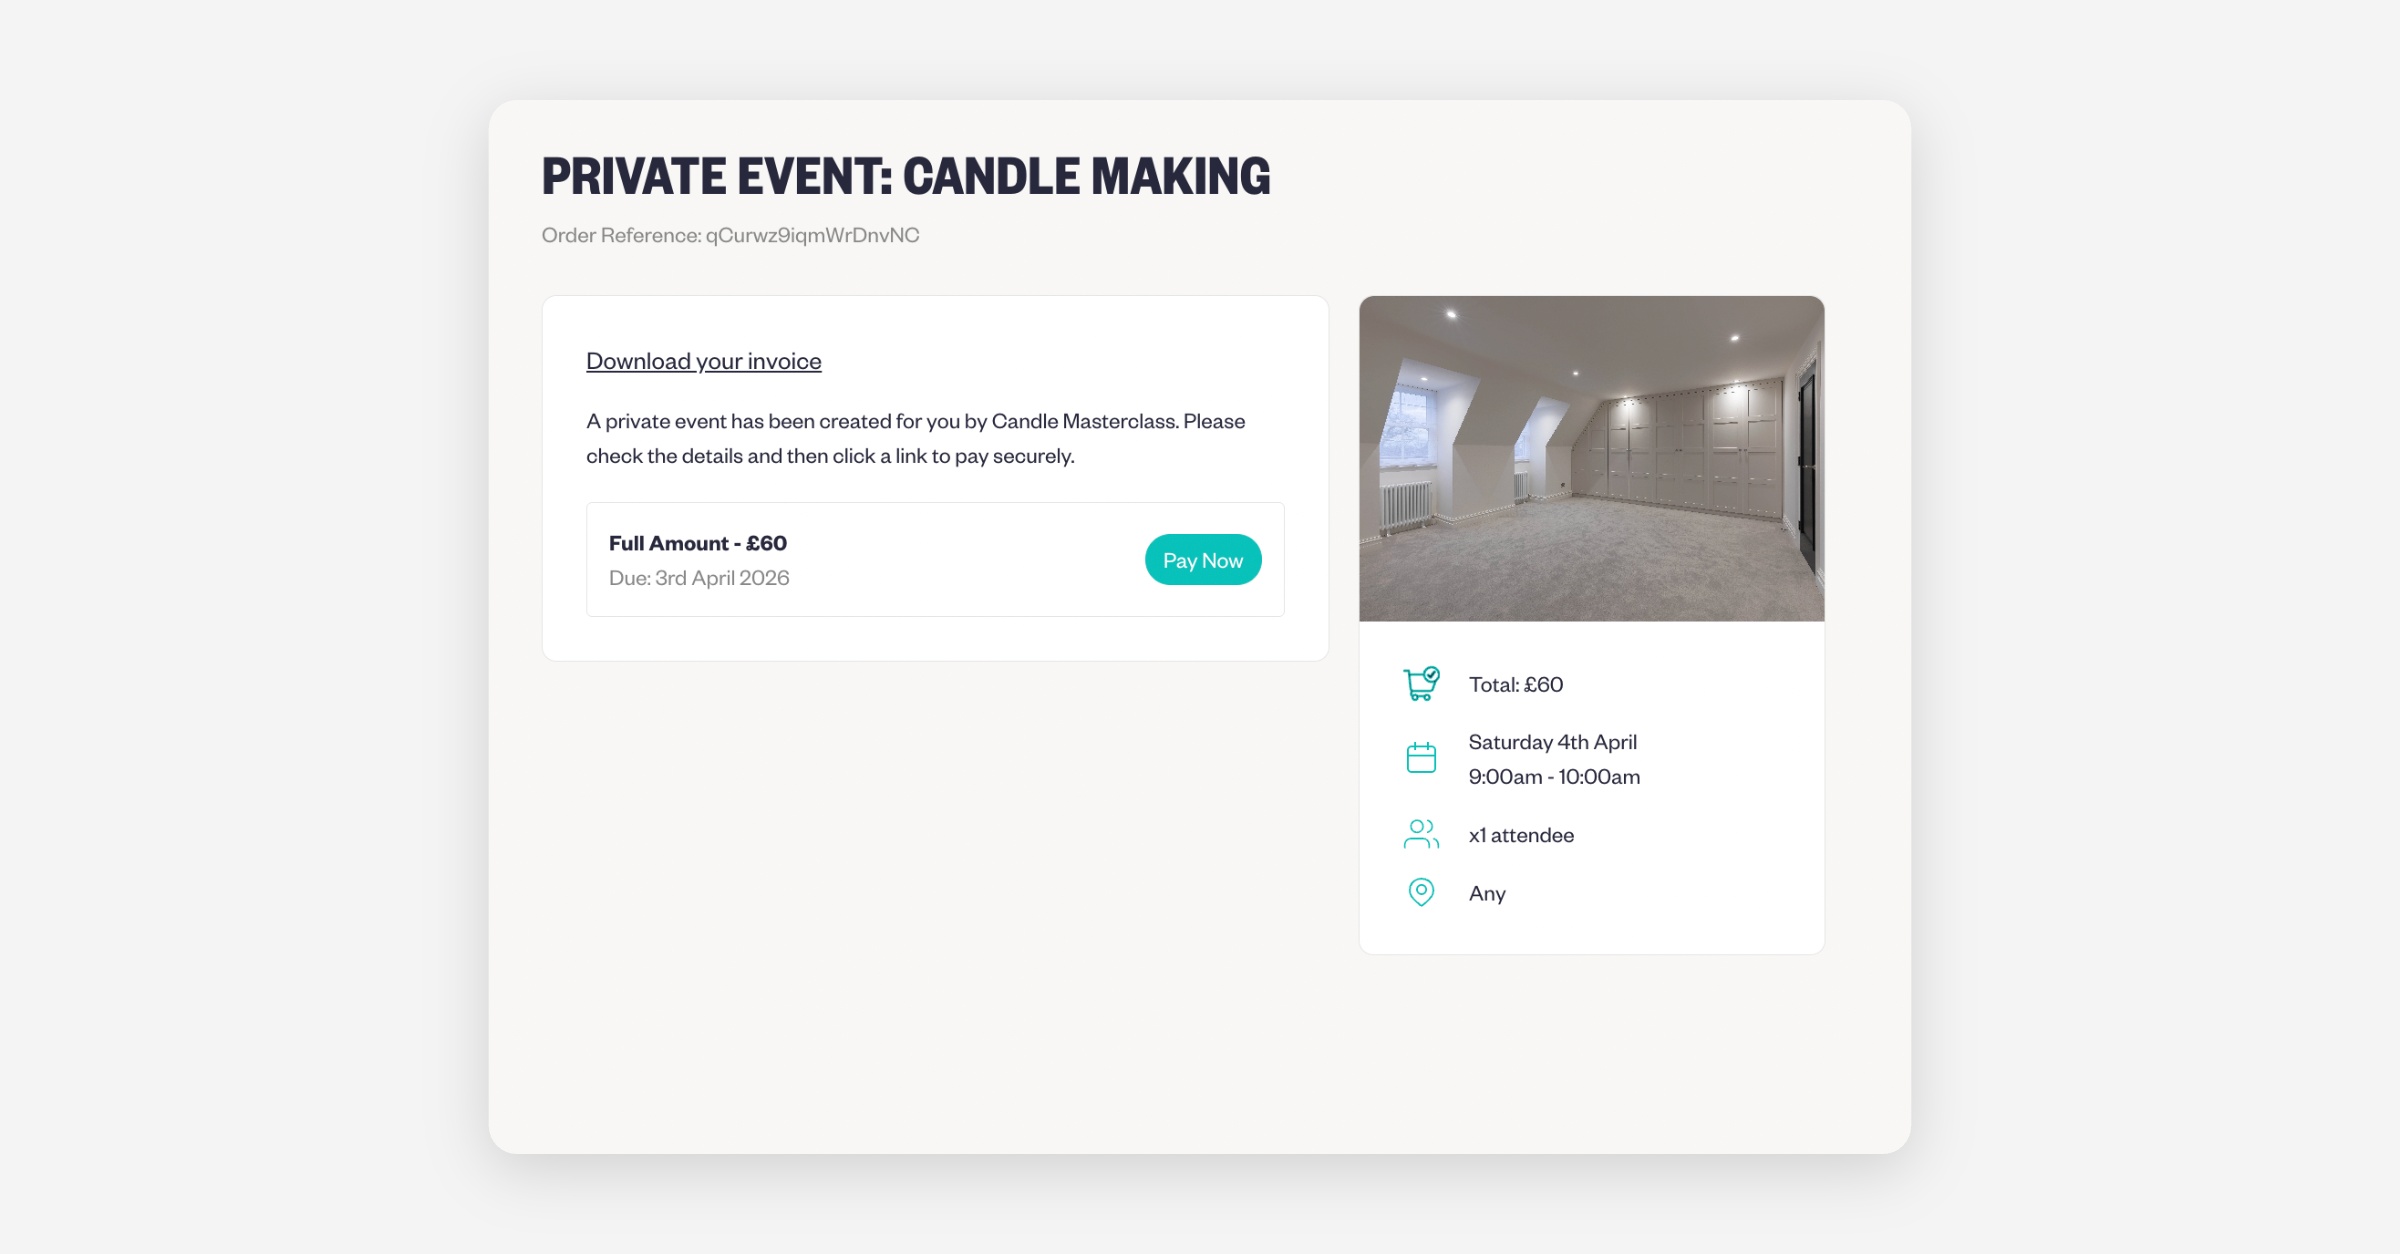
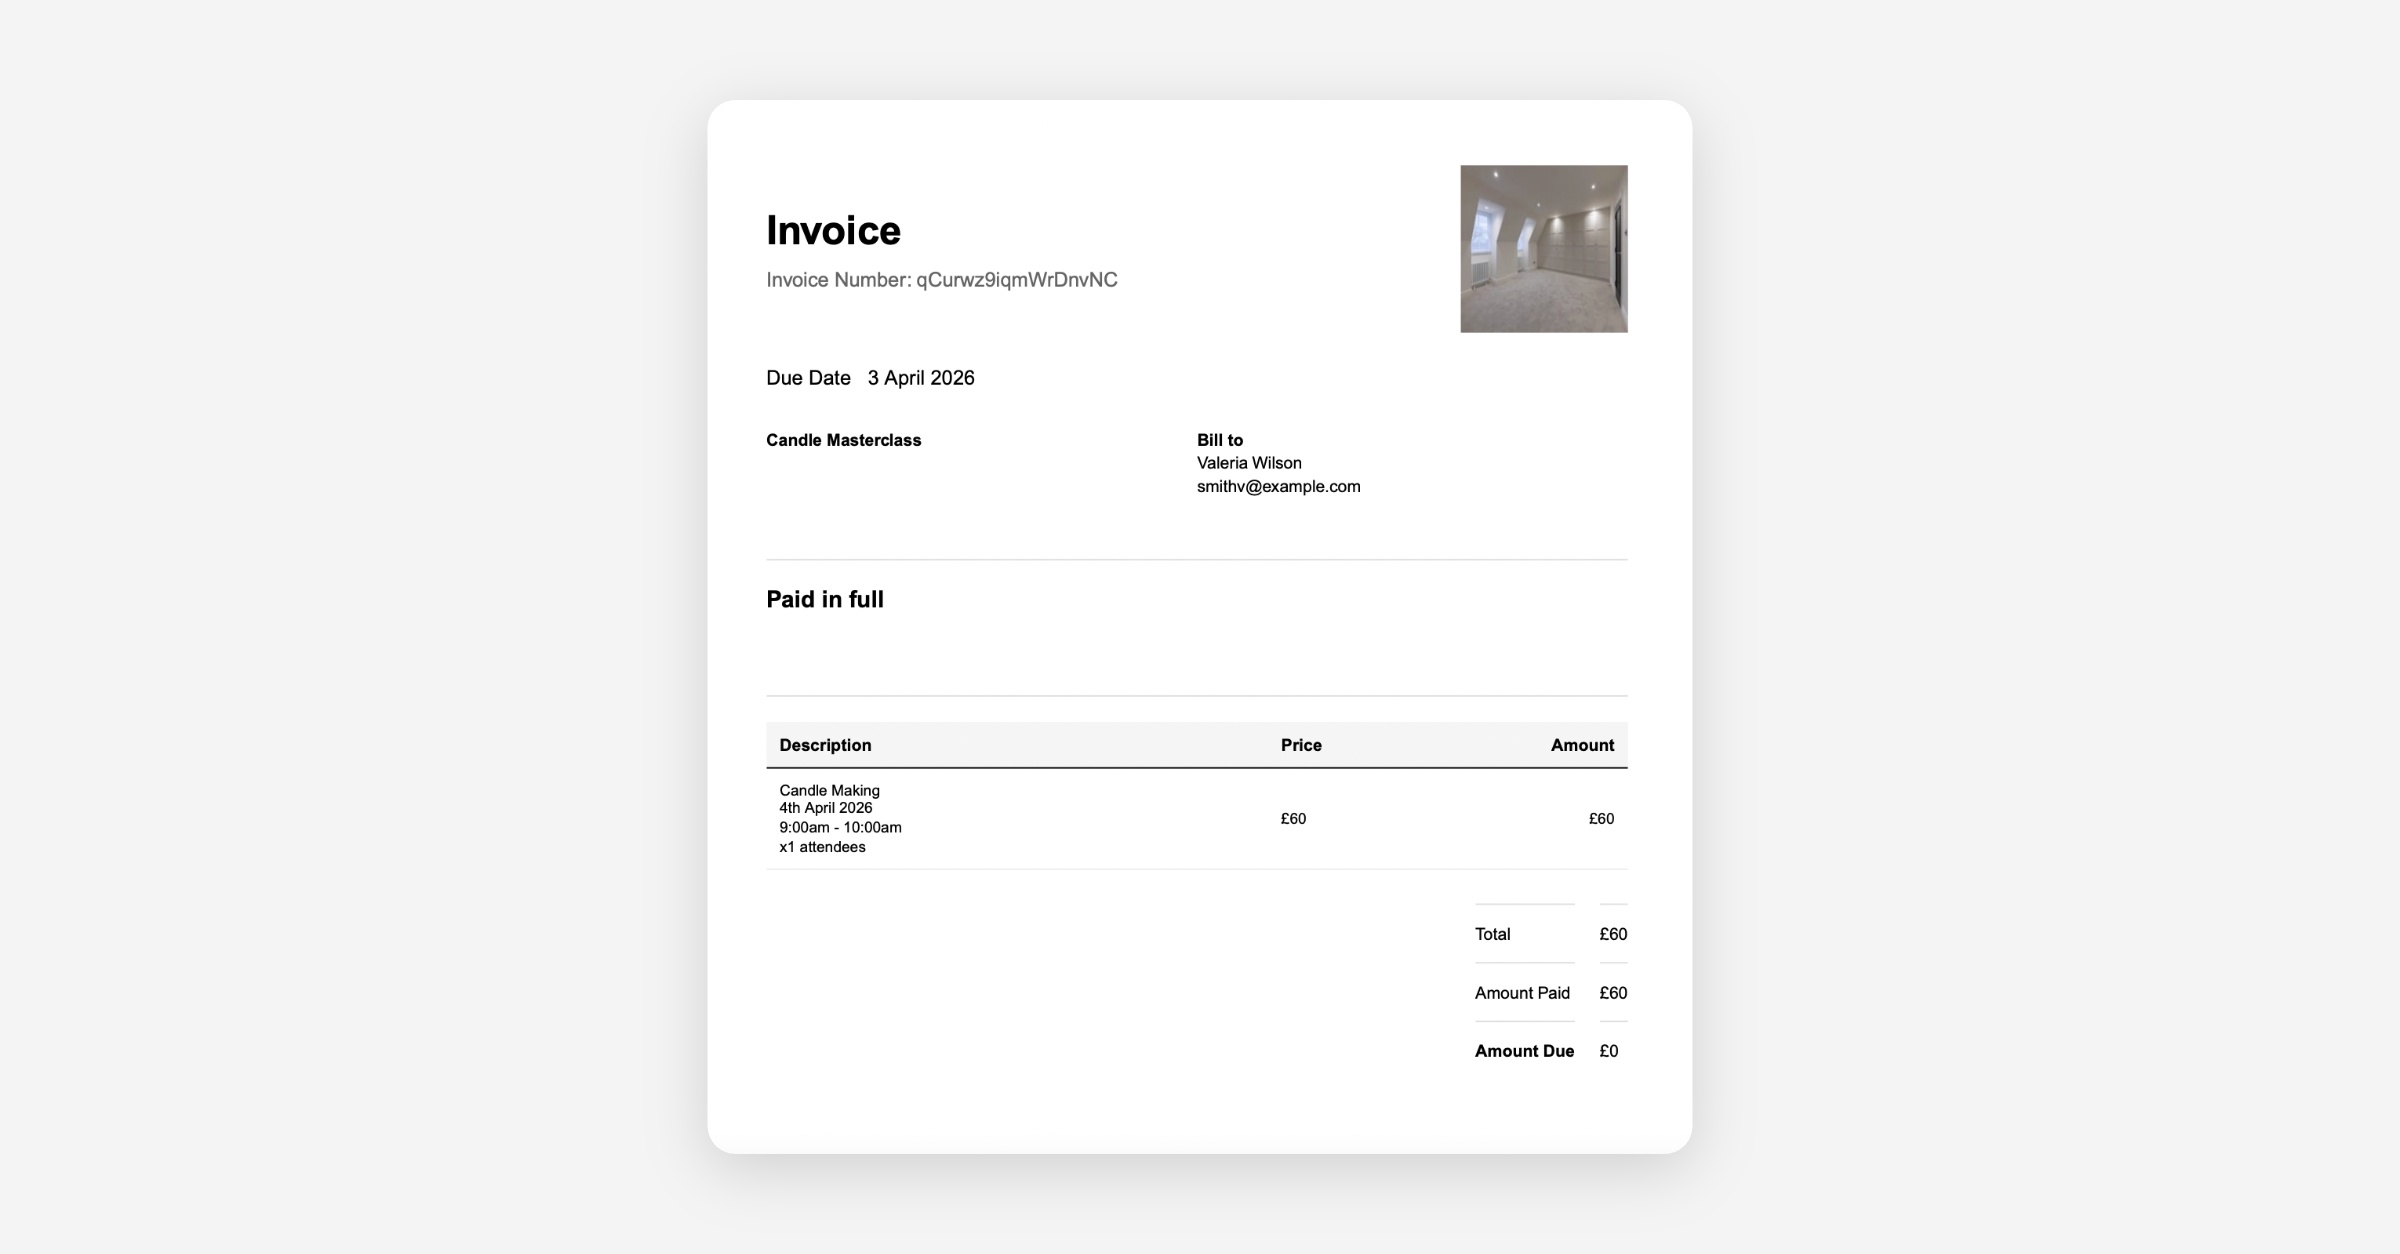
Once the invoice has been paid and marked as paid, the customer can download it on the same page.
PrevHow to Update the Date, Time or Location of an Existing Term
NextRescheduling Bookings
Was this helpful?