How to Create Bundles V2
Bundles V2 gives you more flexibility to sell session packages that can be used across multiple listings and booking types.
What is a Bundle?
A bundle is a prepaid package of sessions that customers can purchase and use over time. Instead of booking each class individually, they buy a set number of sessions in advance and then use those credits to book eligible events whenever it suits them.
Follow the steps below to create and manage your new bundles:
Create a New Bundle Template
Go to the Services section in your dashboard.
Select Bundles V2 from the menu.
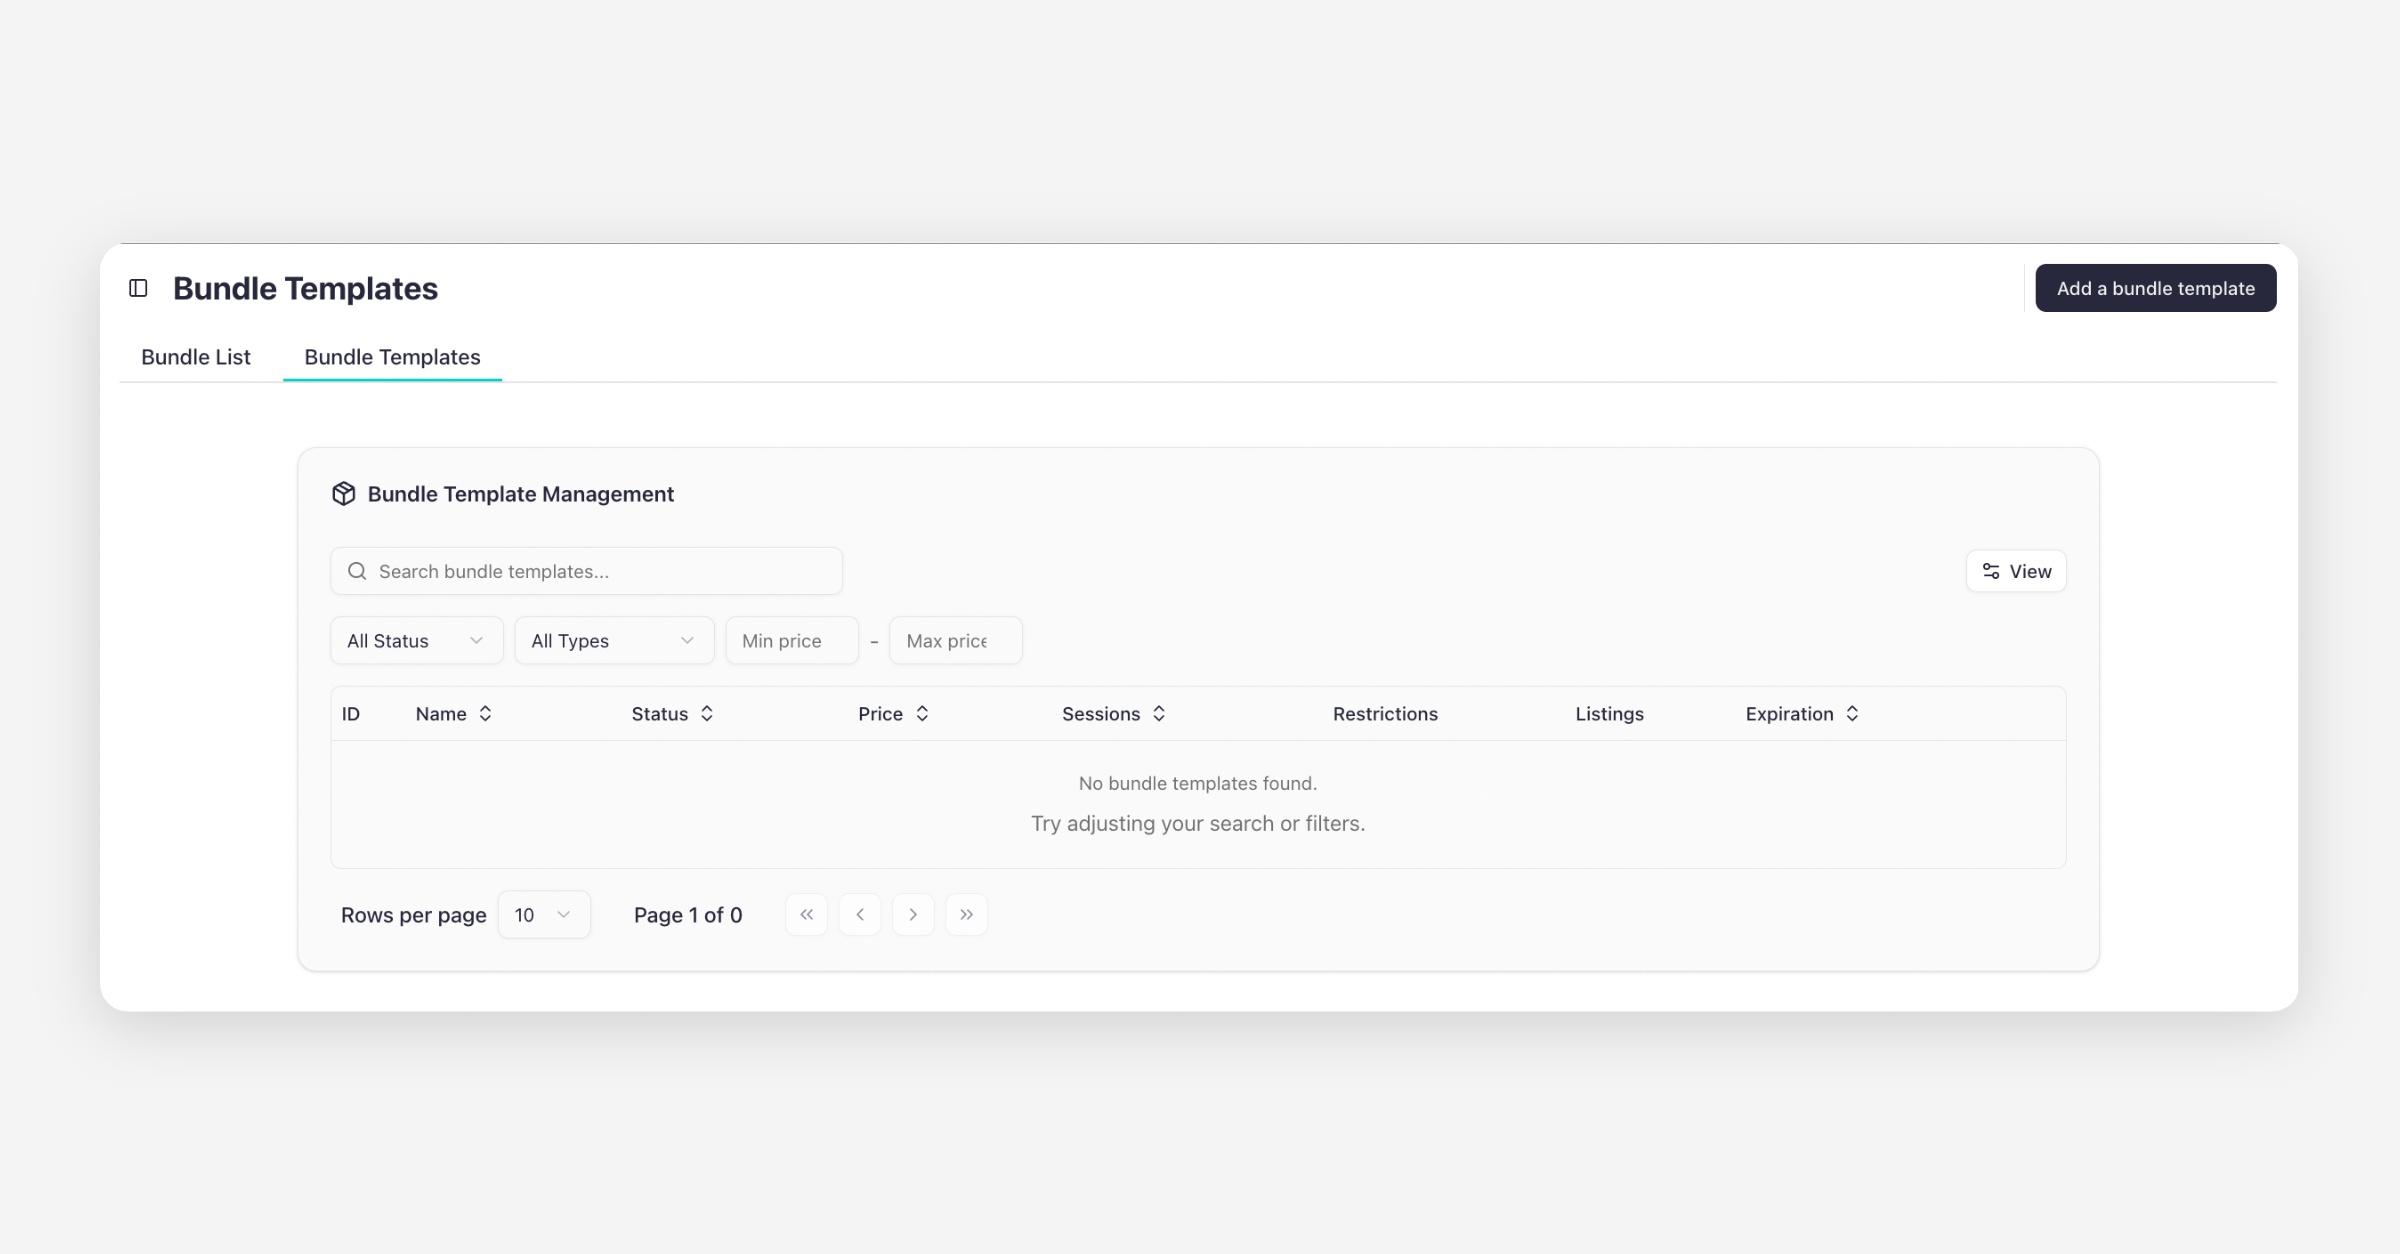
Select Bundle Template tab
In the top-right corner, click Add a Bundle Template.
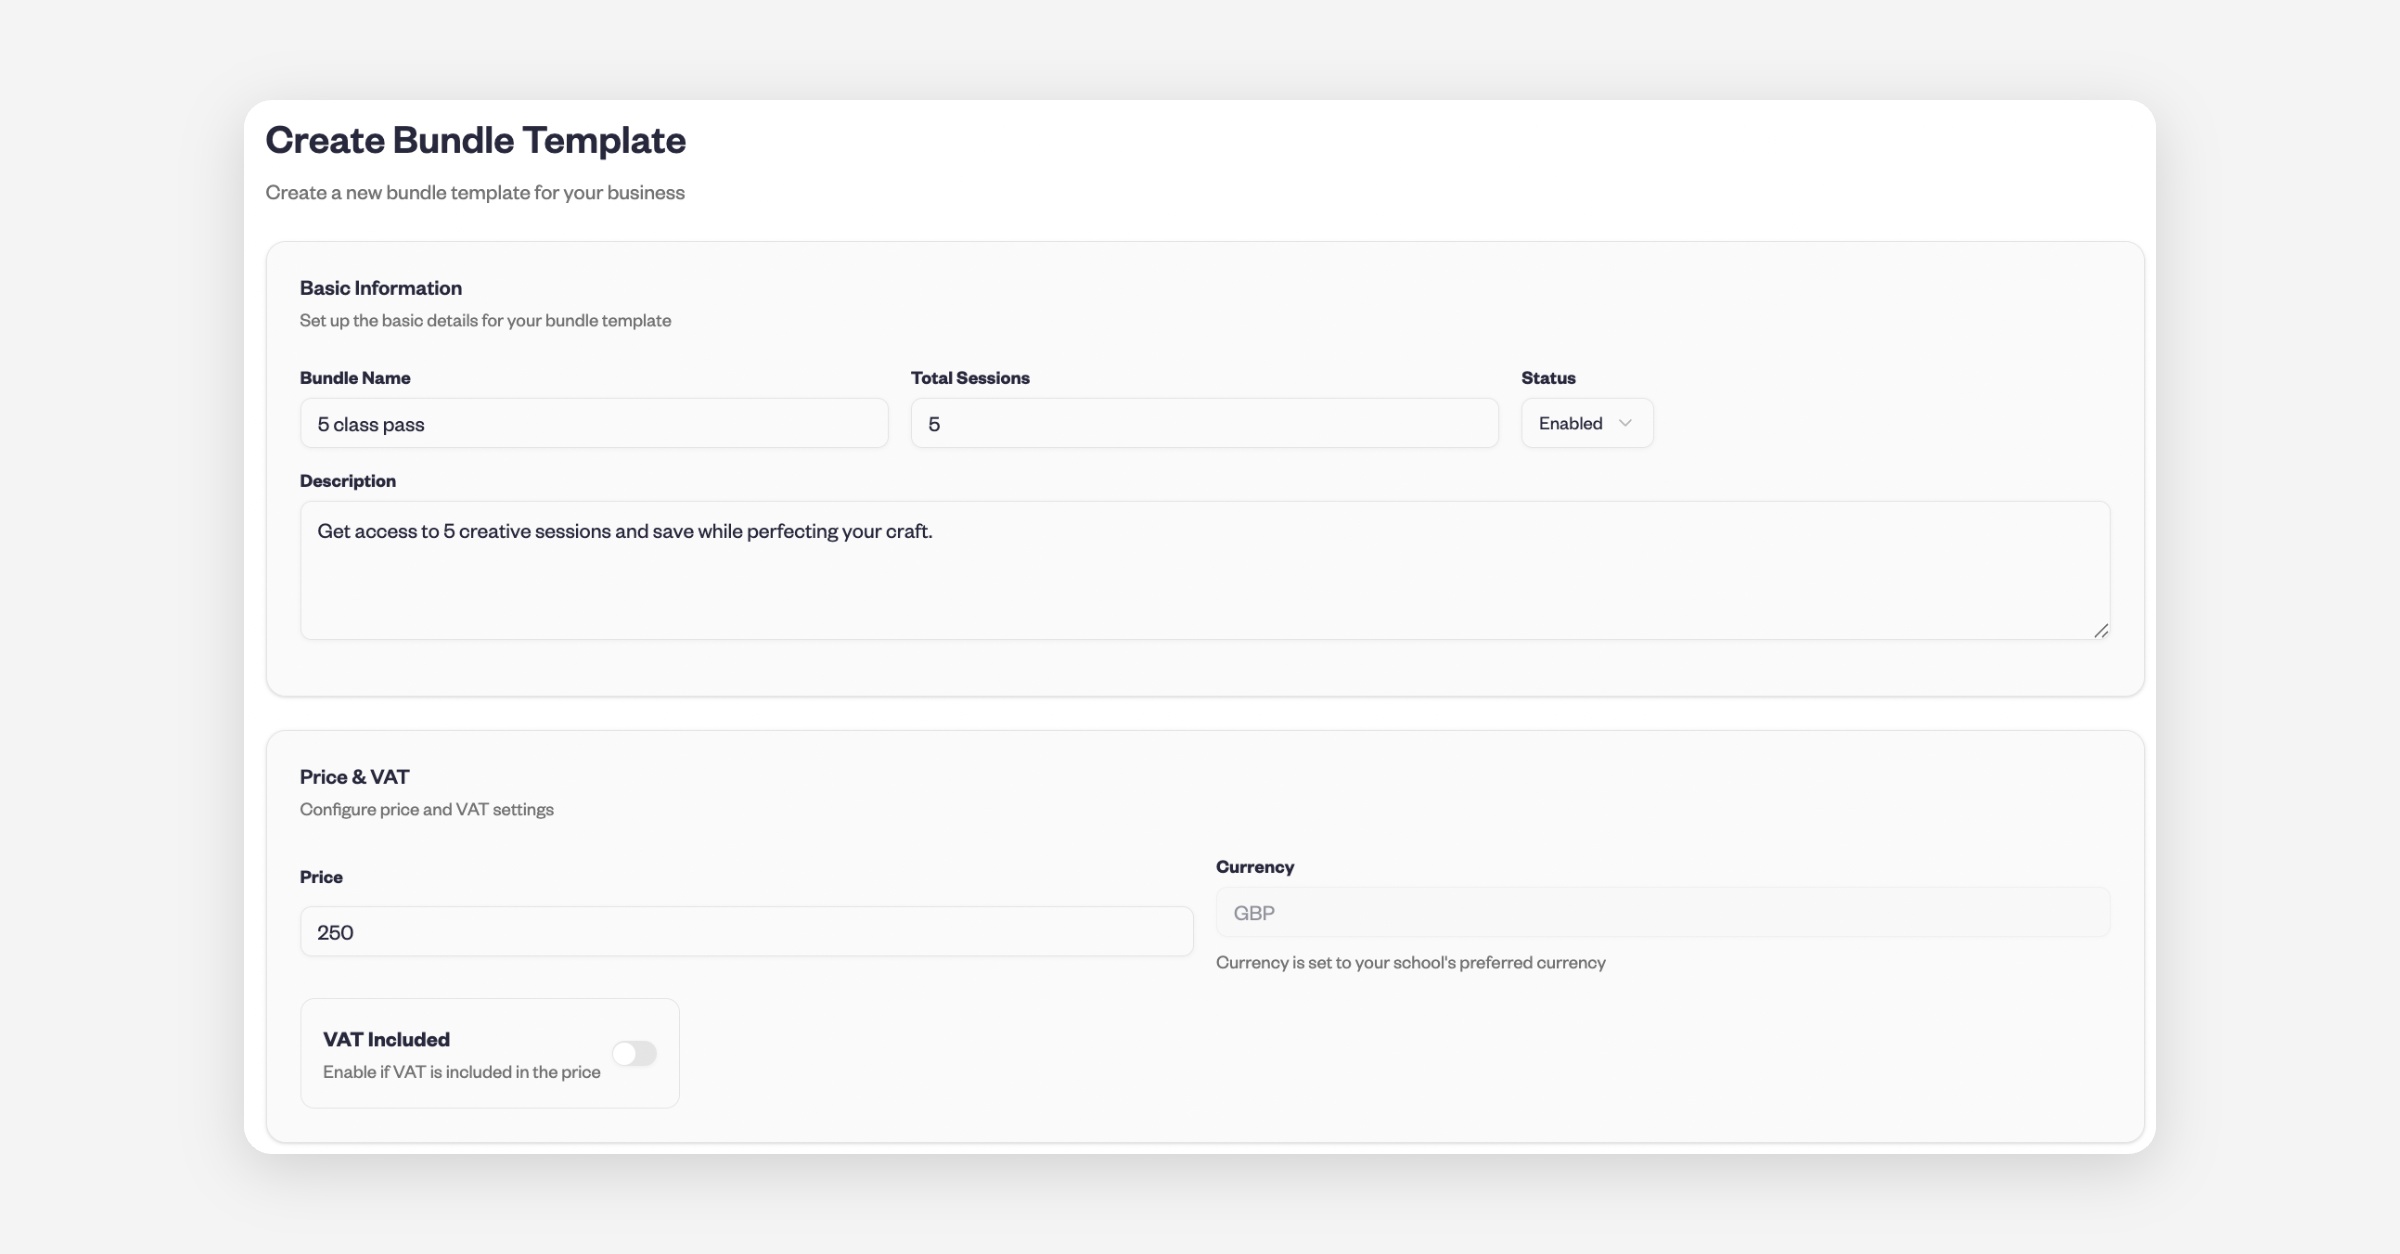
Fill in the bundle details:
Bundle Name
Number of Sessions
Description
Price and VAT
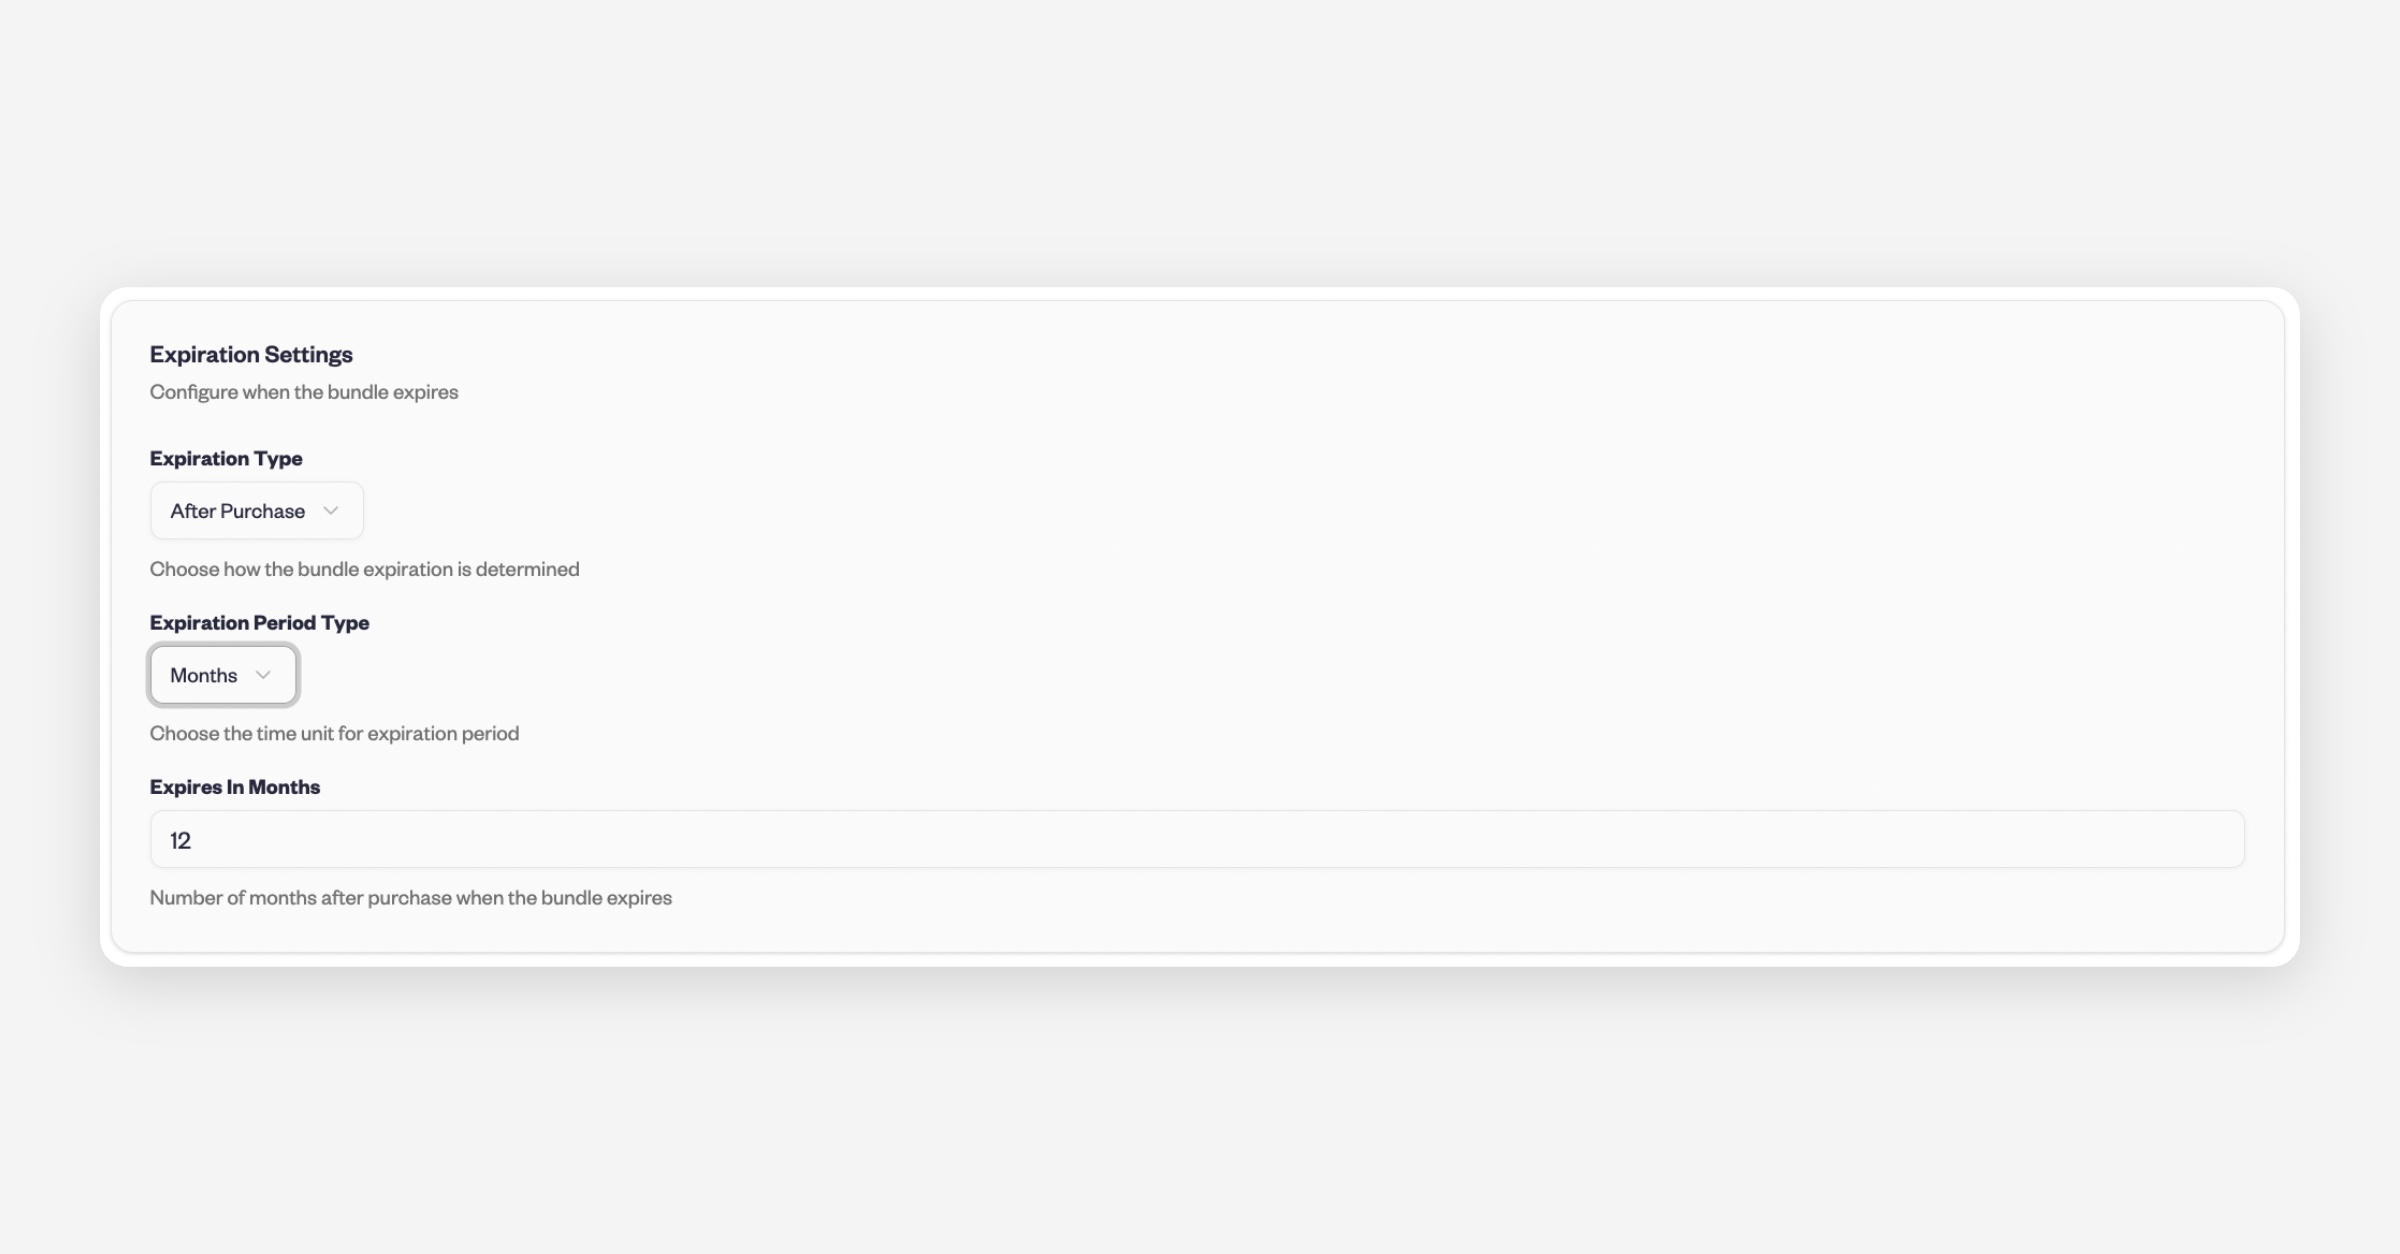
Expiration Time
Set Restrictions (Optional)
In the Restrictions section, you can decide whether the bundle applies to all classes or specific ones.
If you add restrictions, select which classes will not be included in the bundle.
If you leave it unrestricted, the bundle will apply to all eligible sessions.
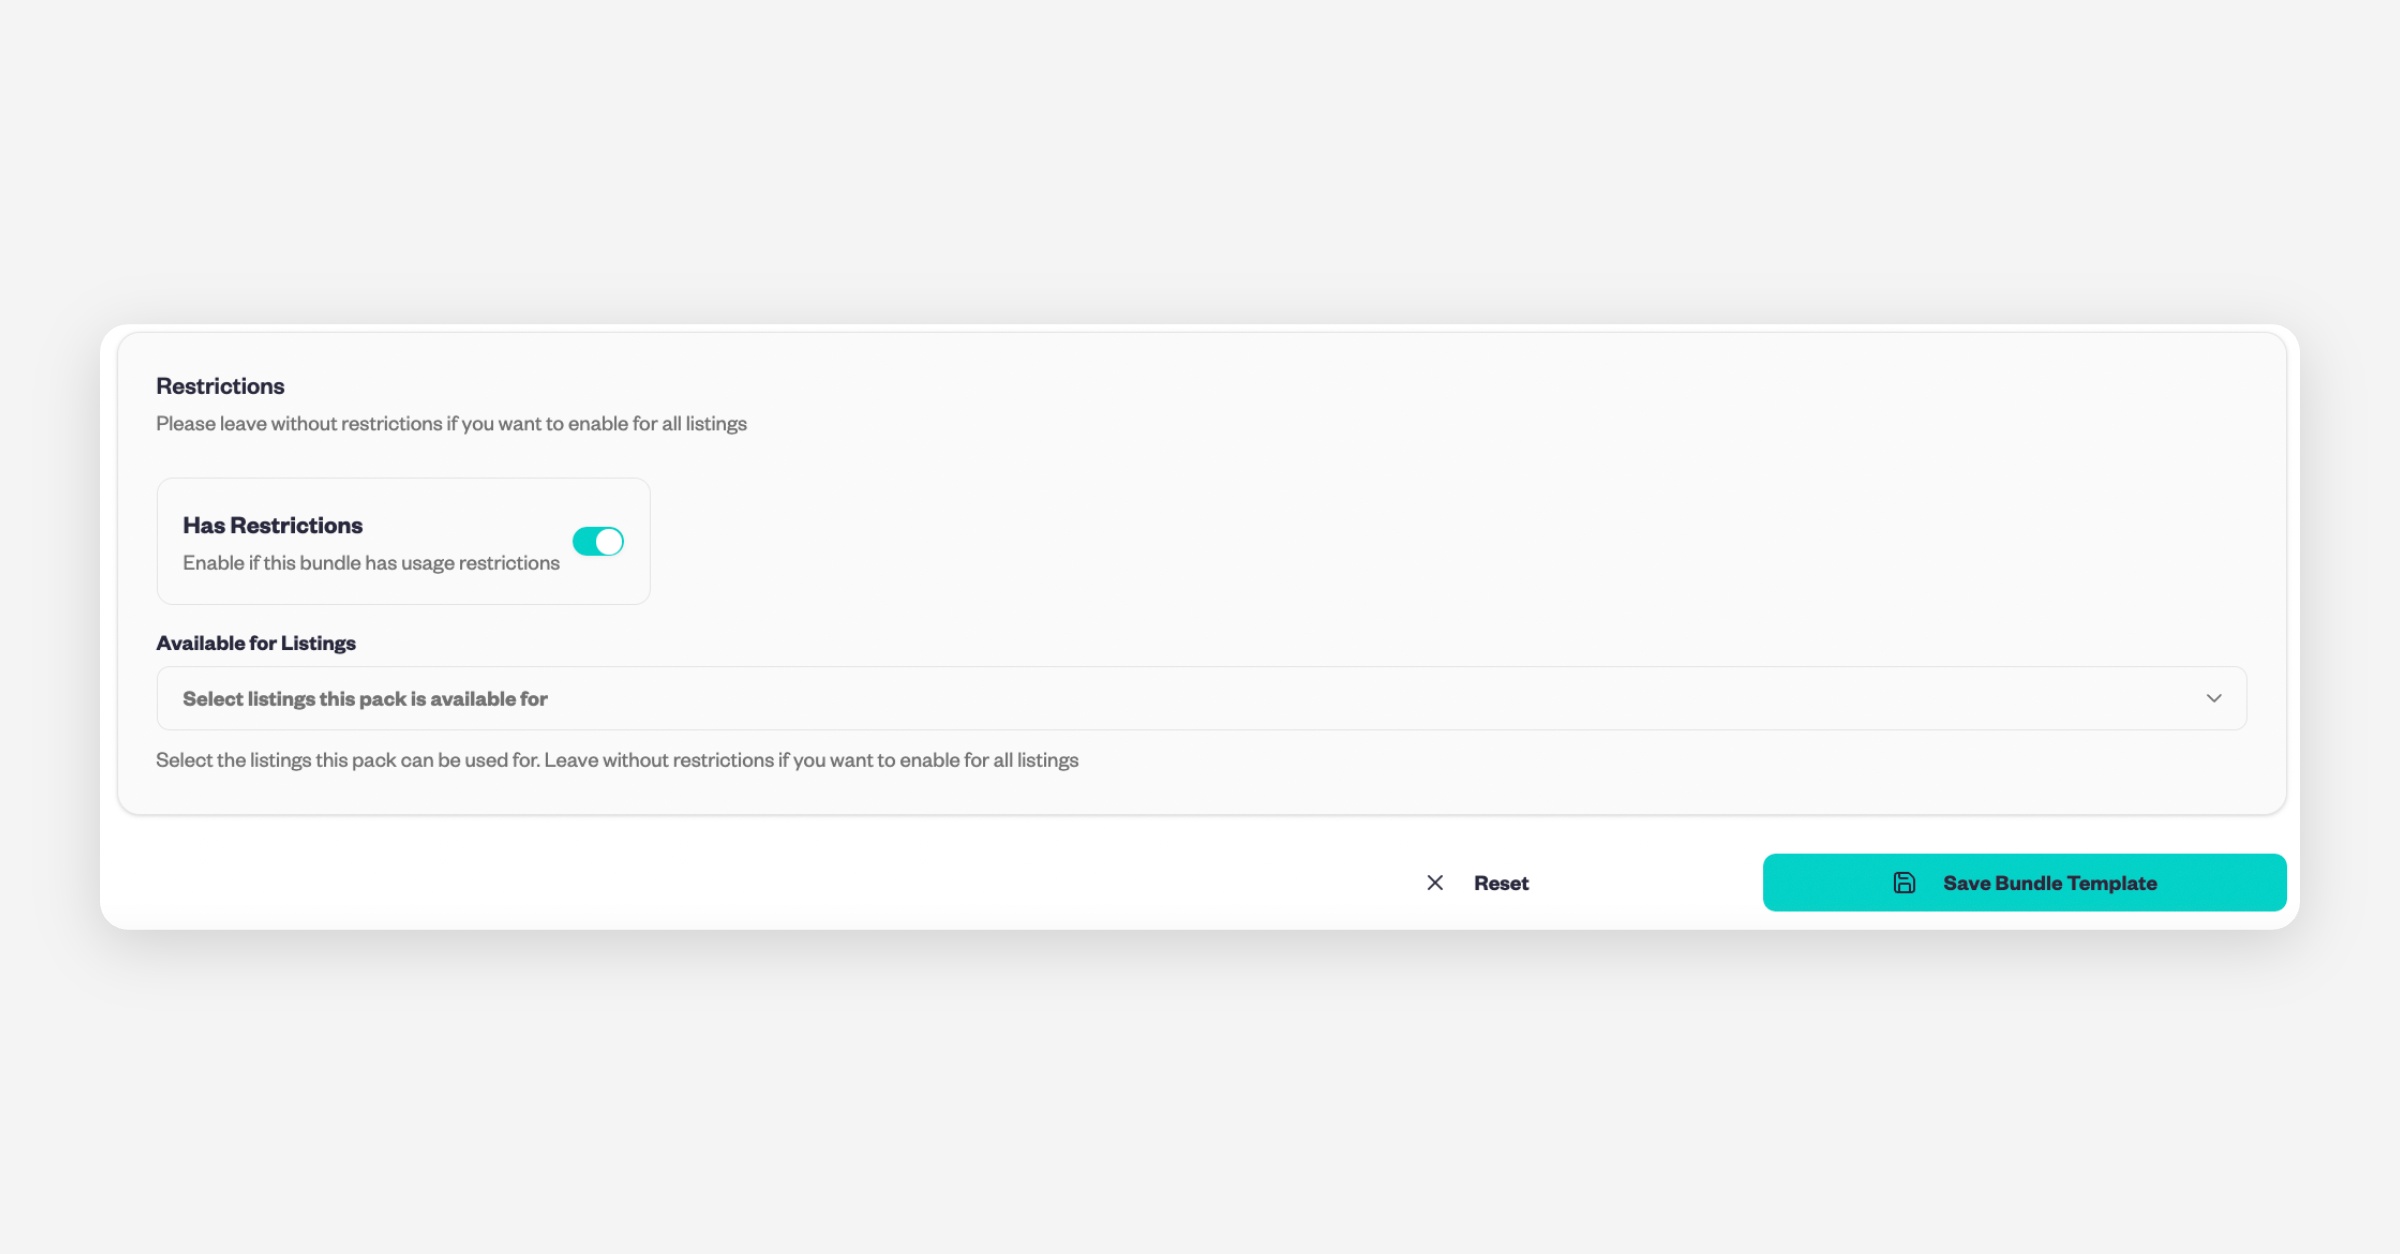
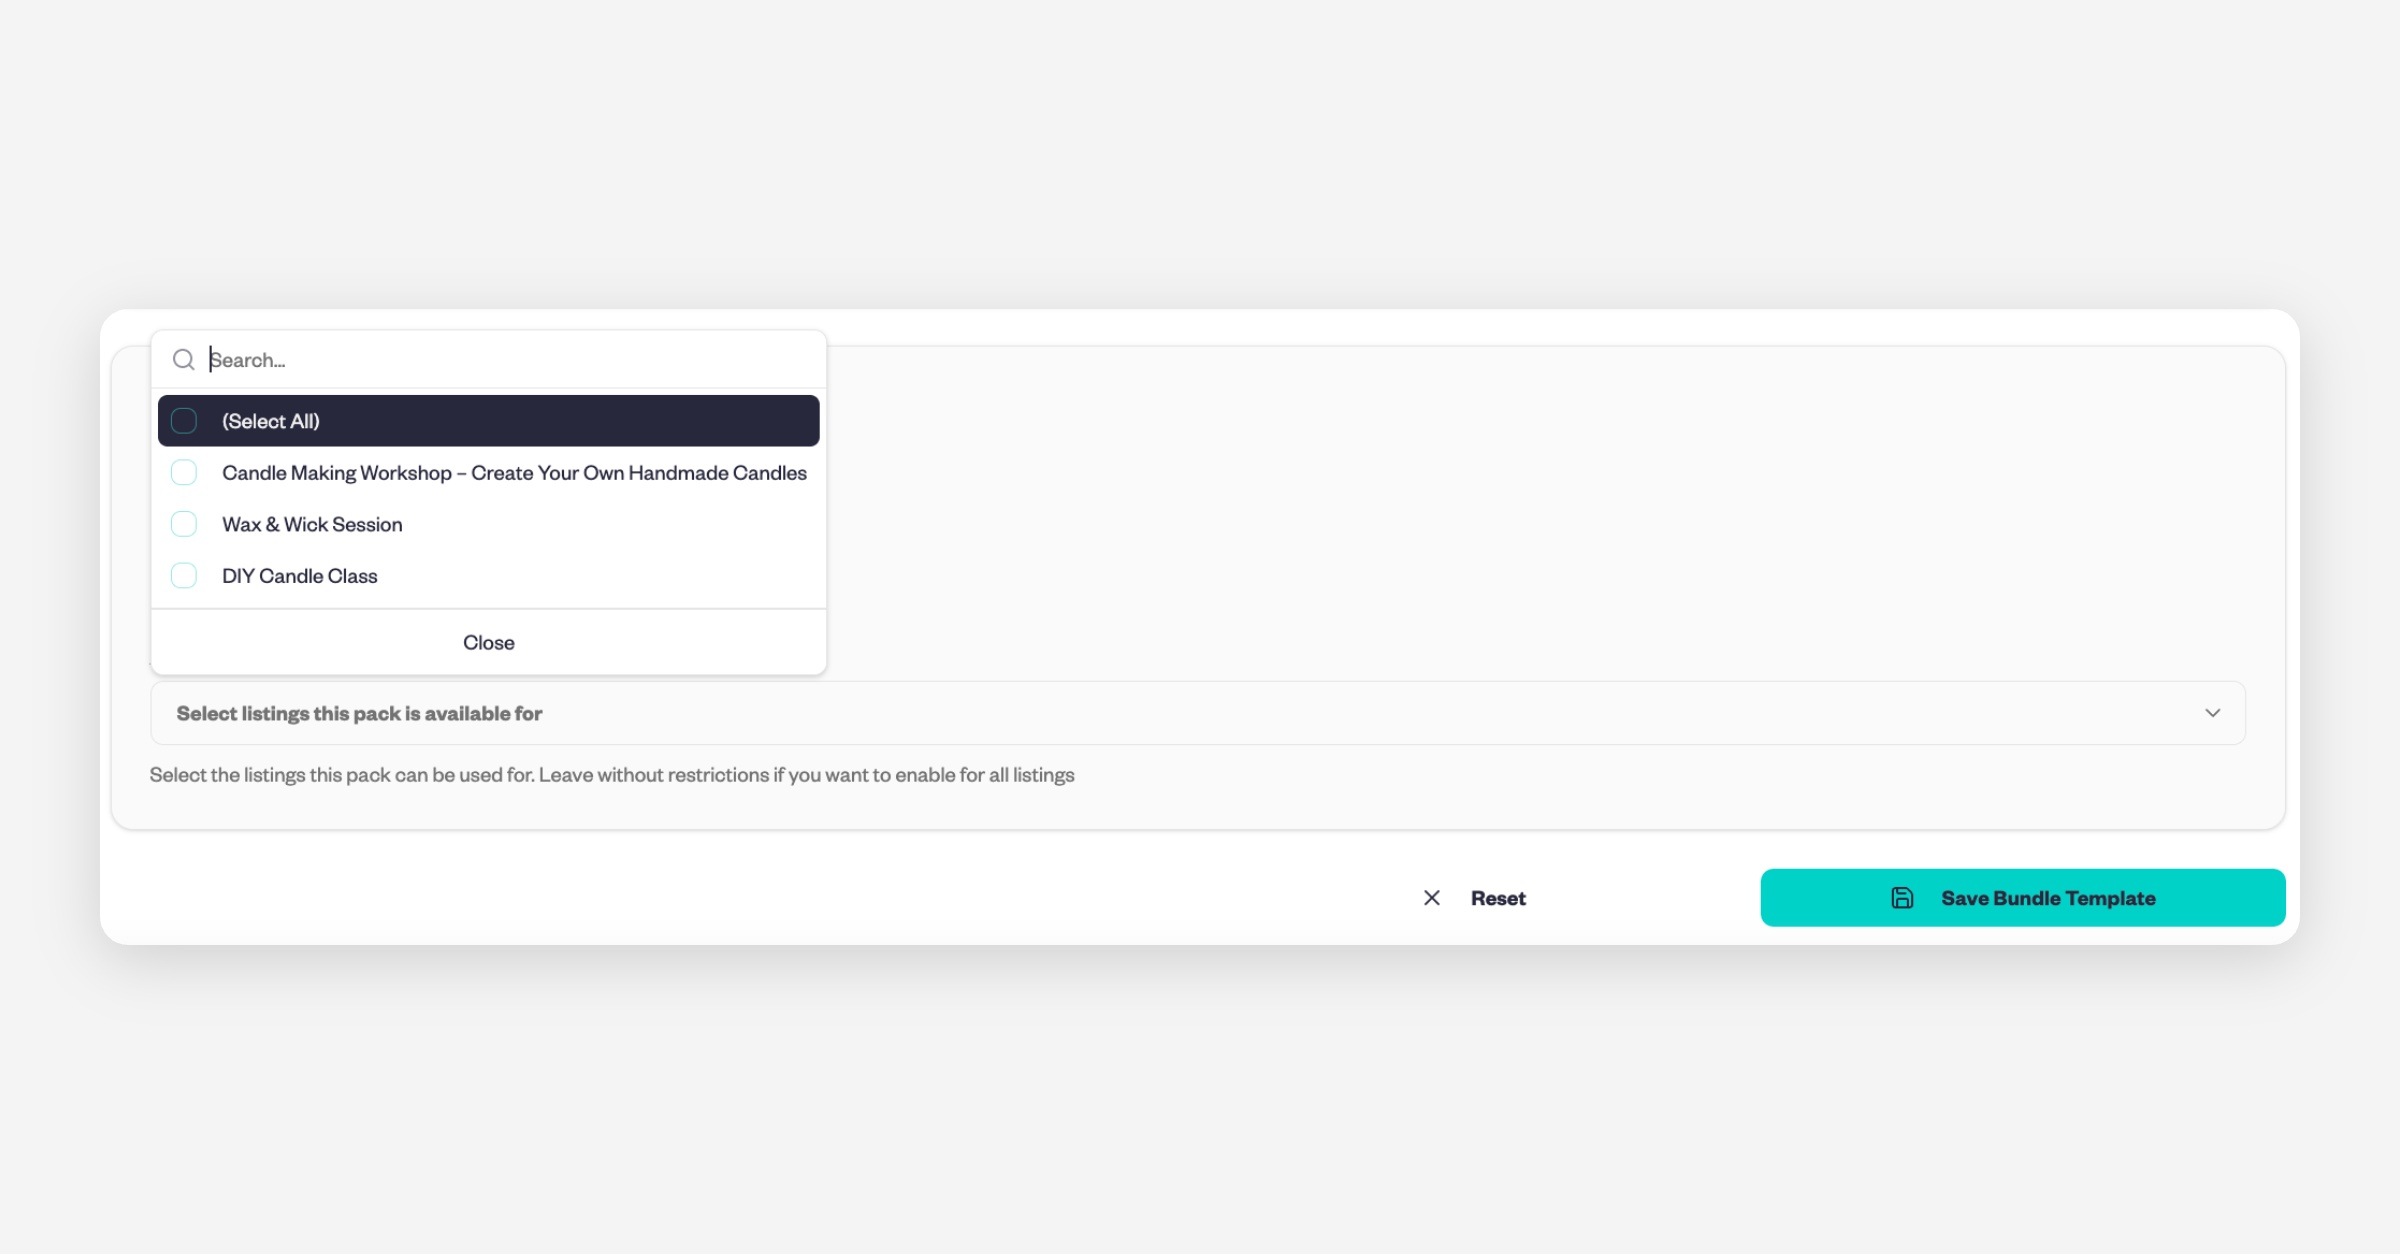
When you’re done, click Save Bundle Template.
How Bundles Appear to Customers?
Once you save your bundle:
All eligible events (those without restrictions) will display a “Buy Bundle” option on the booking page.
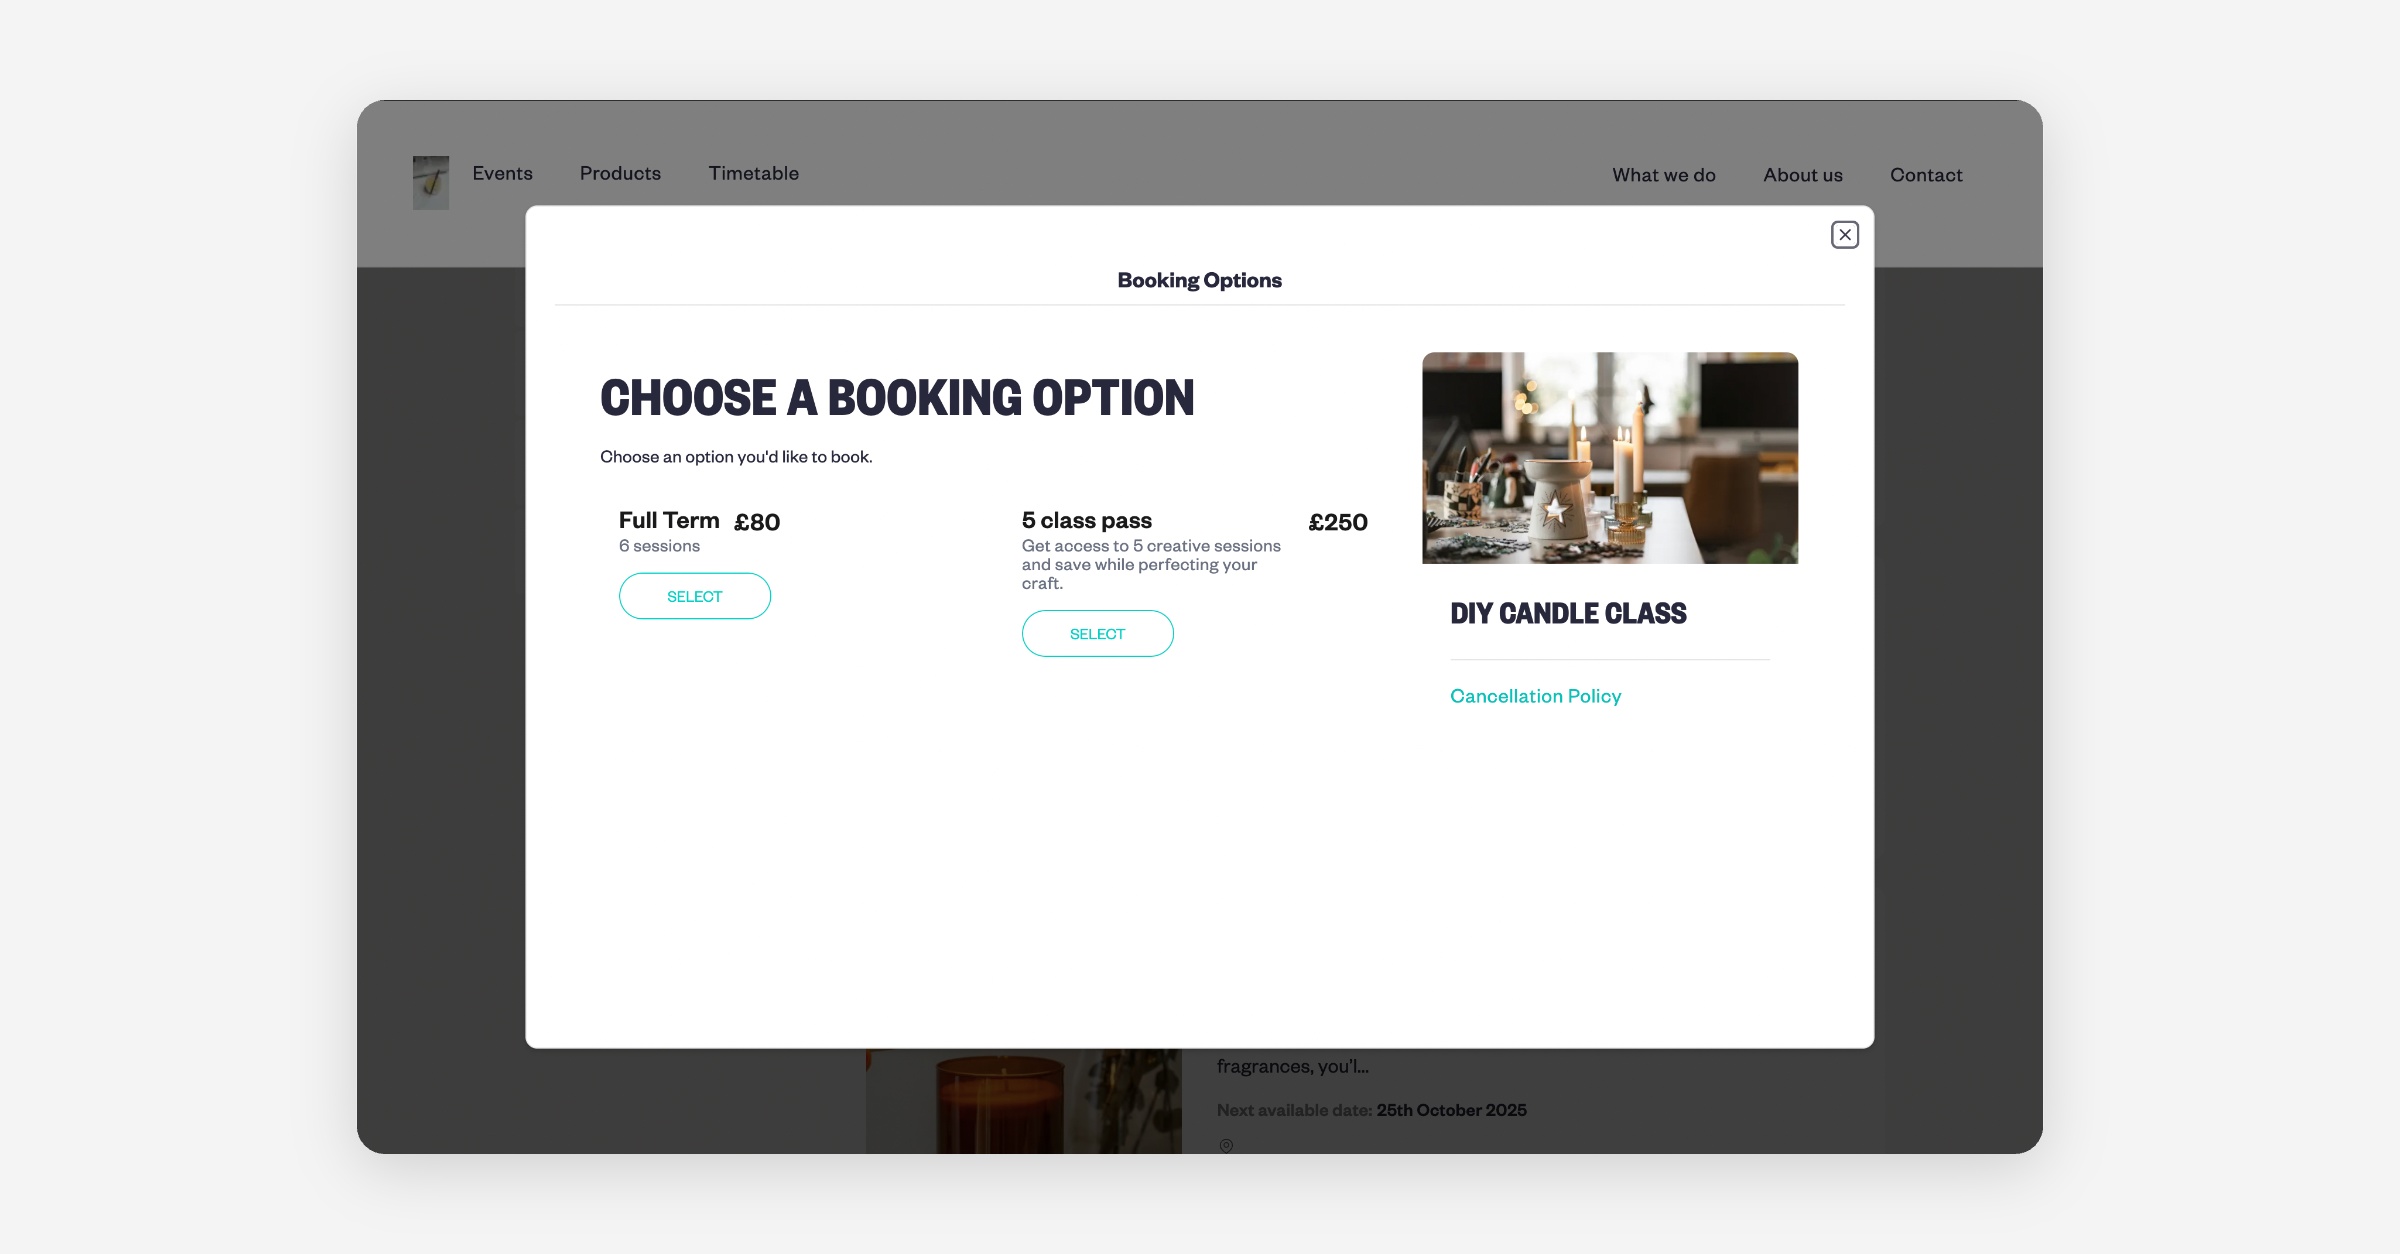
Customers can purchase a bundle and then use it to book any session that isn’t restricted.
Bundles can be used across multiple listings and event types — not just the one they bought it from.
Note: Customers can now bring friends — use your bundle credits to book for guests too!
How to Manage Bundles?
To manage bundles, go to the Bundles Management Page in your dashboard.
Here you can:
There, you'll find information about all bundle purchases, including:
Bundle ID
Buyer Name
Buyer Email
Bundle Name
Price
Sessions Used and Remaining in a Bundle
Status active or expired
Expiry Date
Created Date
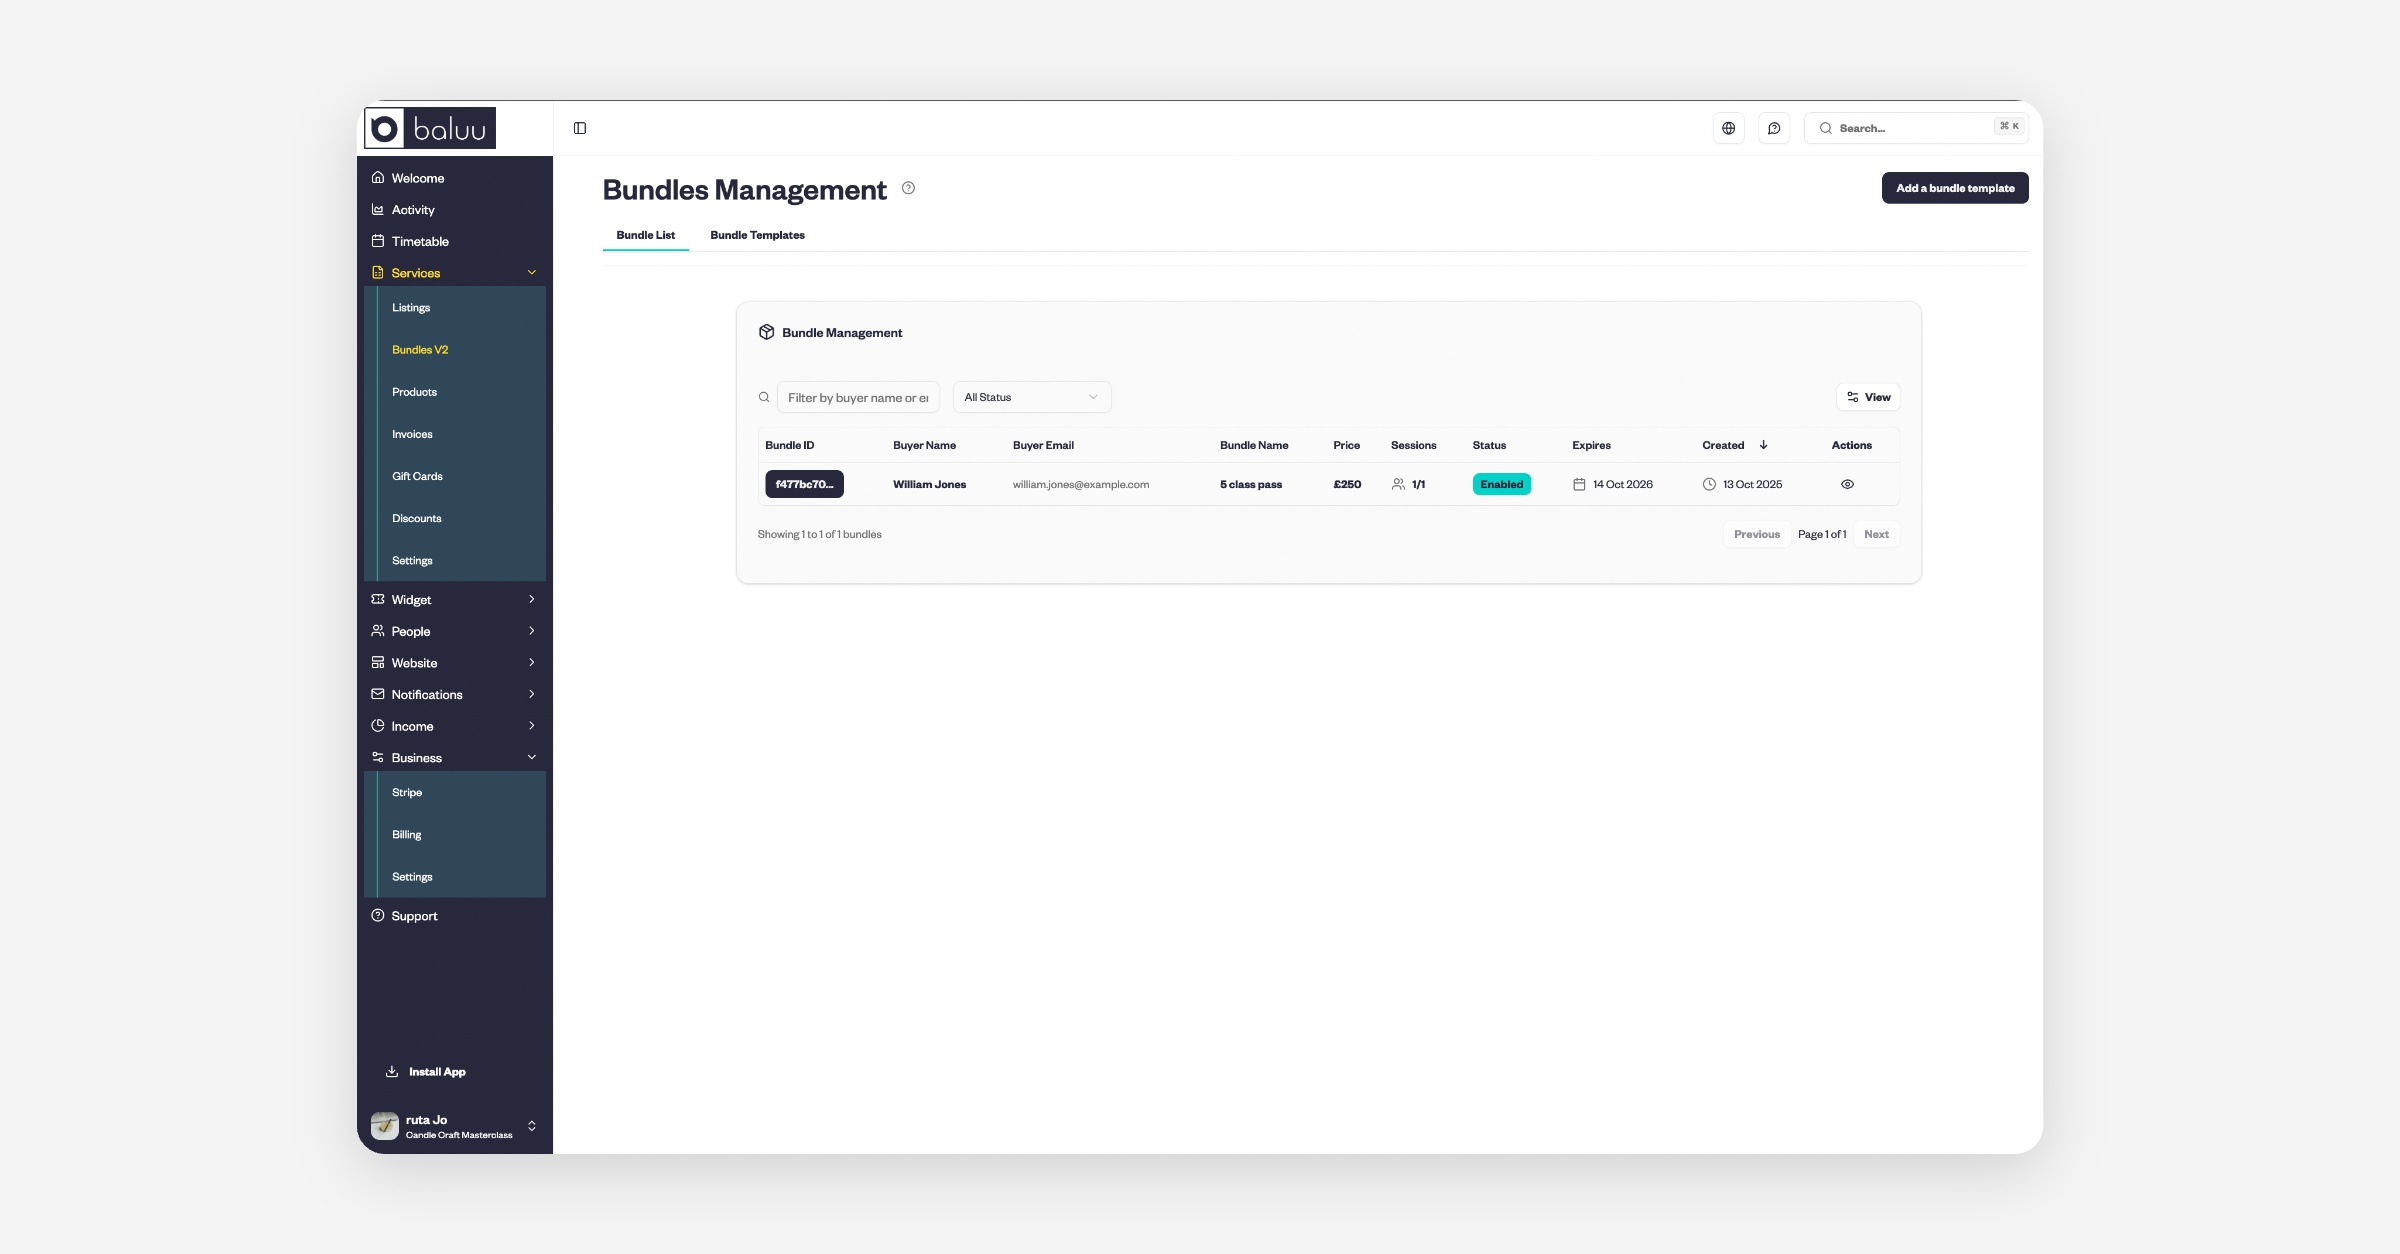
Click on a Bundle ID to see customer details.
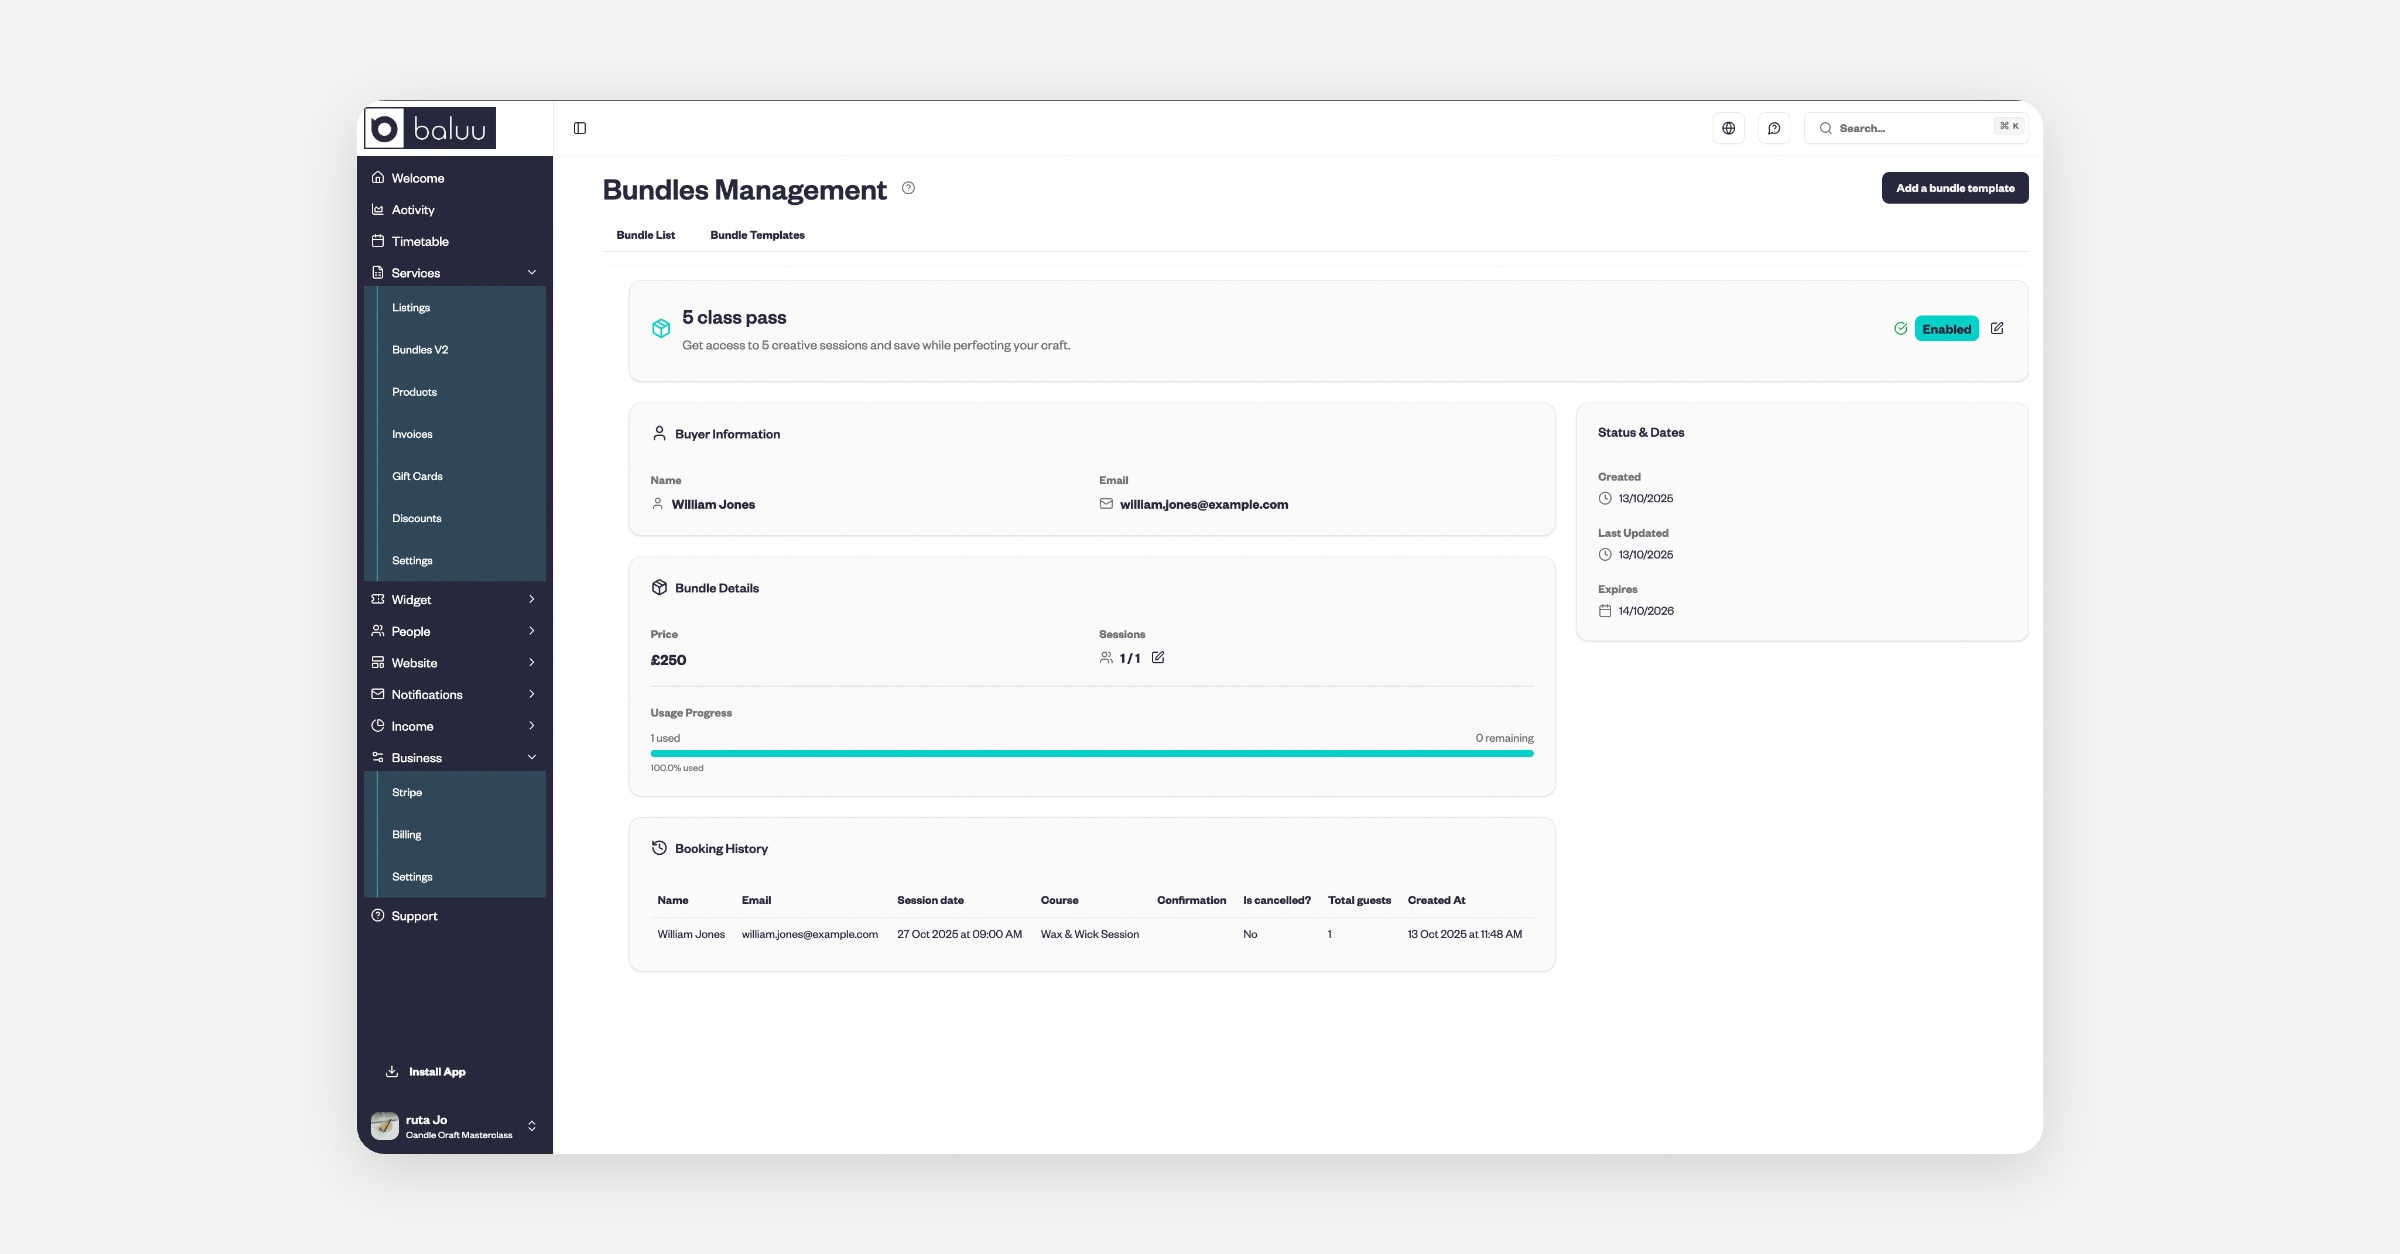
Enable or disable a bundle.
Adjust the number of sessions in a bundle.
Track how many sessions have been used and view which bookings were made using the bundle.
That’s it!
You’ve set up Bundles V2 — a simpler, smarter way to sell sessions across multiple listings. Enjoy easier management, more flexibility, and happier customers!
Was this helpful?