How to Set Up and Sell Memberships on Baluu
We’ve introduced a new Memberships feature to help you create recurring revenue and offer more value to your customers.
Why Memberships?
Memberships turn your business into a predictable revenue stream. Instead of relying on one-off bookings, your customers pay a recurring fee and return regularly.
You get steady, predictable income
Your customers get better value
You build long-term customer loyalty
How to Create a Membership Plan
To set up a membership:
Go to your Dashboard
Click Memberships
Select Plans
Click Create Plan
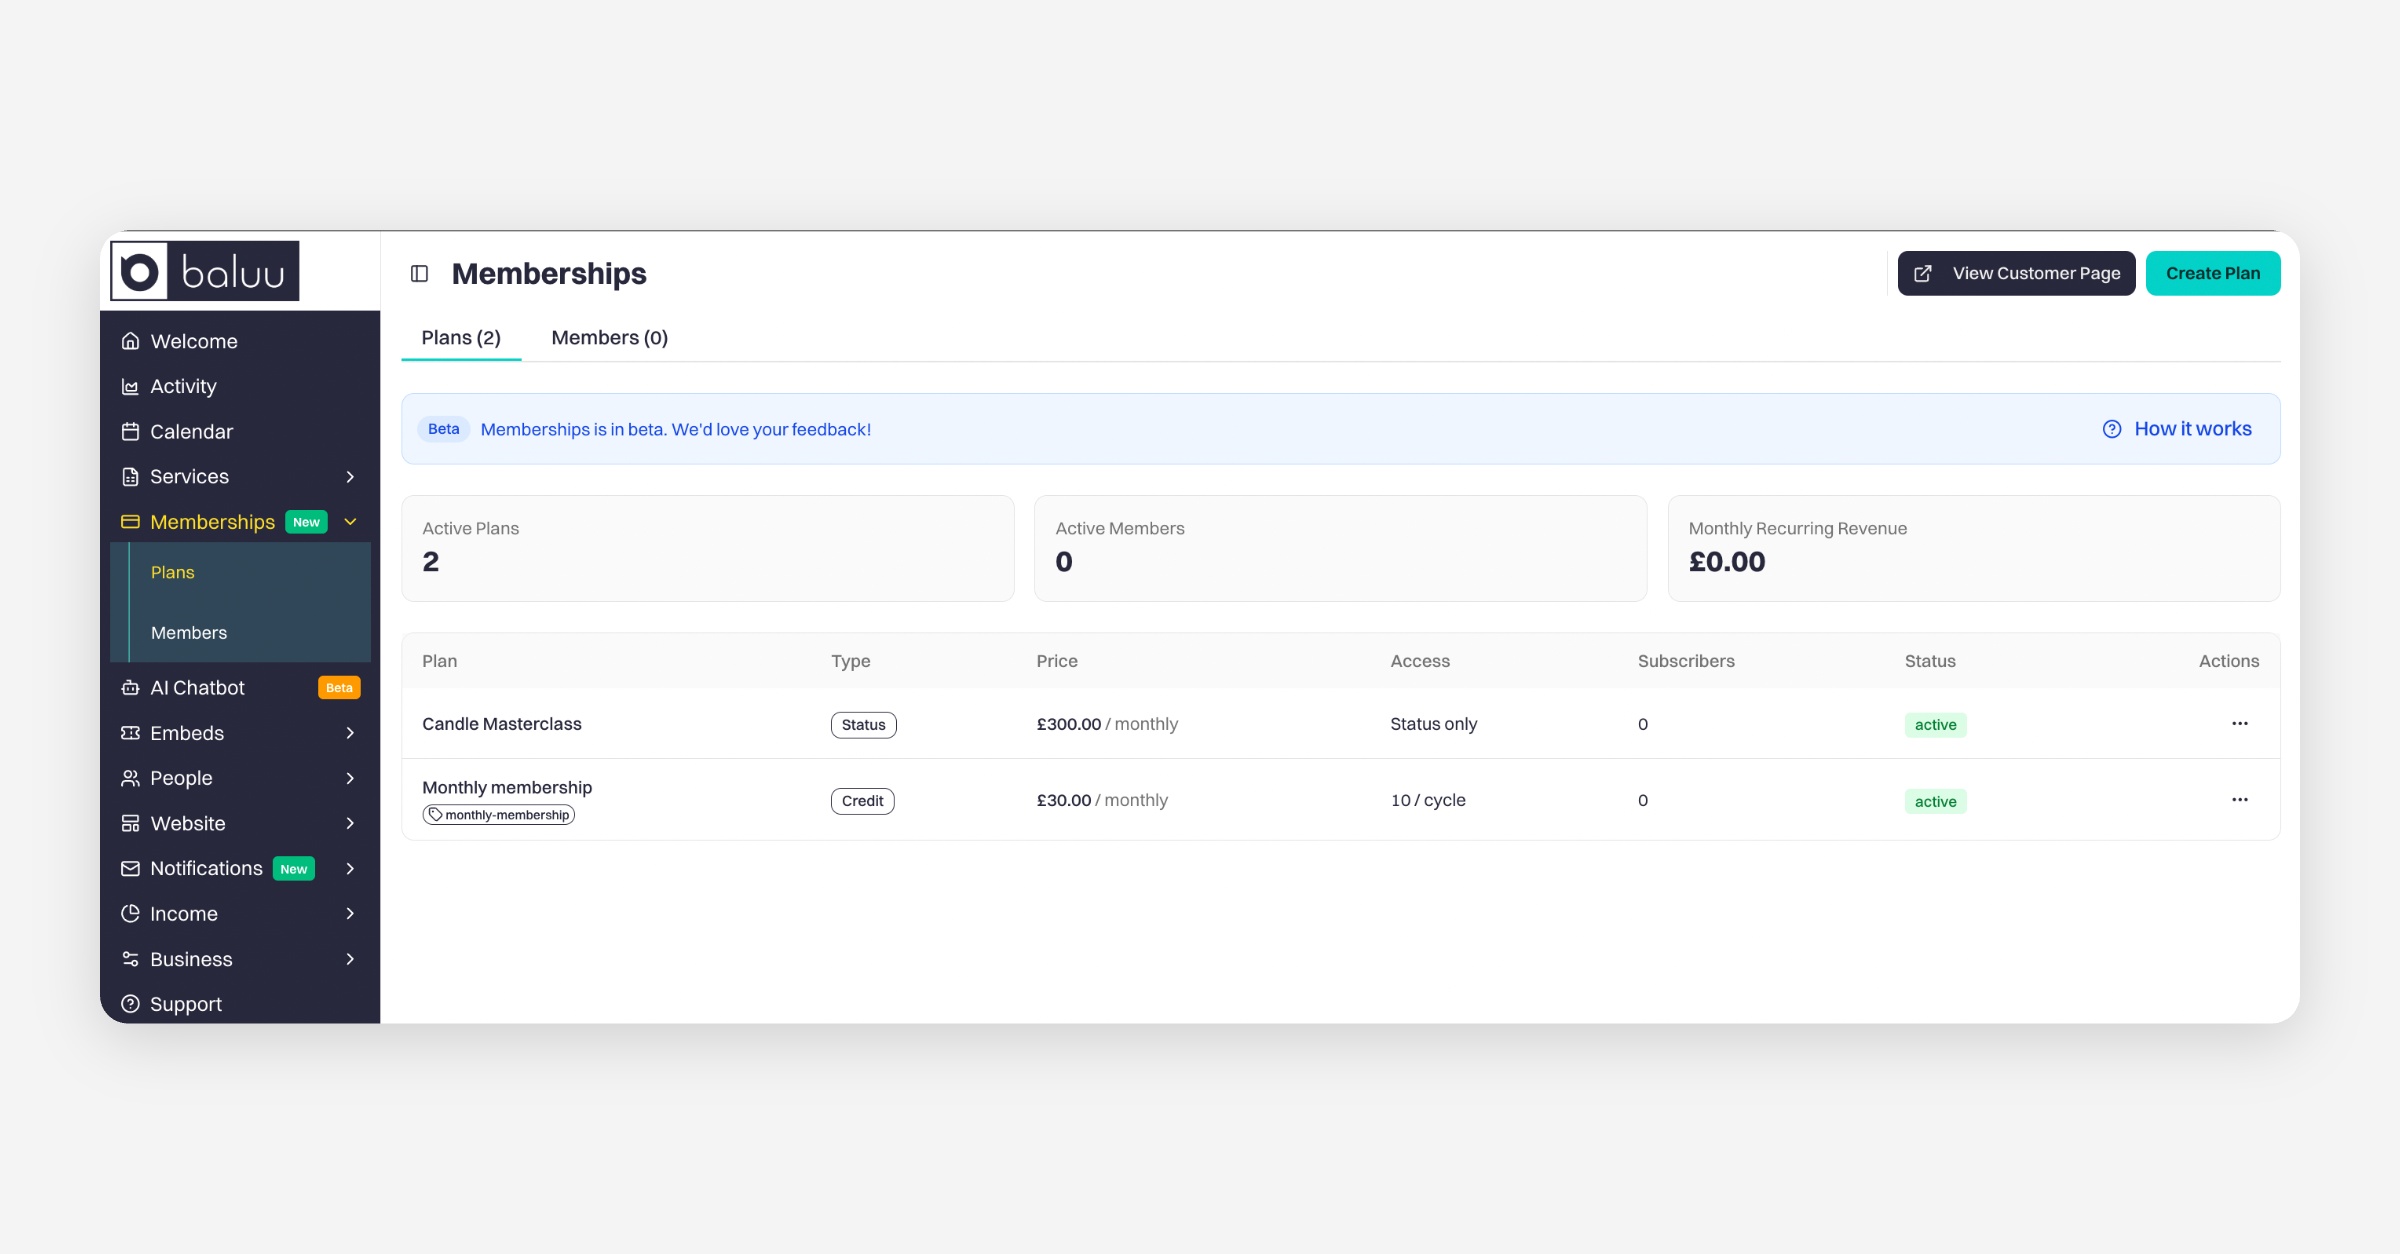
Create Membership Plan
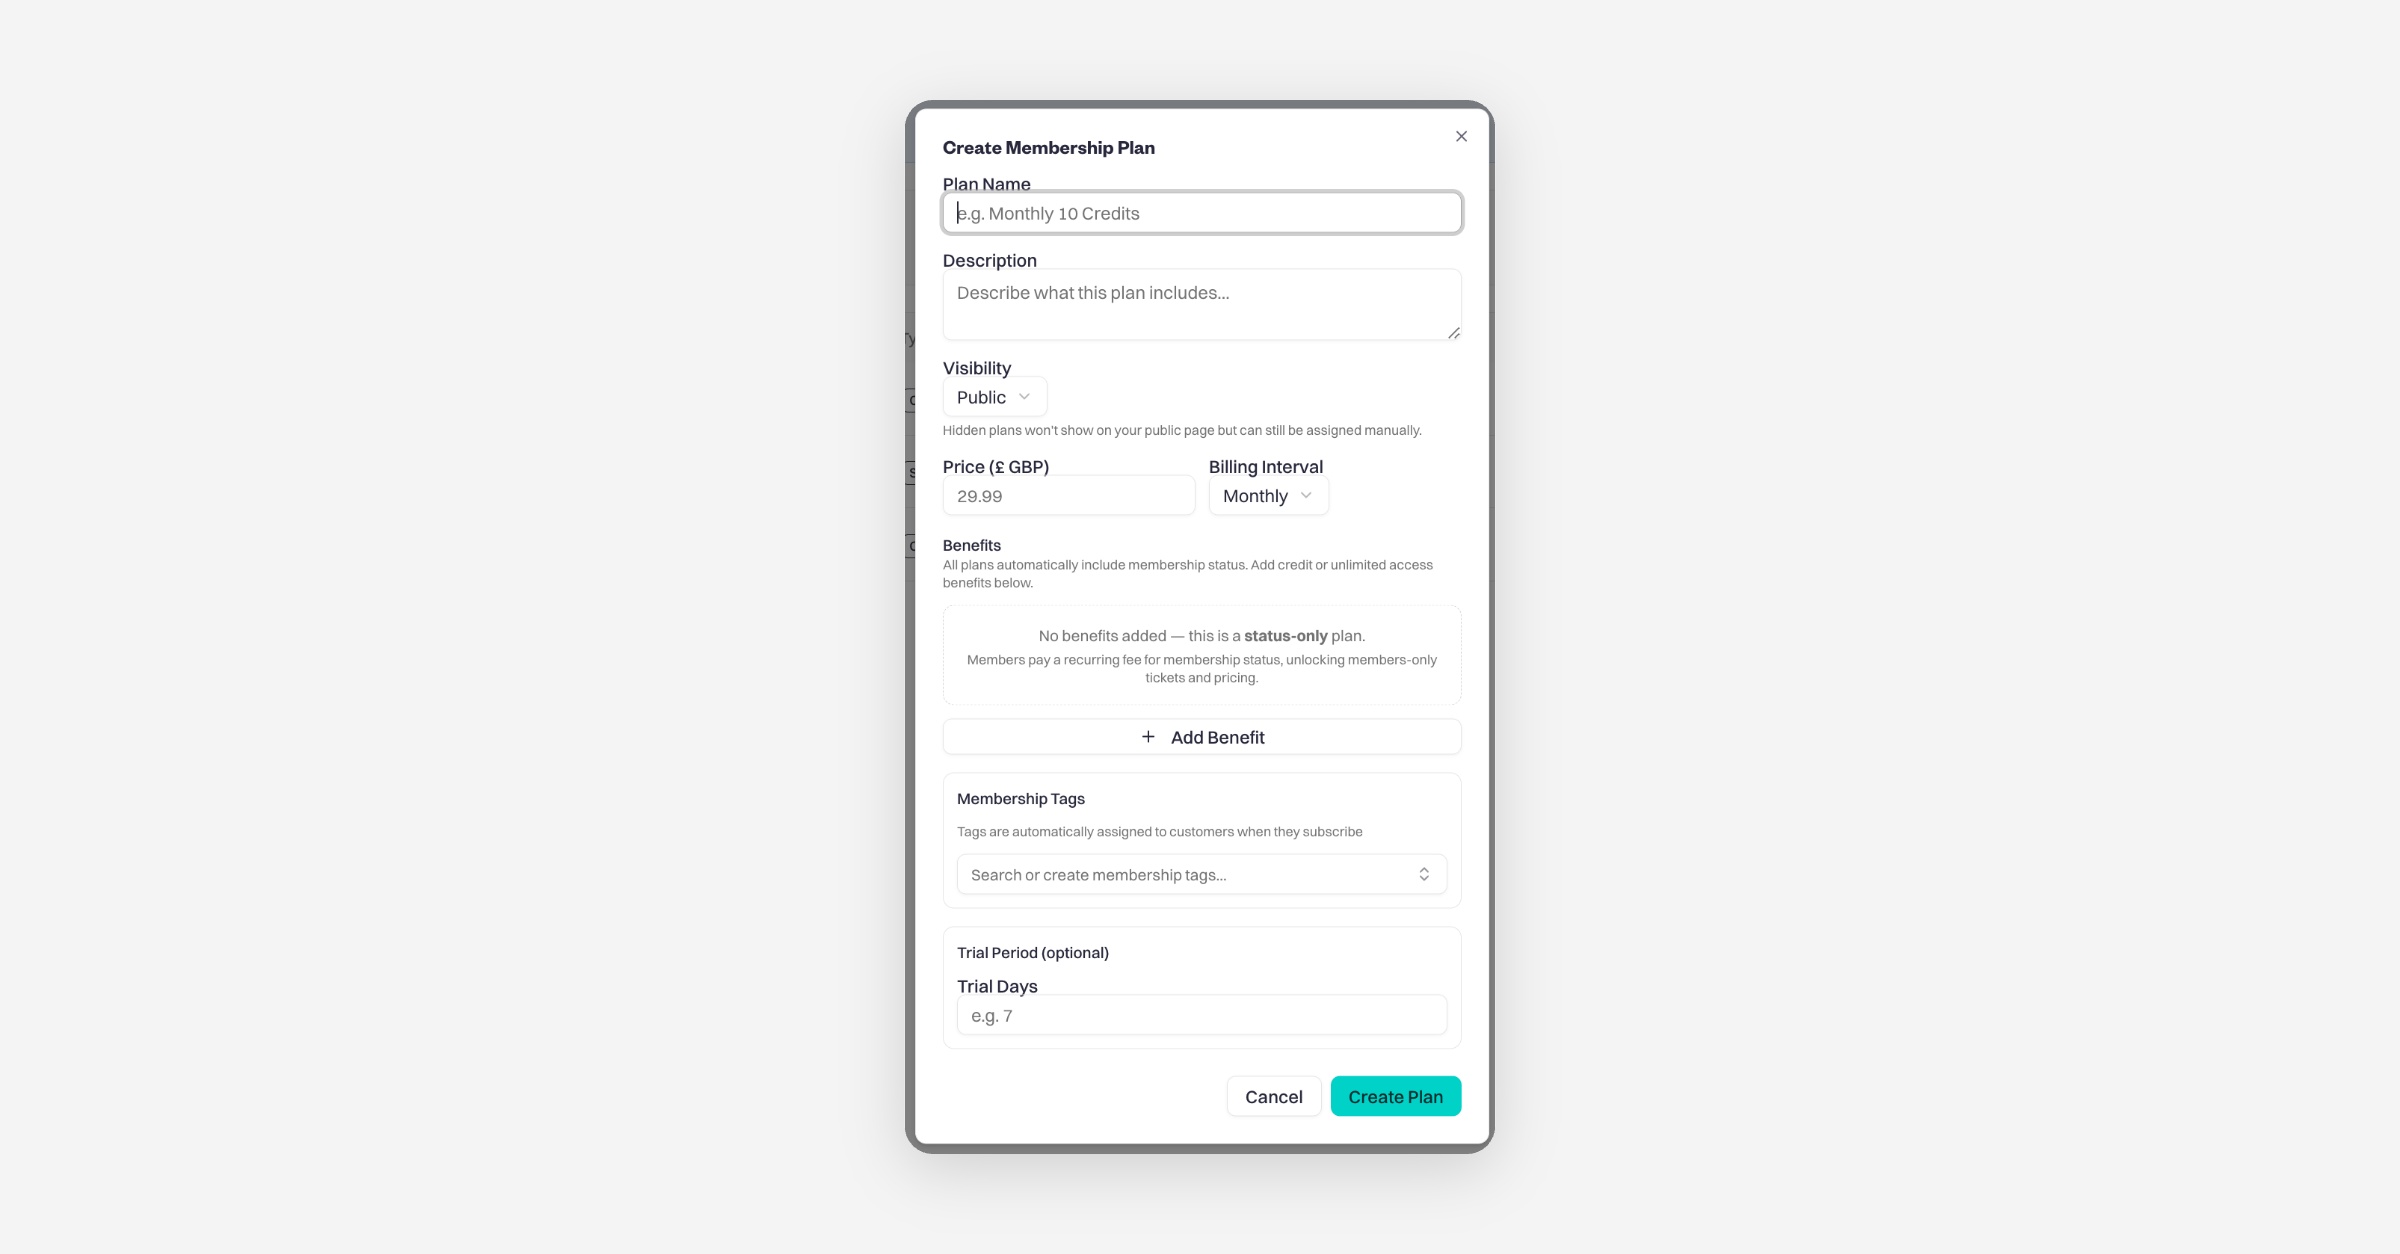
Plan Name – Give your membership a name (e.g. “Monthly 10 Credits”).
Description – Explain what the membership includes (optional but recommended).
Visibility
You can set your membership as public or hidden.
When set to public, customers will be able to see it on your website.
When set to hidden, it won’t be visible to customers, but you can still assign it to them manually.
Pricing
Price – Set how much customers will pay
Billing Interval – Choose how often they are charged (e.g. monthly)
Benefits
You can define what the membership gives access to:
Credit-based → customers receive credits to spend on bookings
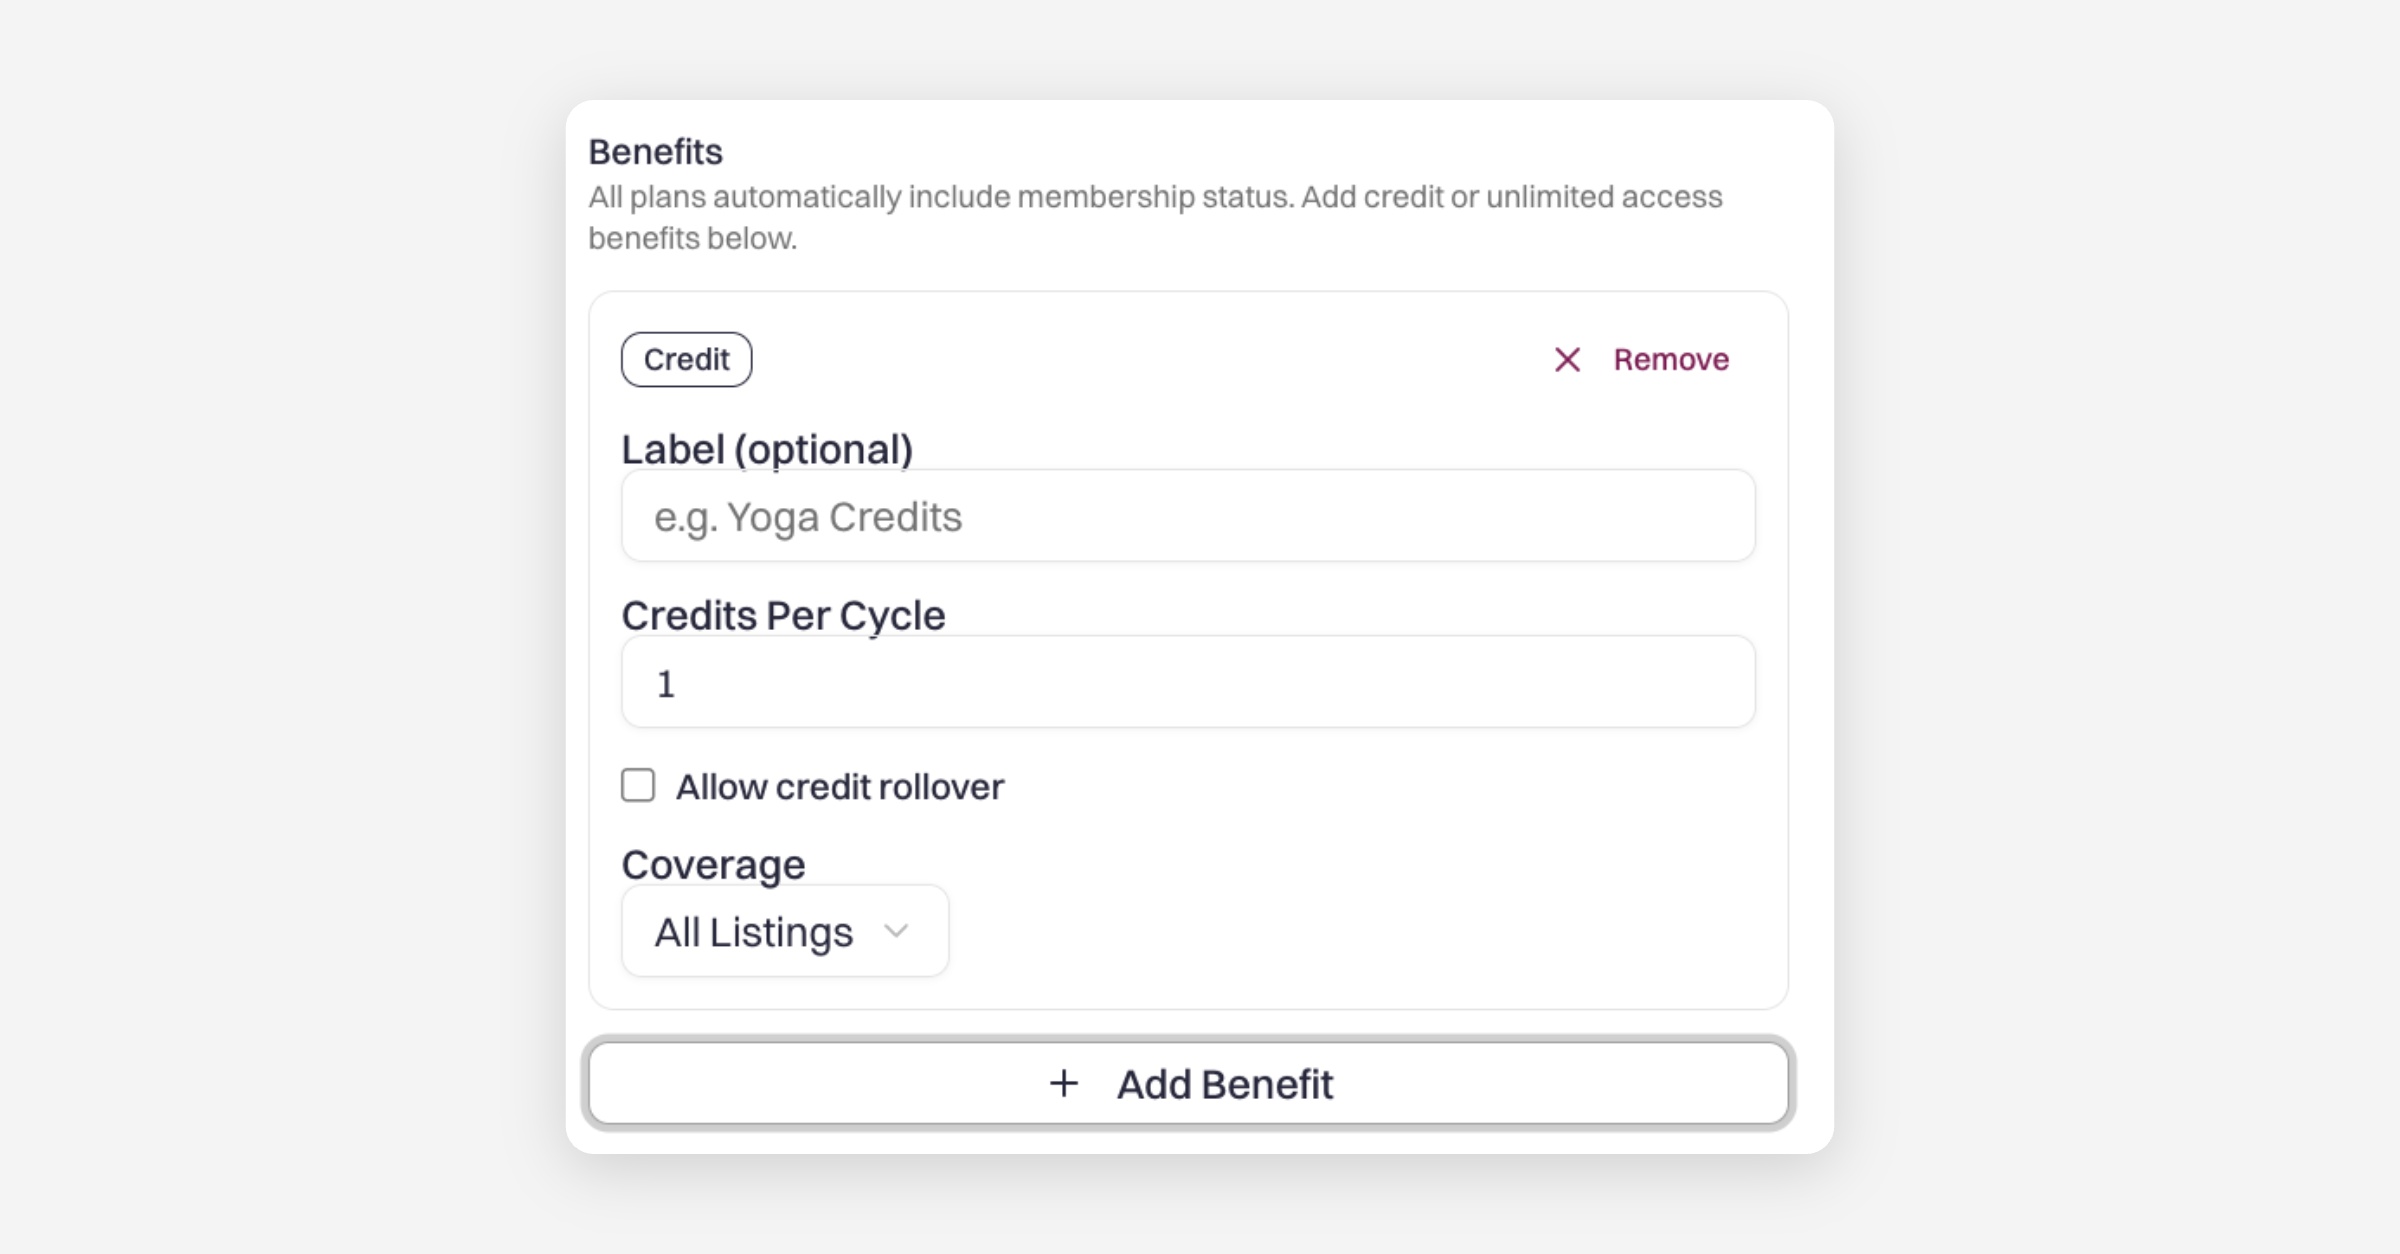
Unlimited access → access to selected sessions without limits
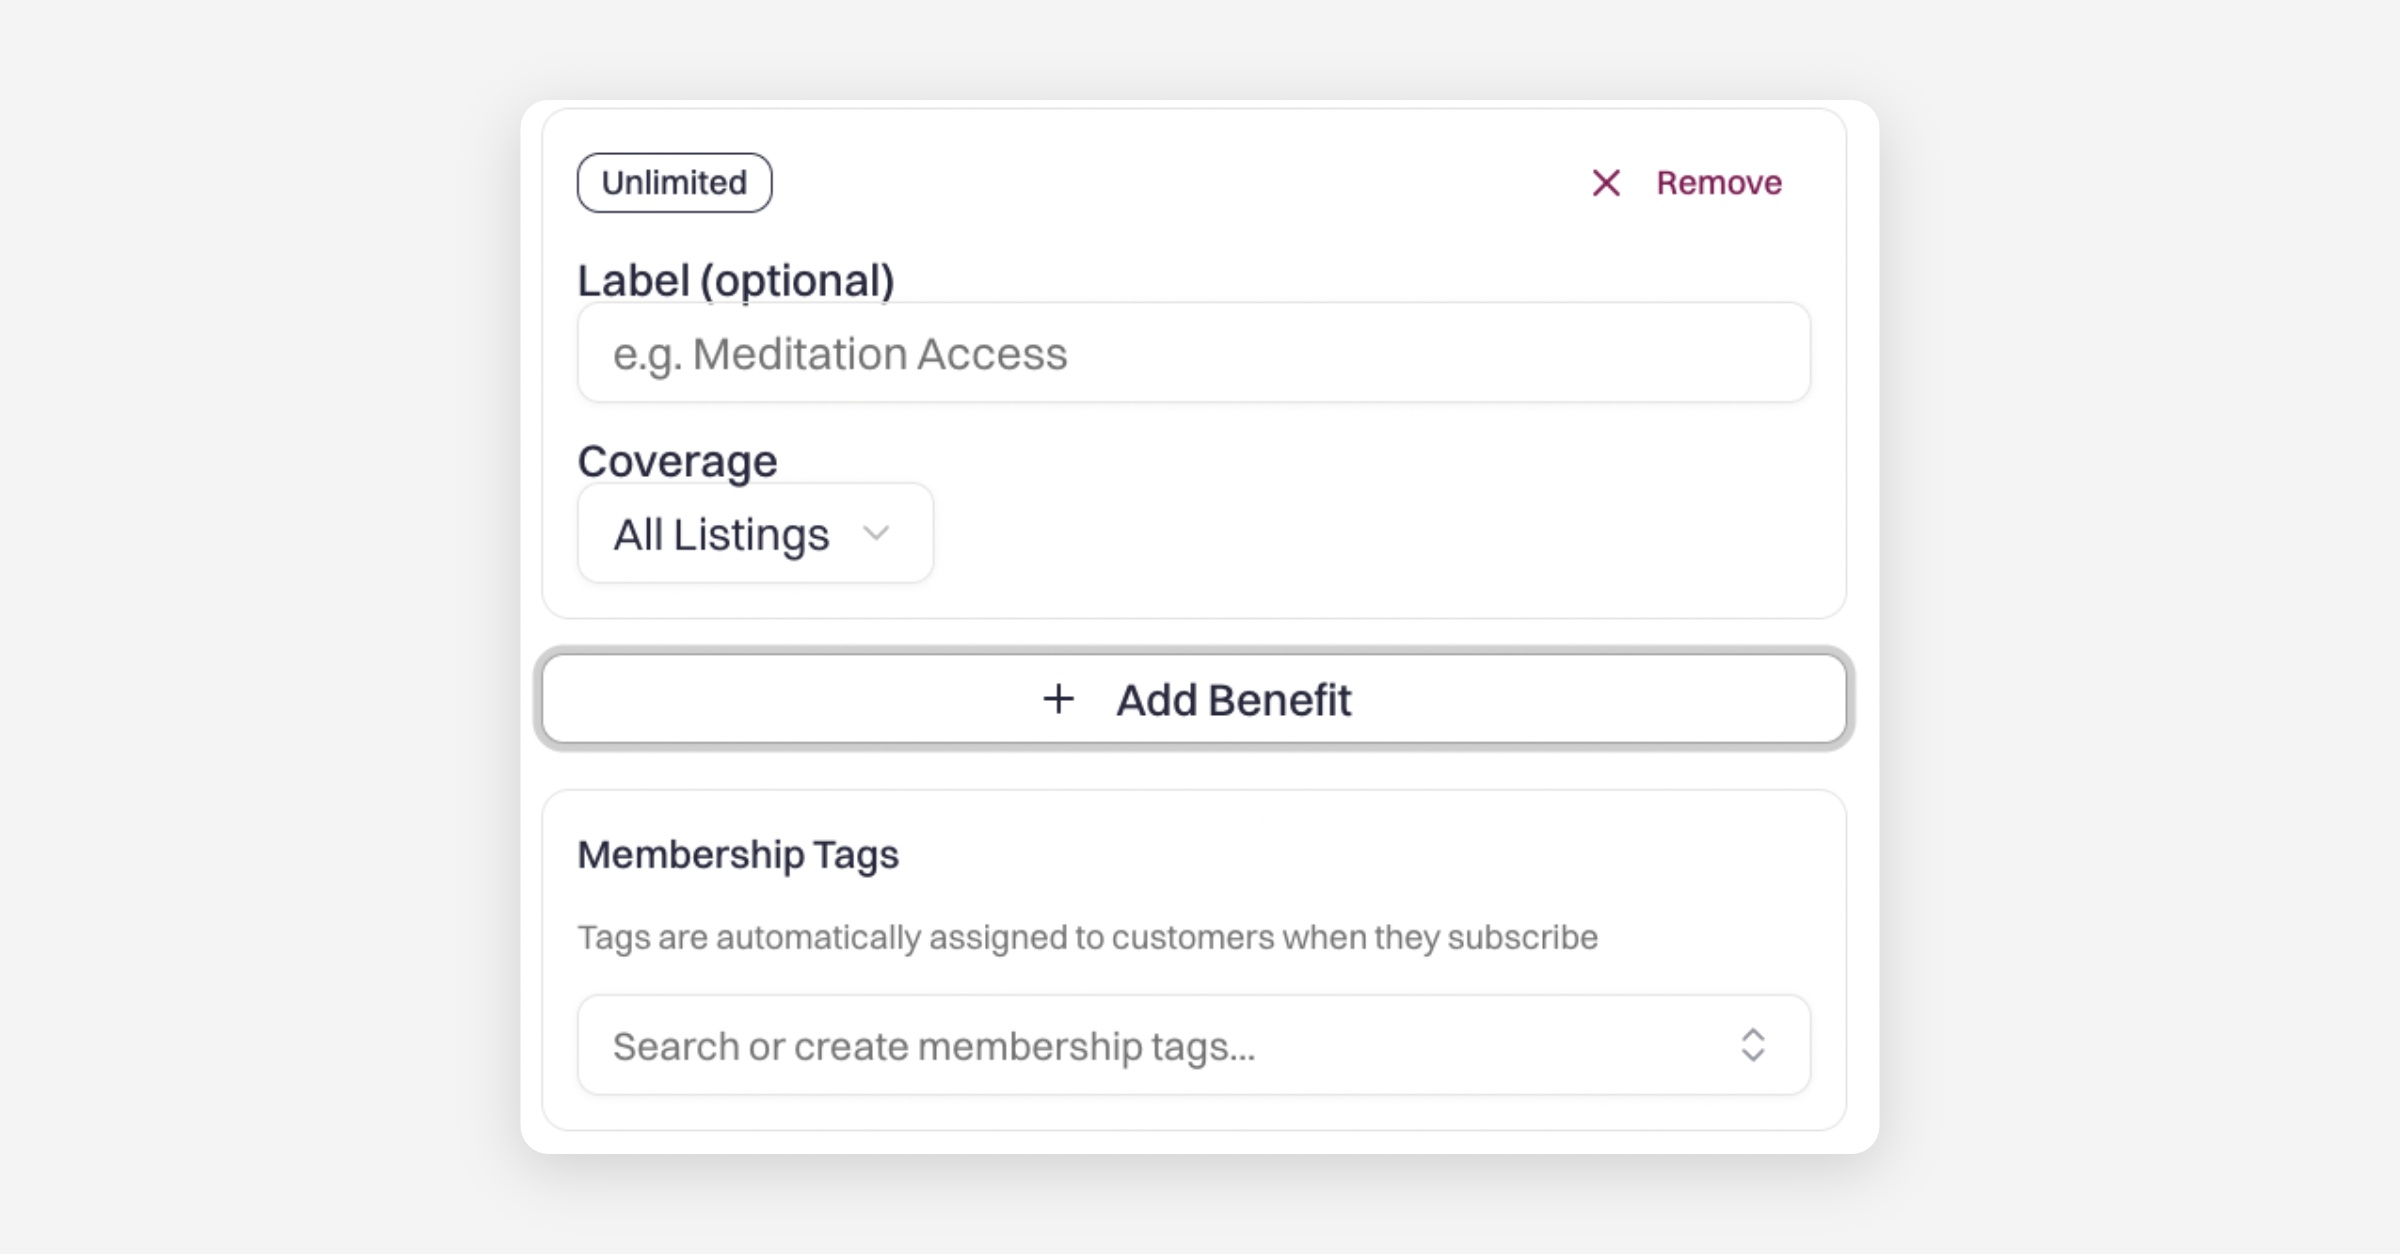
Frequency → control how often a member can use a benefit
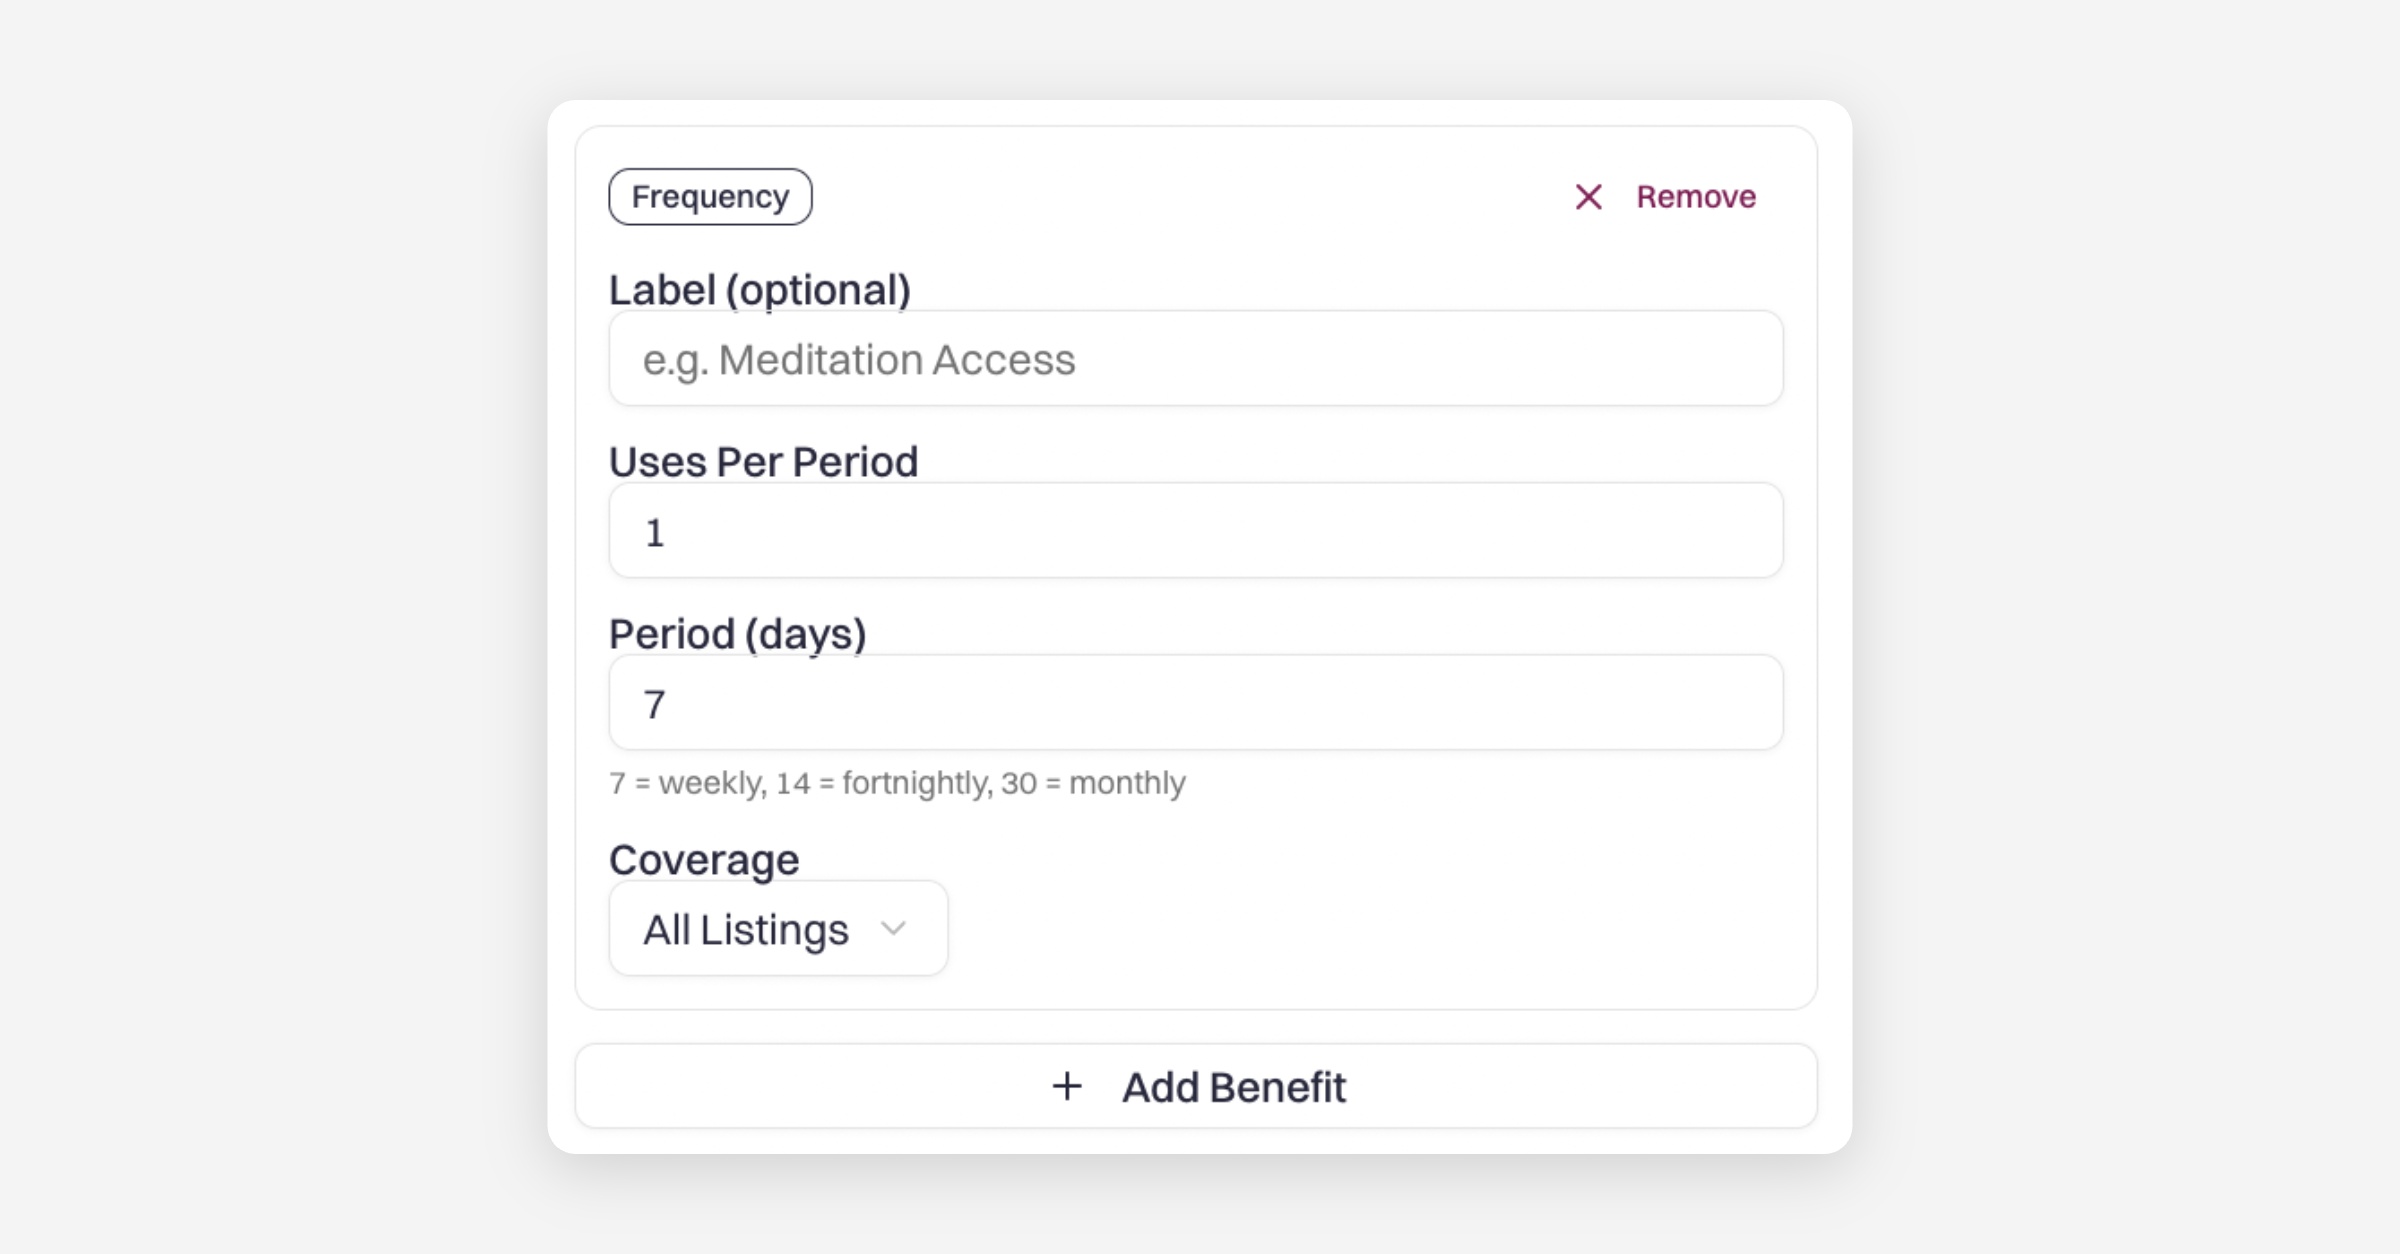
If no benefit is added, the plan becomes a status-only membership, meaning:
customers pay for membership status
they may unlock special pricing or member-only bookings
Membership Tags
Tags are automatically applied to customers who subscribe
You can use these for filtering, communication, or access control
Trial Period (optional)
Add a free trial (e.g. 7 days) before billing starts
Final step
Click Create Plan to make it live
Or Cancel to discard changes
How to assign membership manually to customer?
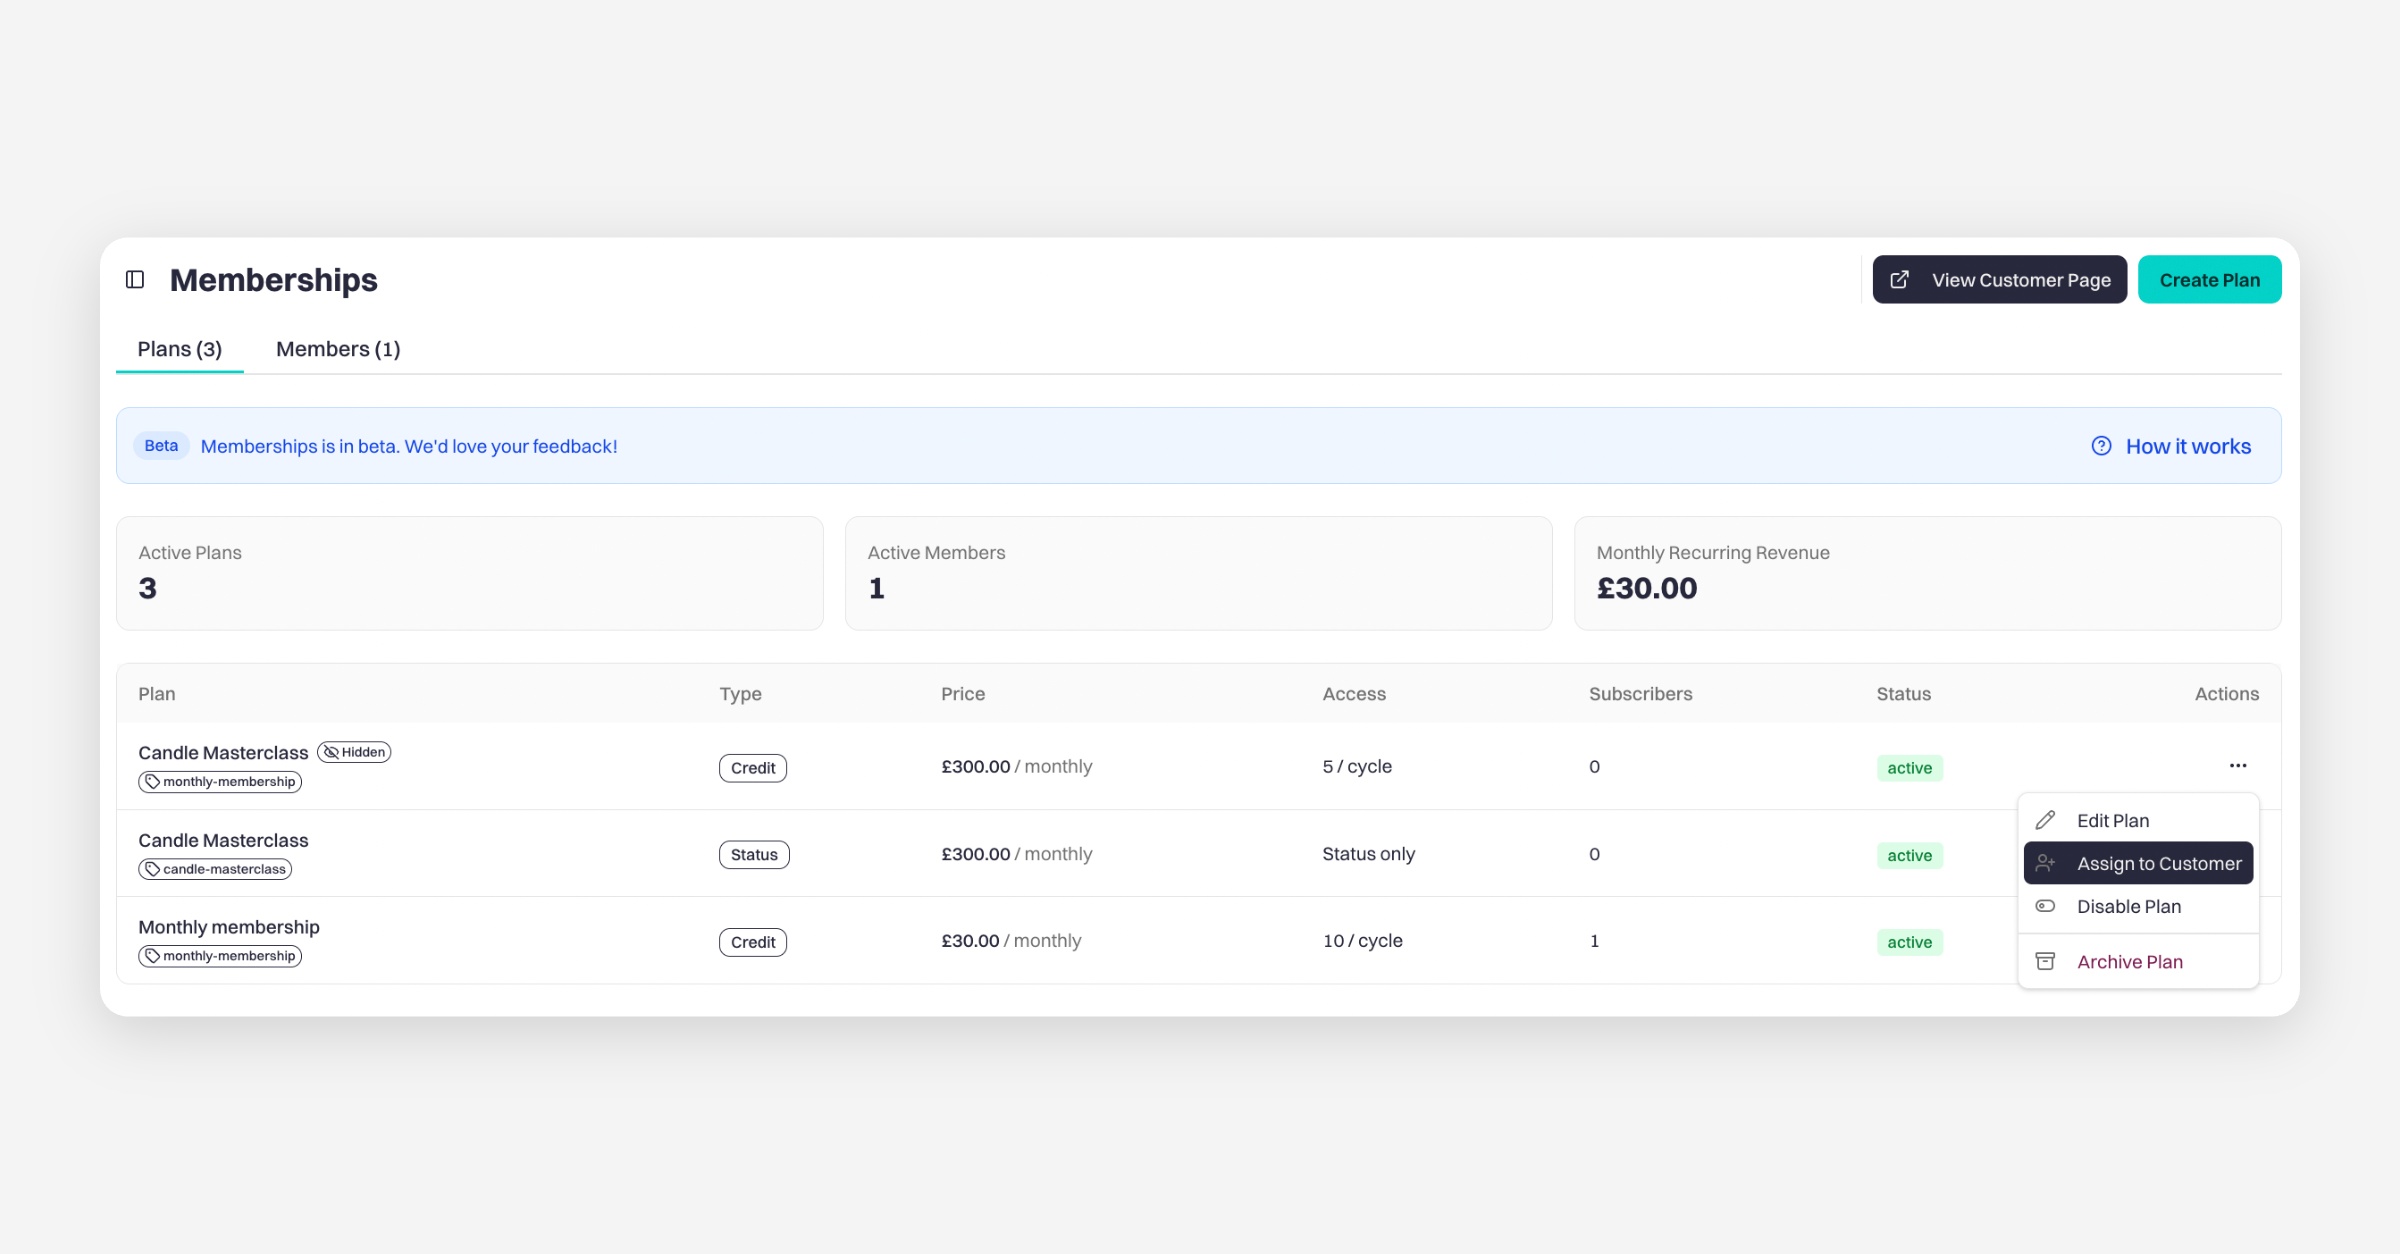
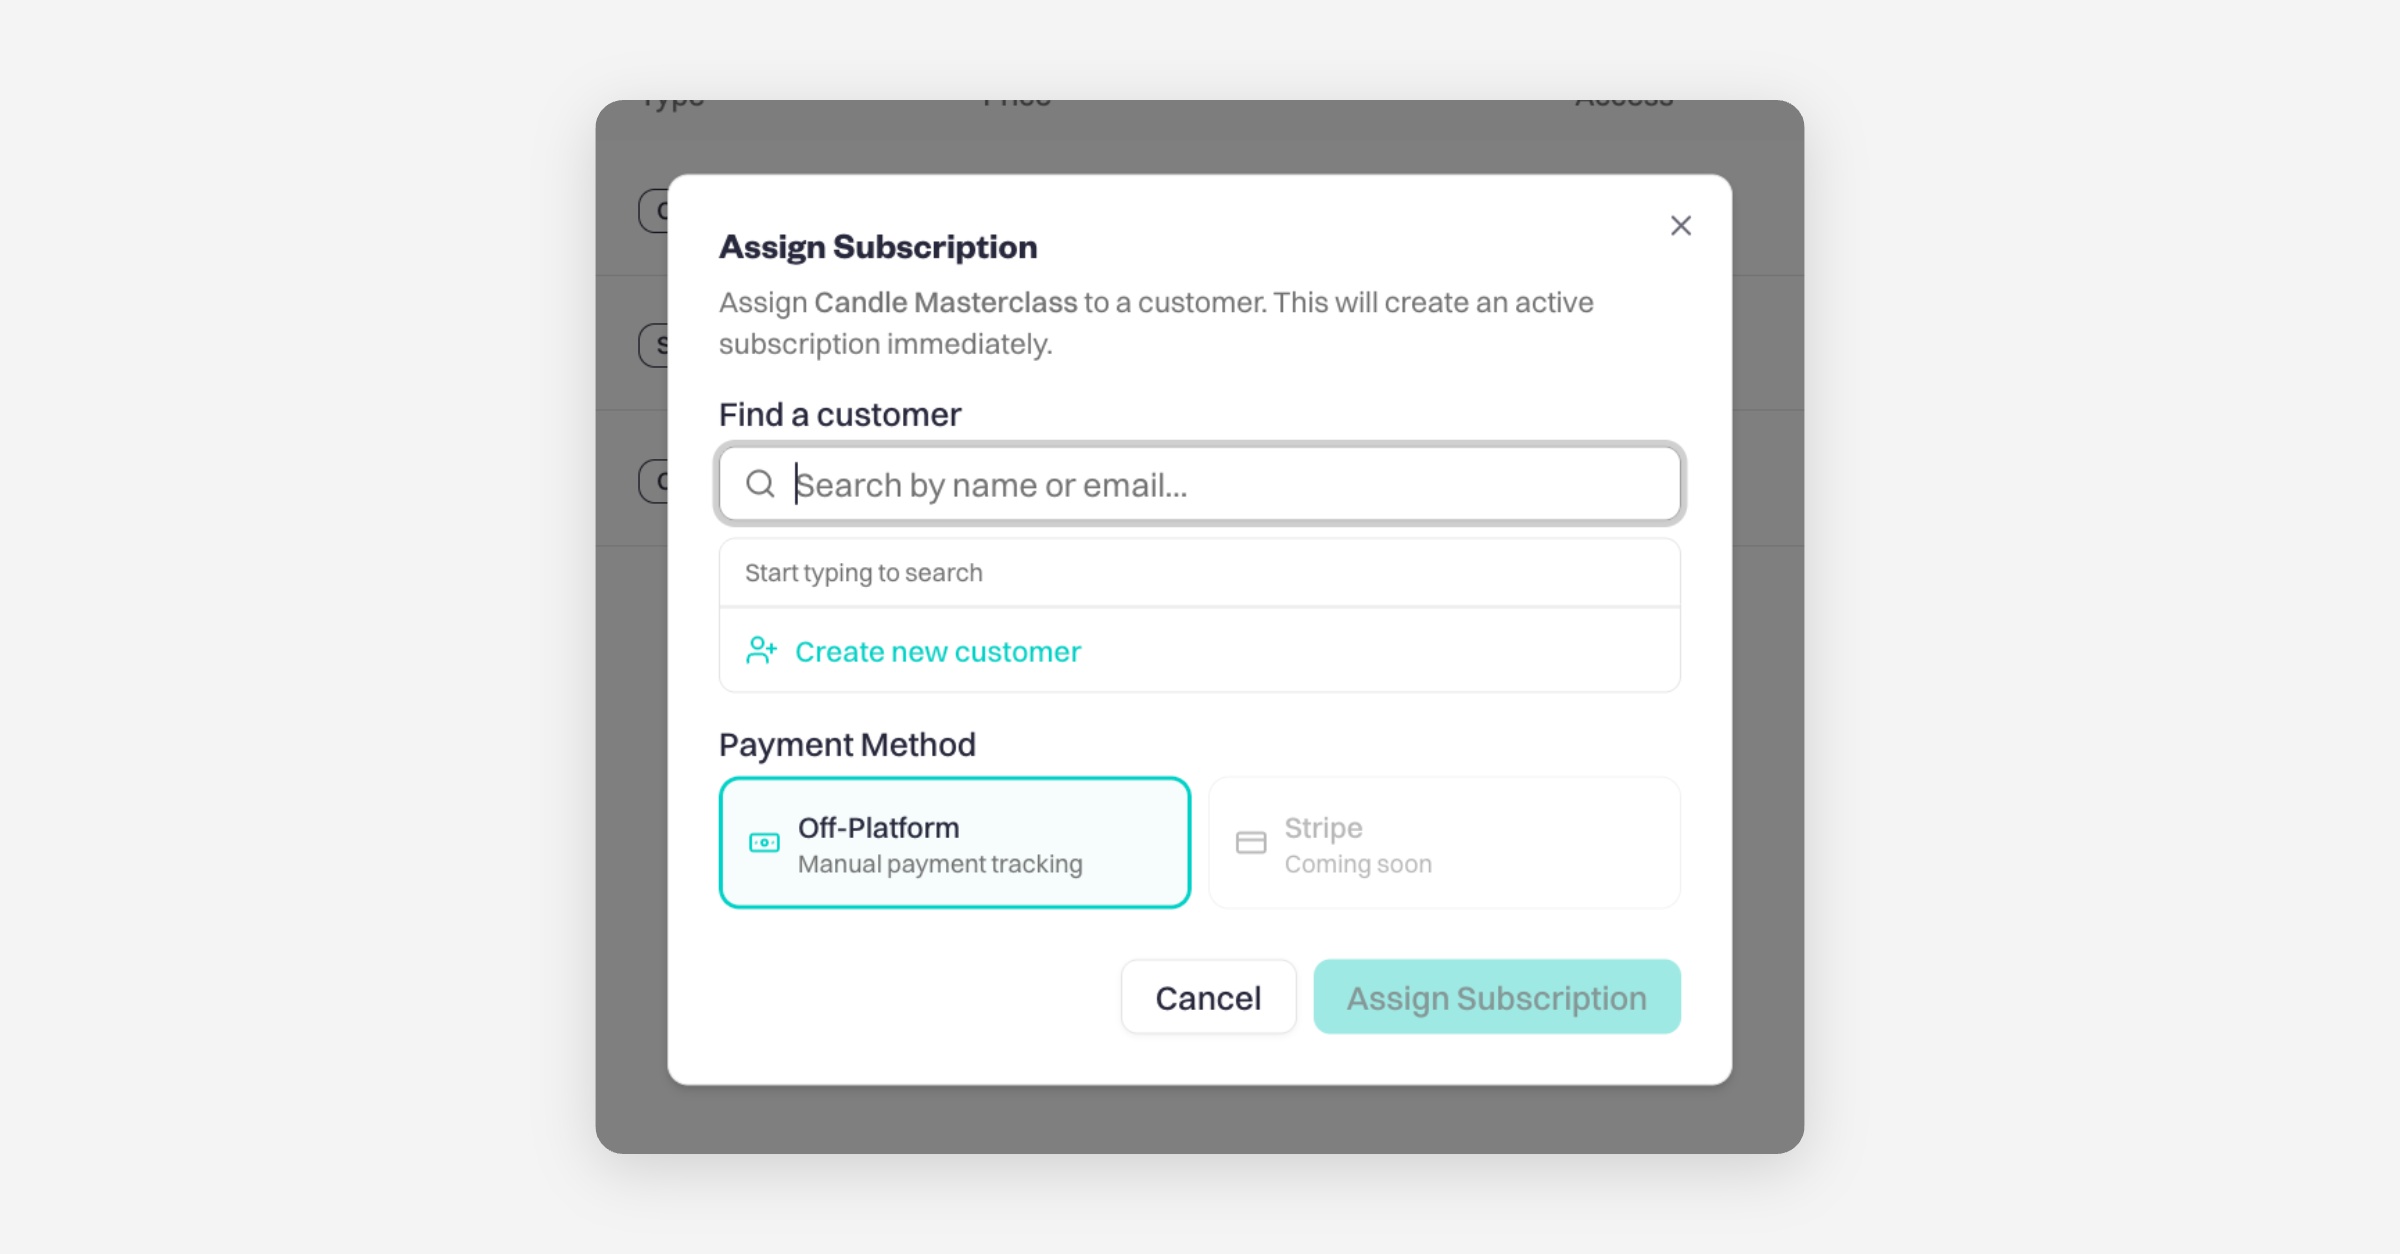
To assign a membership, click the three dots (•••) next to the created membership and select Assign customer.
From there, you can either:
mark the membership as paid off-platform and grant access, or
record it as paid via Stripe.
How to Show Memberships on Your Website
To allow customers to view and purchase memberships, you’ll need to enable them in your navigation:
Go to Website
Select Navigation
Tick Memberships
Click Save changes
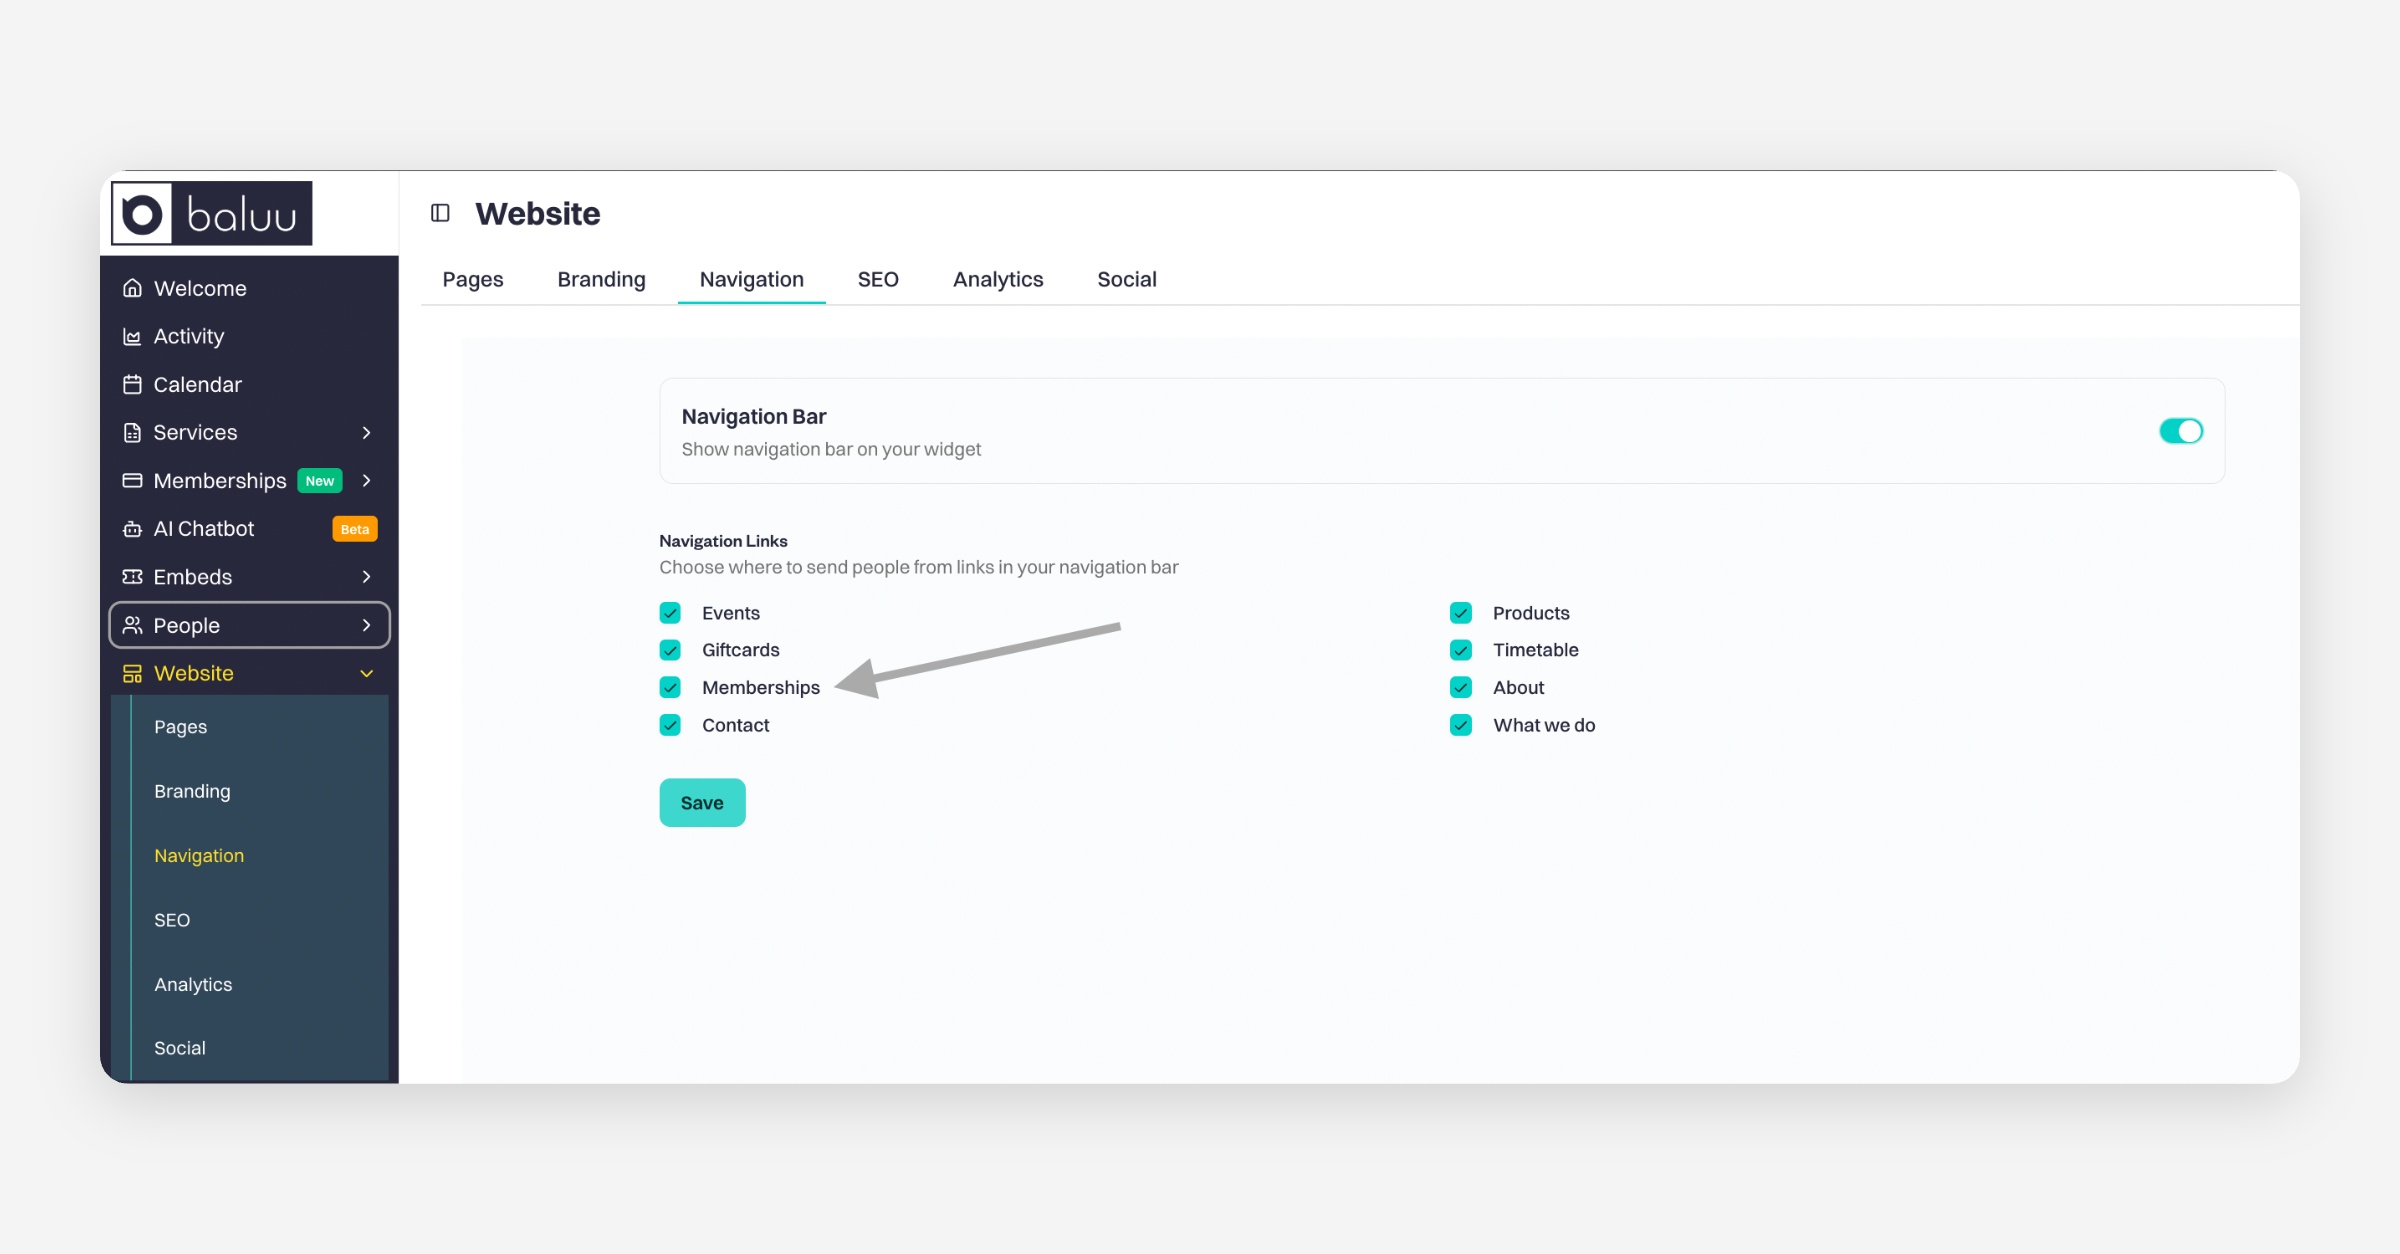
Once enabled, a Memberships tab will appear in your navigation menu, allowing customers to browse and purchase your plans.
Was this helpful?