How to Create and Send Newsletters in Baluu
Before you start
Make sure your customers have the option to subscribe to marketing emails.
To enable or edit this feature:
Go to Settings → Newsletter Signup.
Set the display of your Newsletter Signup to ON or OFF for all events.
Add or edit the text you’d like to show.
Click Save.
To check who has signed up:
Go to Customers → List
You’ll see a Newsletter column showing whether each customer has subscribed (Enabled/Disabled).
Creating a Newsletter
Go to Customers in the left-hand menu
Click on Newsletters
Click New newsletter (top right)
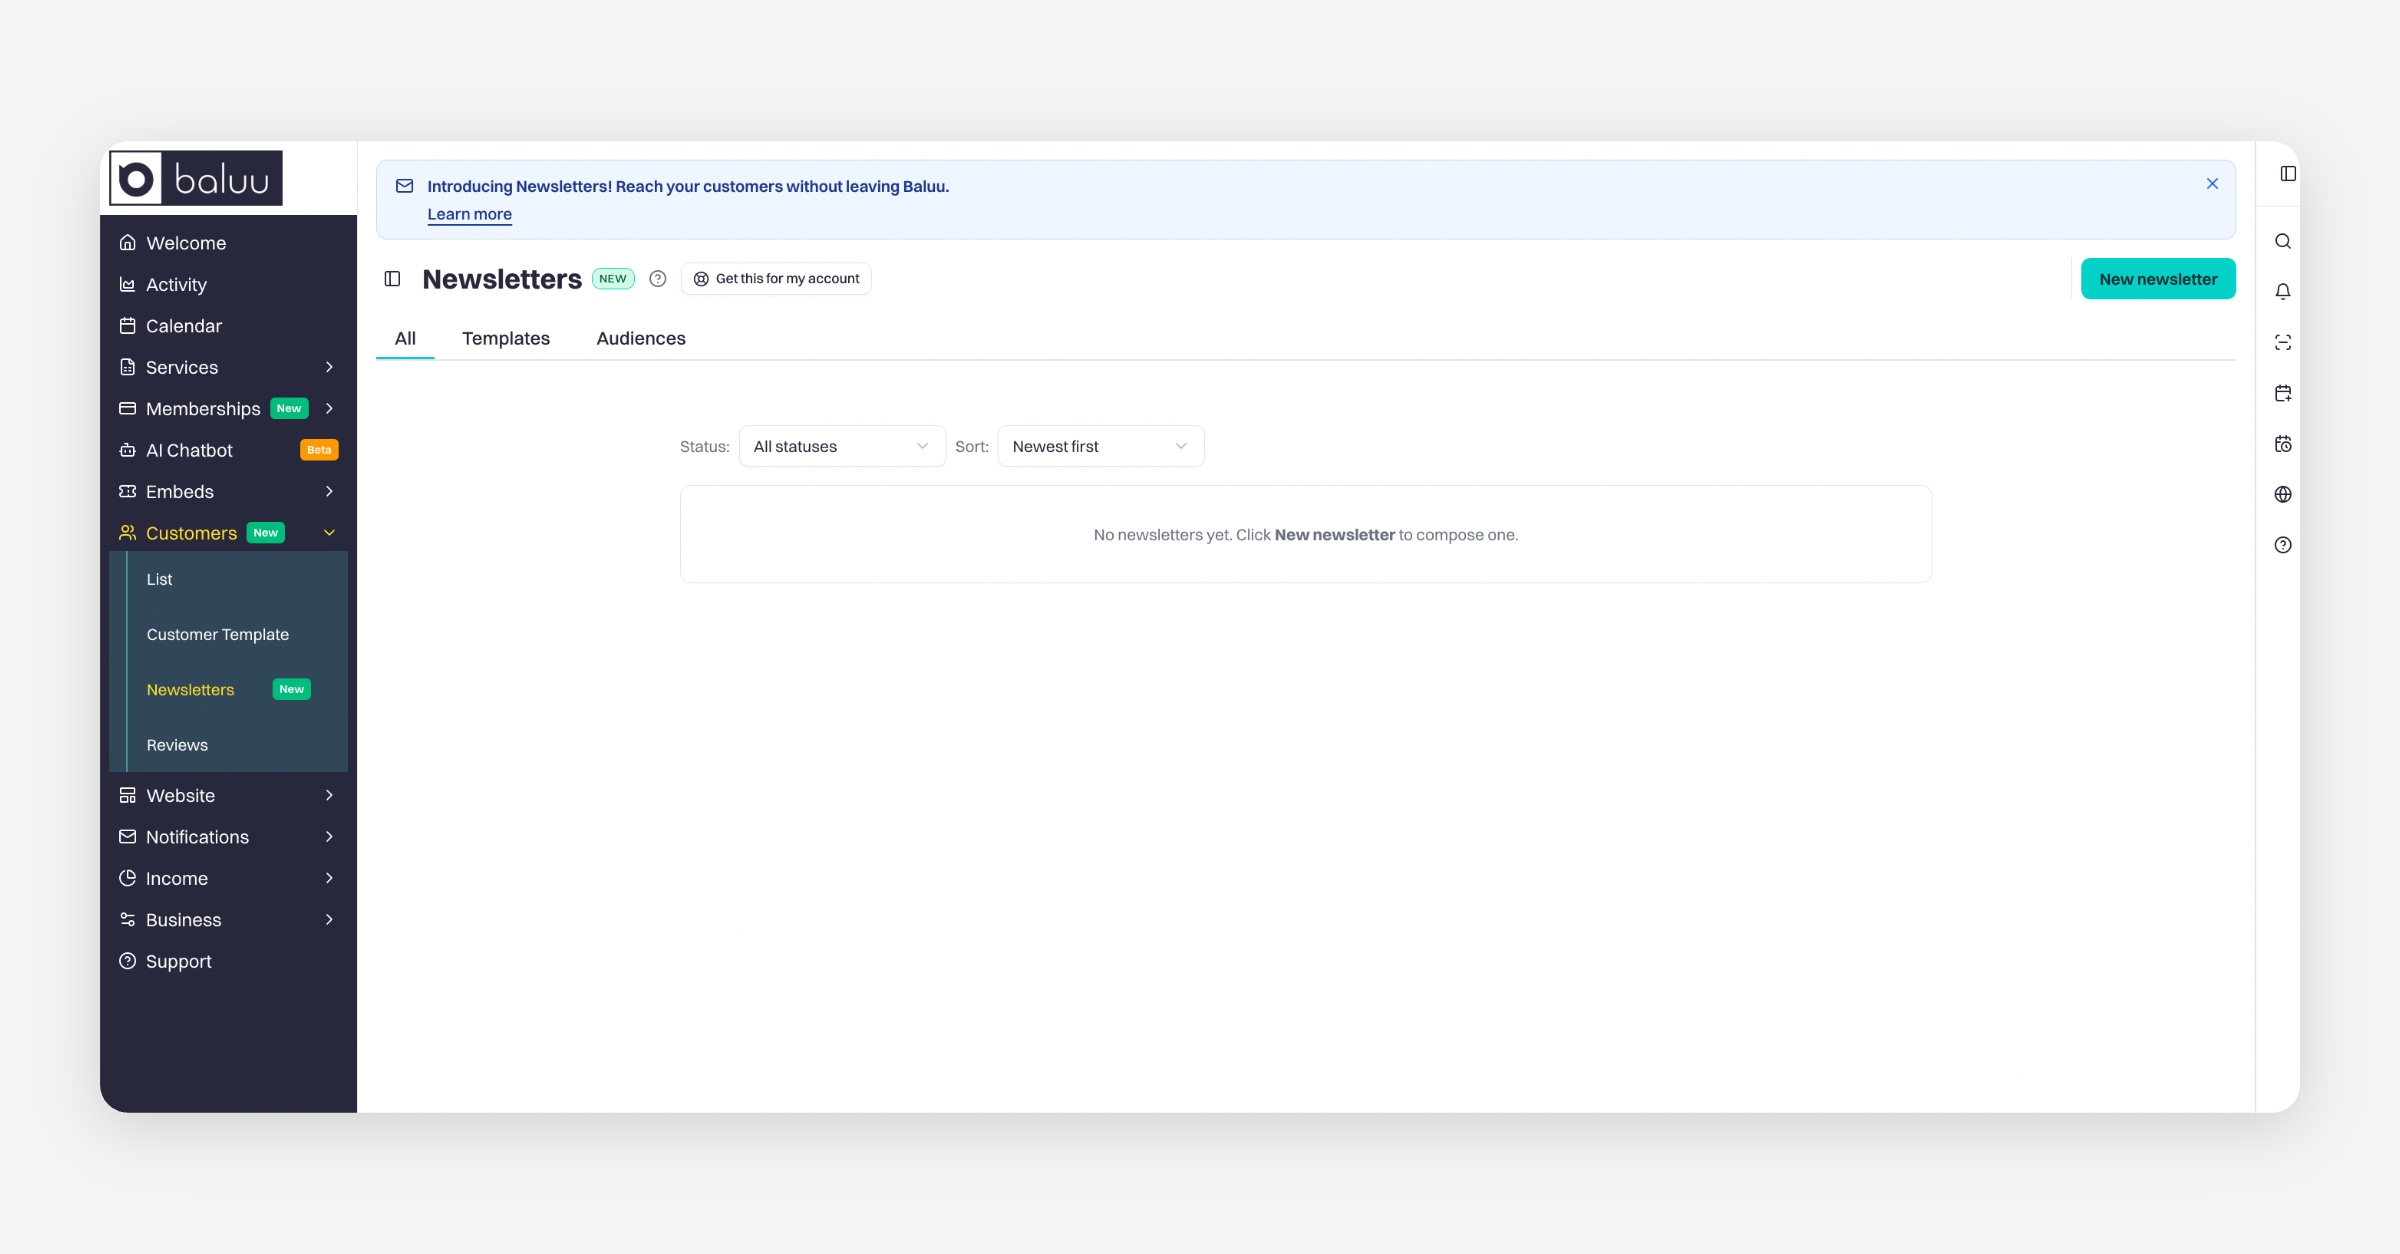
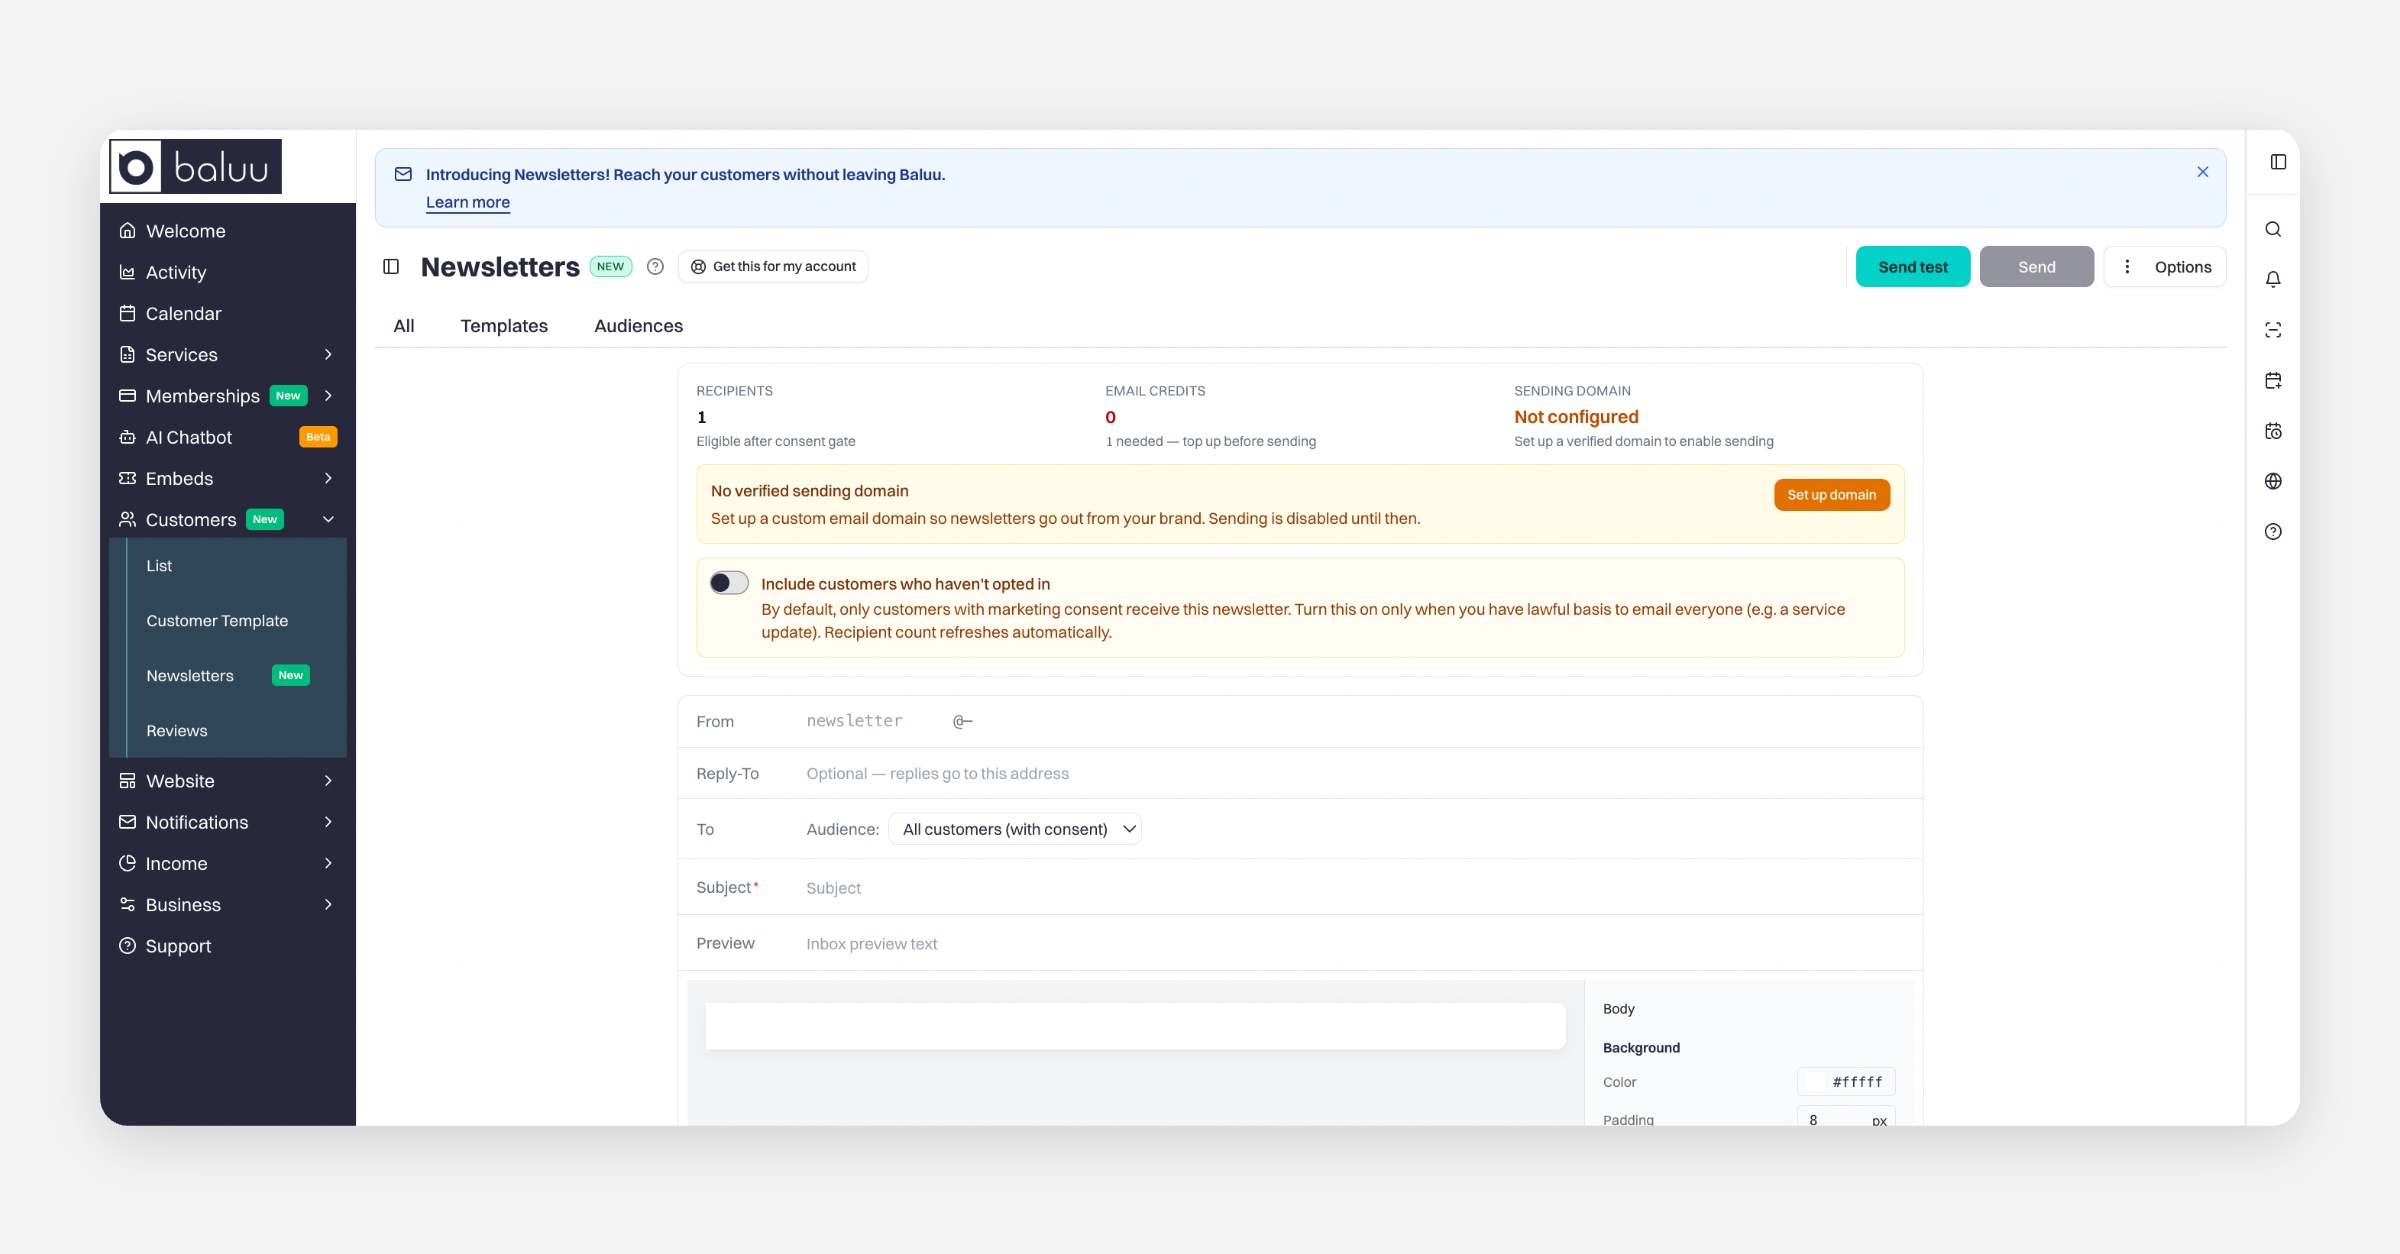
You’ll be taken to the newsletter editor.
Setting up your Newsletter
At the top of the page, you’ll see key settings:
Recipients – choose your audience
From email – sender address
Subject – required
Preview text – appears in inbox preview
⚠️ Note:
You must configure a sending domain before sending
You will also need email credits
Building your Newsletter Content
Click inside the white content area
Type
/(slash) to open the content menuSelect from different block types
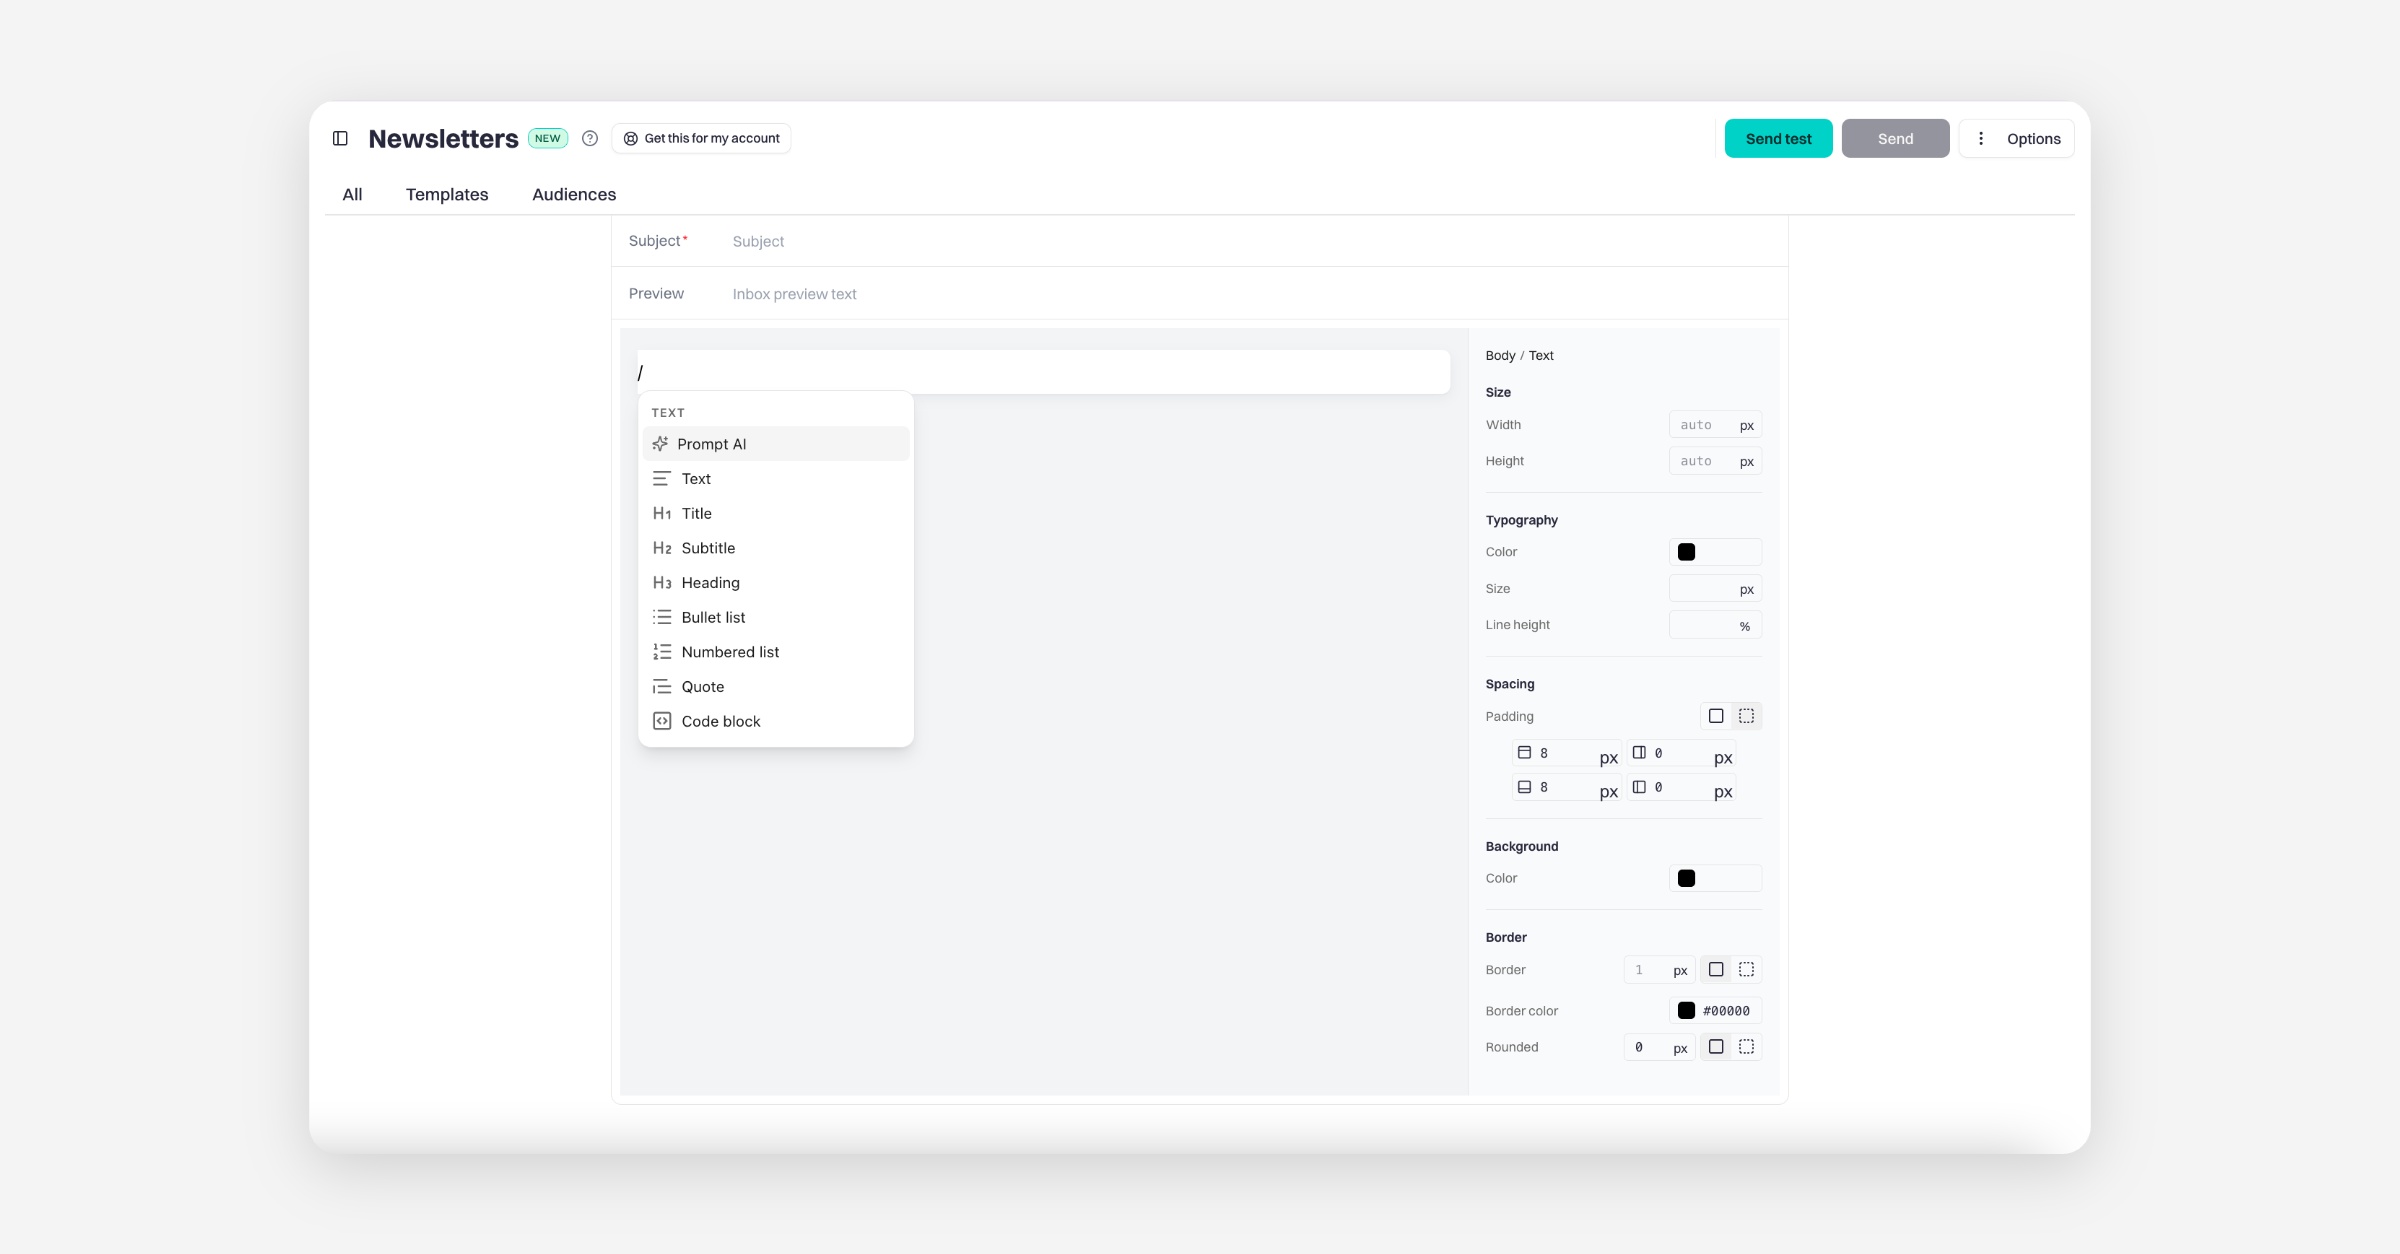
Available content options include:
Text (paragraphs, titles, headings)
Bullet or numbered lists
Images
Buttons
Sections and columns
Event cards
Featured articles
Social links
Spacers and dividers
Each block can be customised from the right-hand panel (font, size, spacing, colours, etc.).
Editing Layout and Design
Use Sections and Columns to structure your layout
Add Images or Event cards to highlight content
Adjust styling from the right-hand editor panel
Use Variables (e.g. First name) to personalise emails
Sending your Newsletter
Once your newsletter is ready:
Click Send test to preview
Make sure:
Sending domain is configured
You have enough email credits
Click Send
Using Templates
Go to the Templates tab to speed up your workflow.
You’ll find ready-made layouts such as:
Welcome emails
Event announcements
Monthly updates
Promotions / discounts
To use one:
Click Use this template
The editor will open
You can fully customise the content
You can also save your own newsletters as templates for reuse.
Creating an Audience
Go to the Audiences tab.
Click + New audience and choose:
Manual
Select specific customers manually
Fixed list
Filter
Create dynamic audiences using tags or filters
Automatically updates when sending
Name your audience and click Create audience
Important Notes
By default, newsletters are only sent to customers who have opted in
You can enable sending to non-opted-in users only if you have a lawful basis
Recipient count updates automatically
Was this helpful?