Docs / Getting Started
Step-by-step guide to create your Baluu website
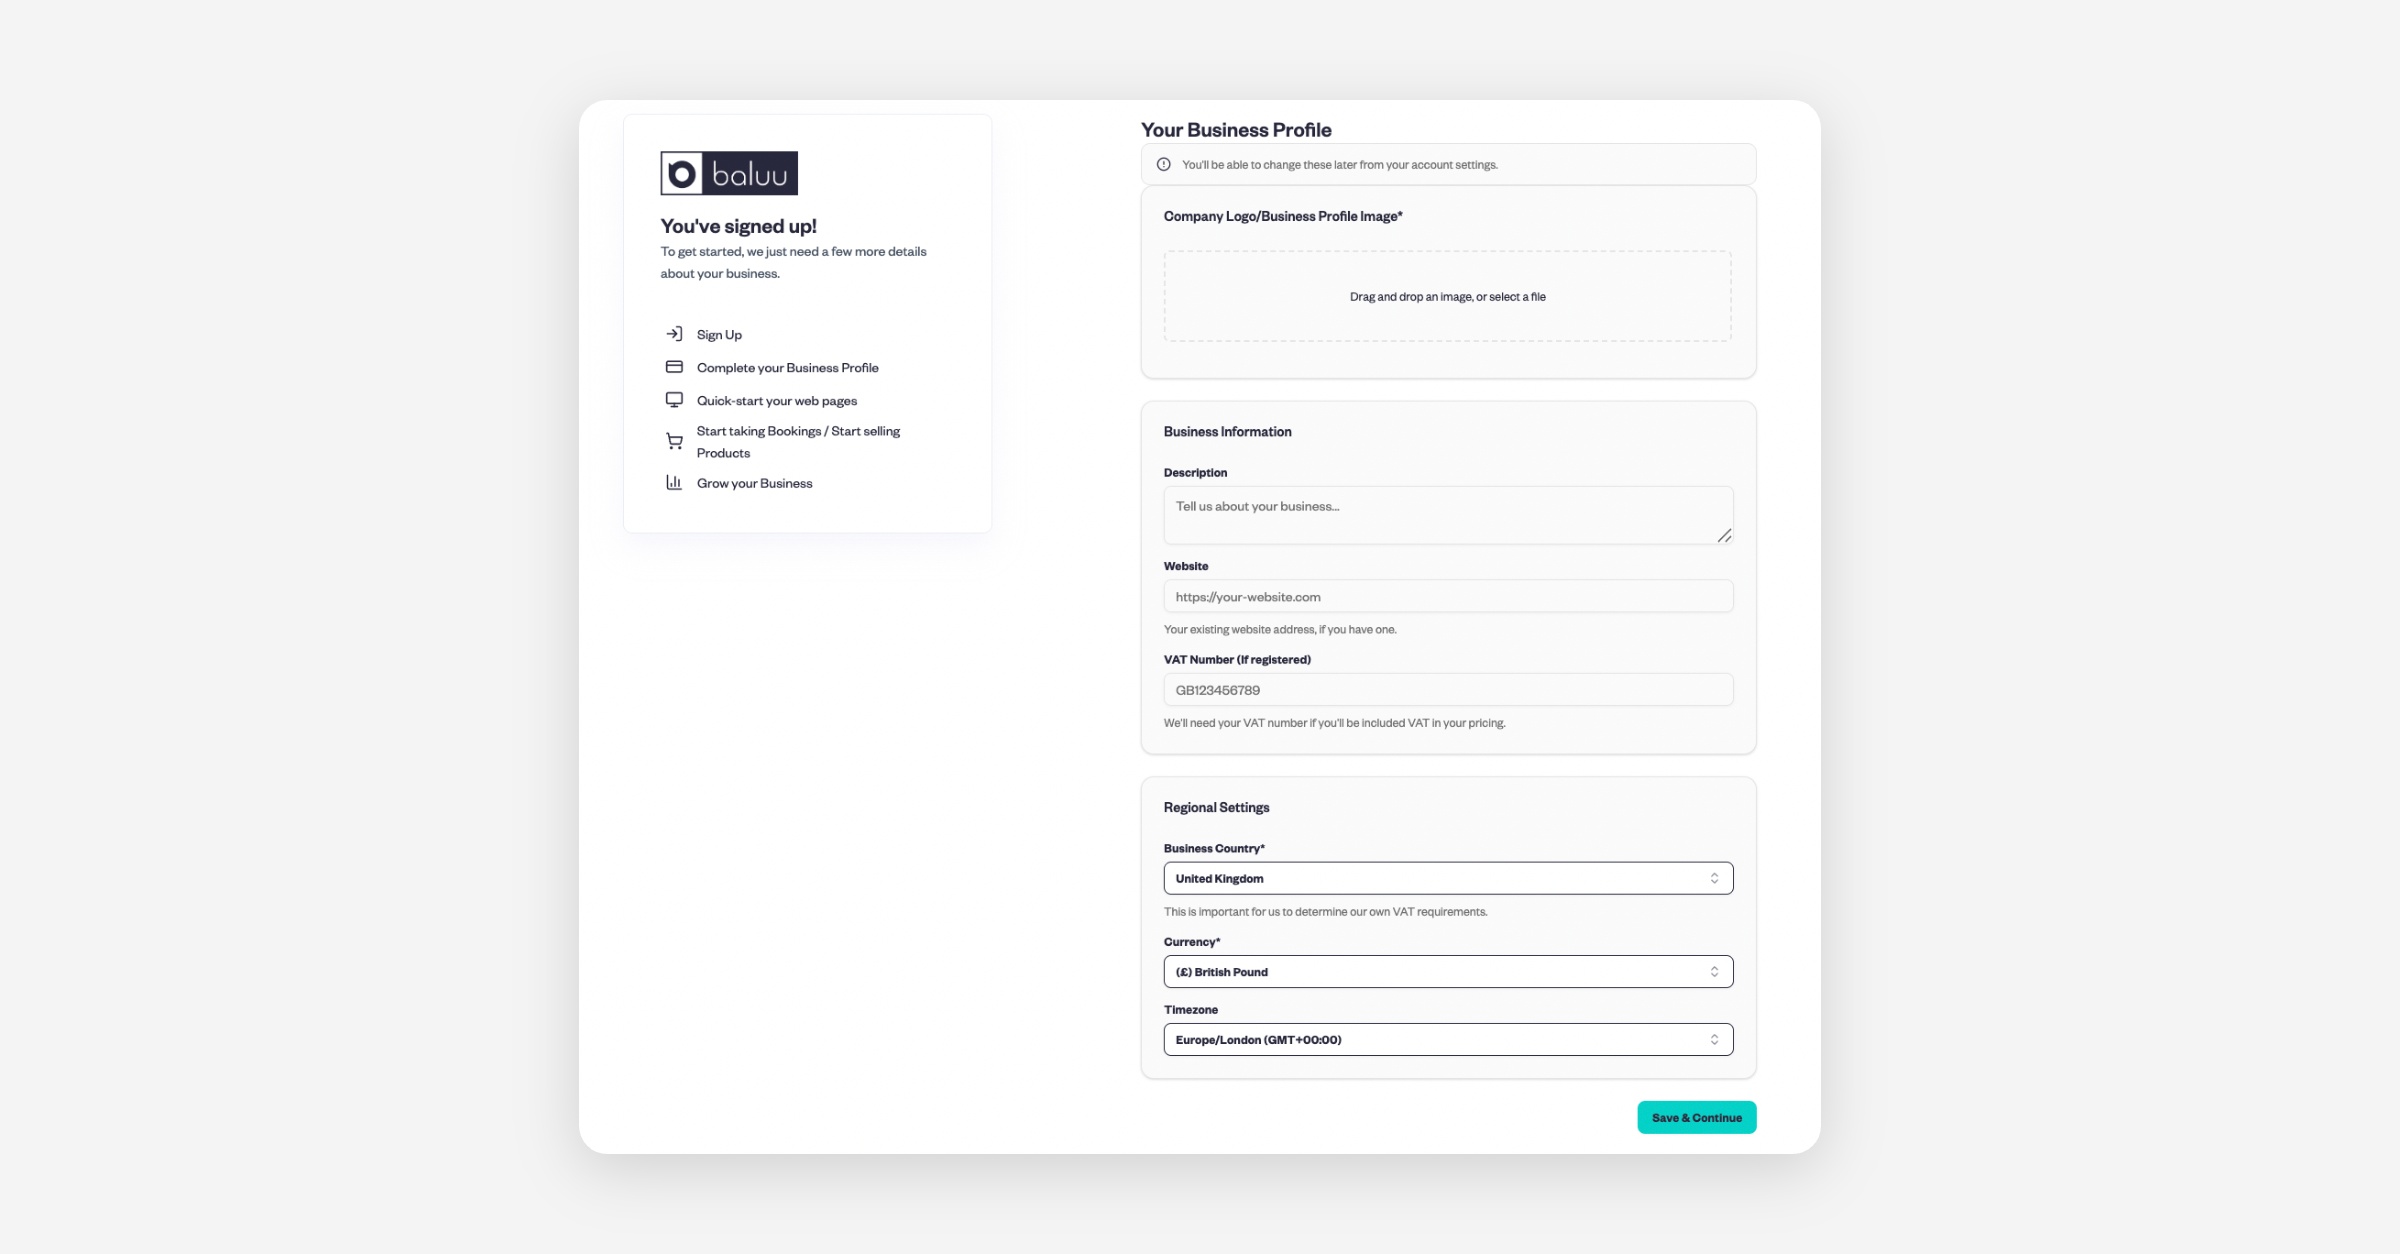
1) Sign up & complete your profile
Create your account and sign in.
Fill in personal details (name, email, password).
Add business details: company name, company email, short description, and upload your logo.
Set Regional settings (timezone, currency, country).
Save changes.
Welcome to Baluu!
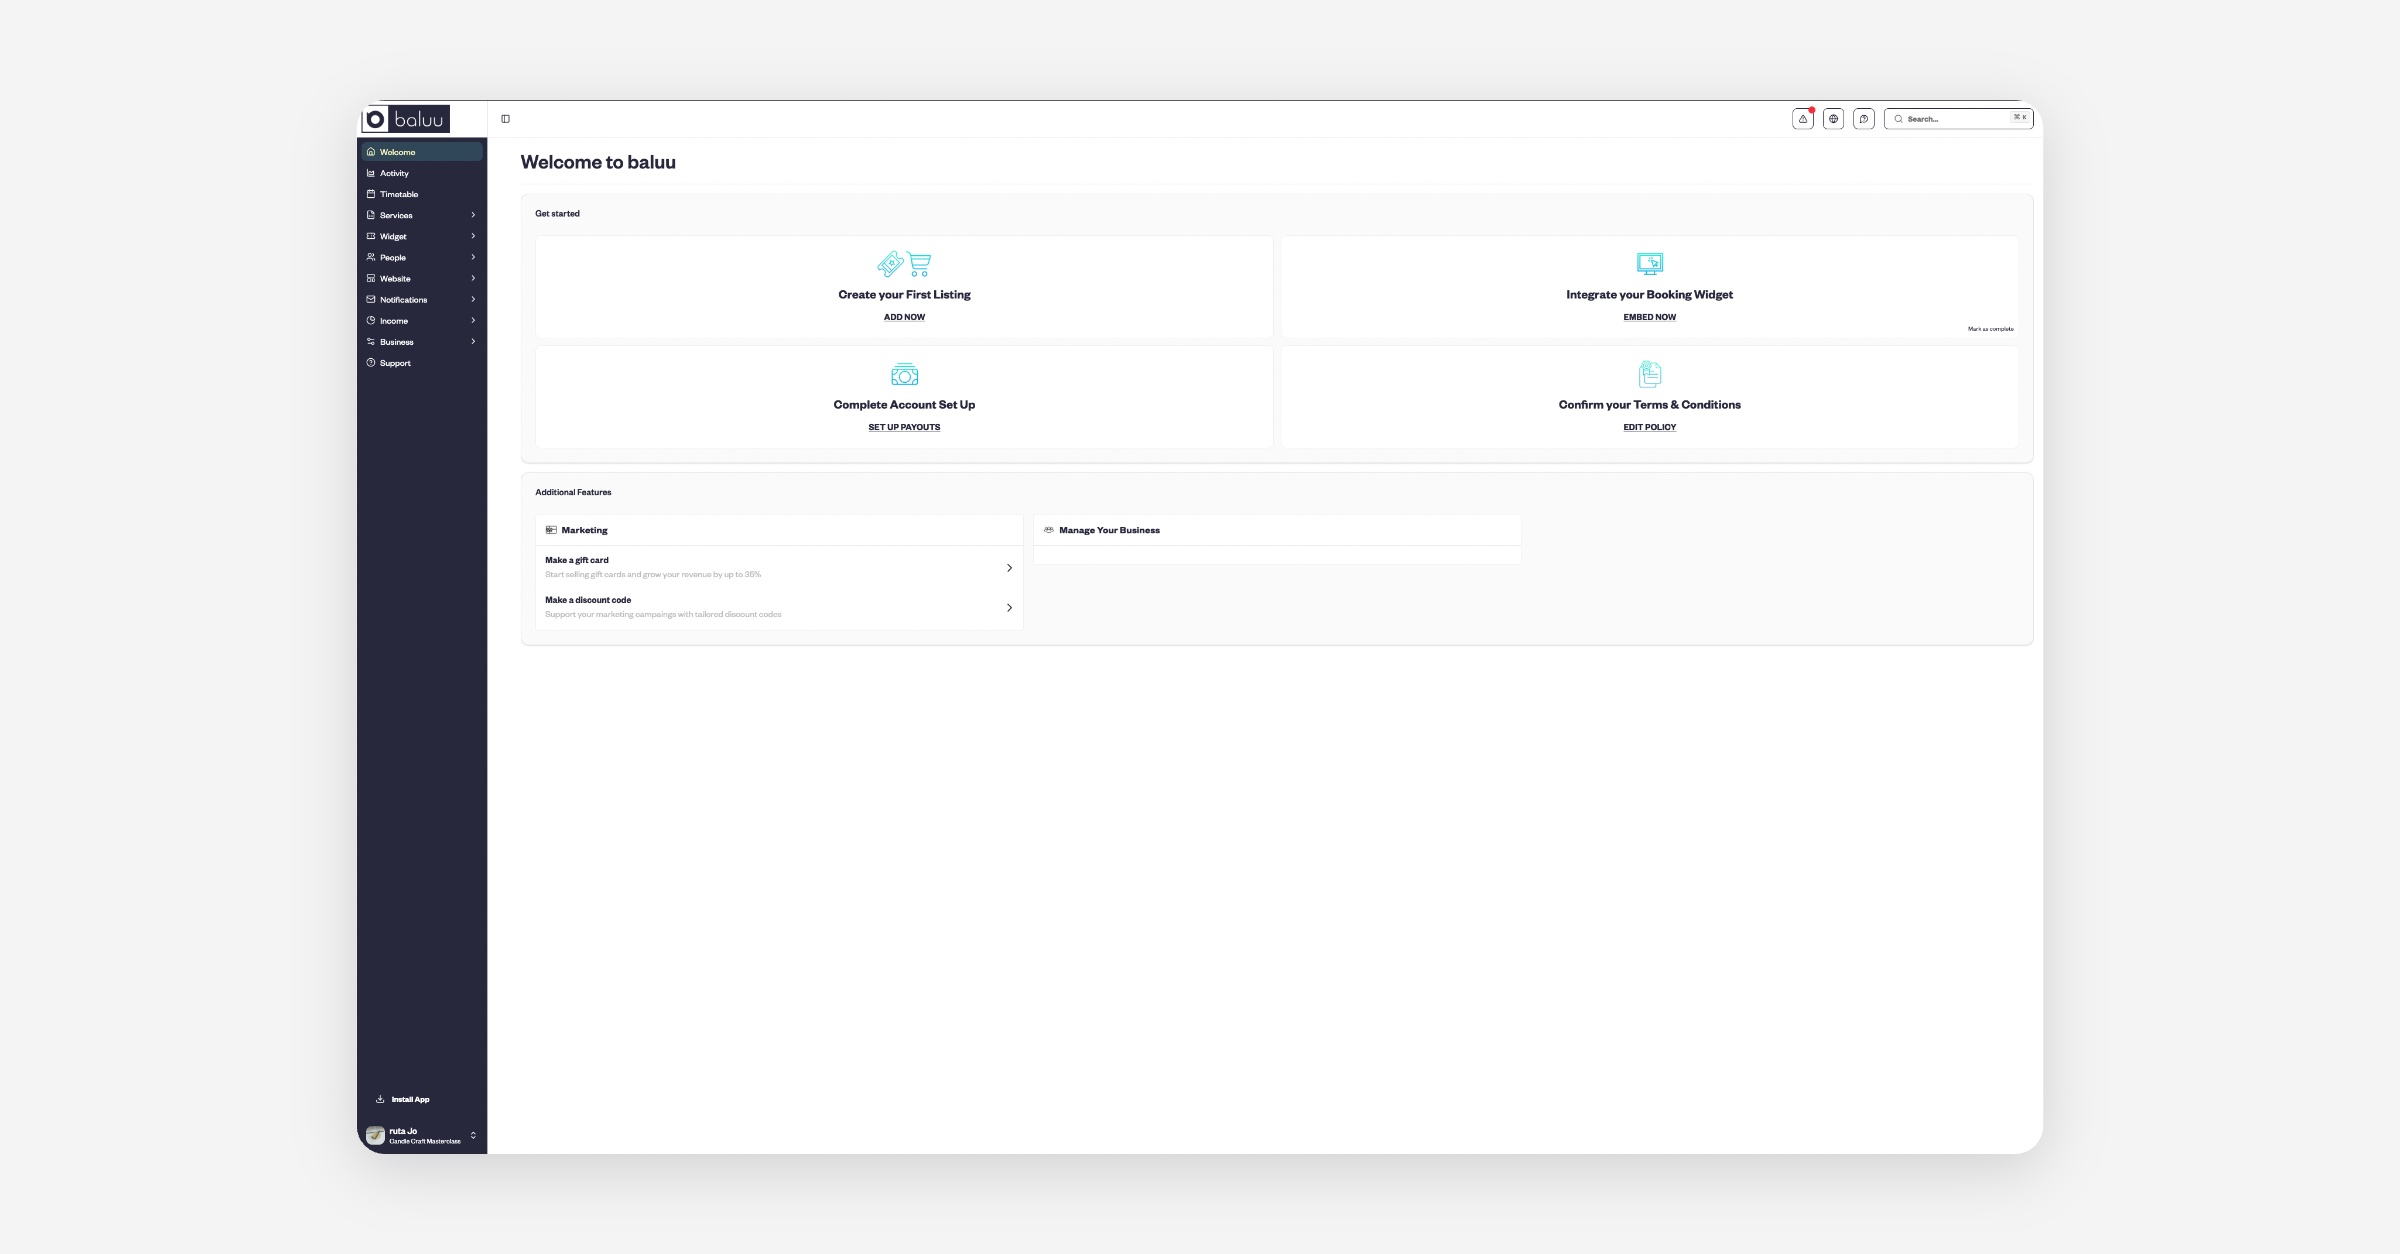
2) Create your first listing
Go to Listings → Add listing.
Choose type of event
Enter a title, description, cover image, and price.
Add availability (dates/times or appointments).
Publish the listing.
Open the Website builder
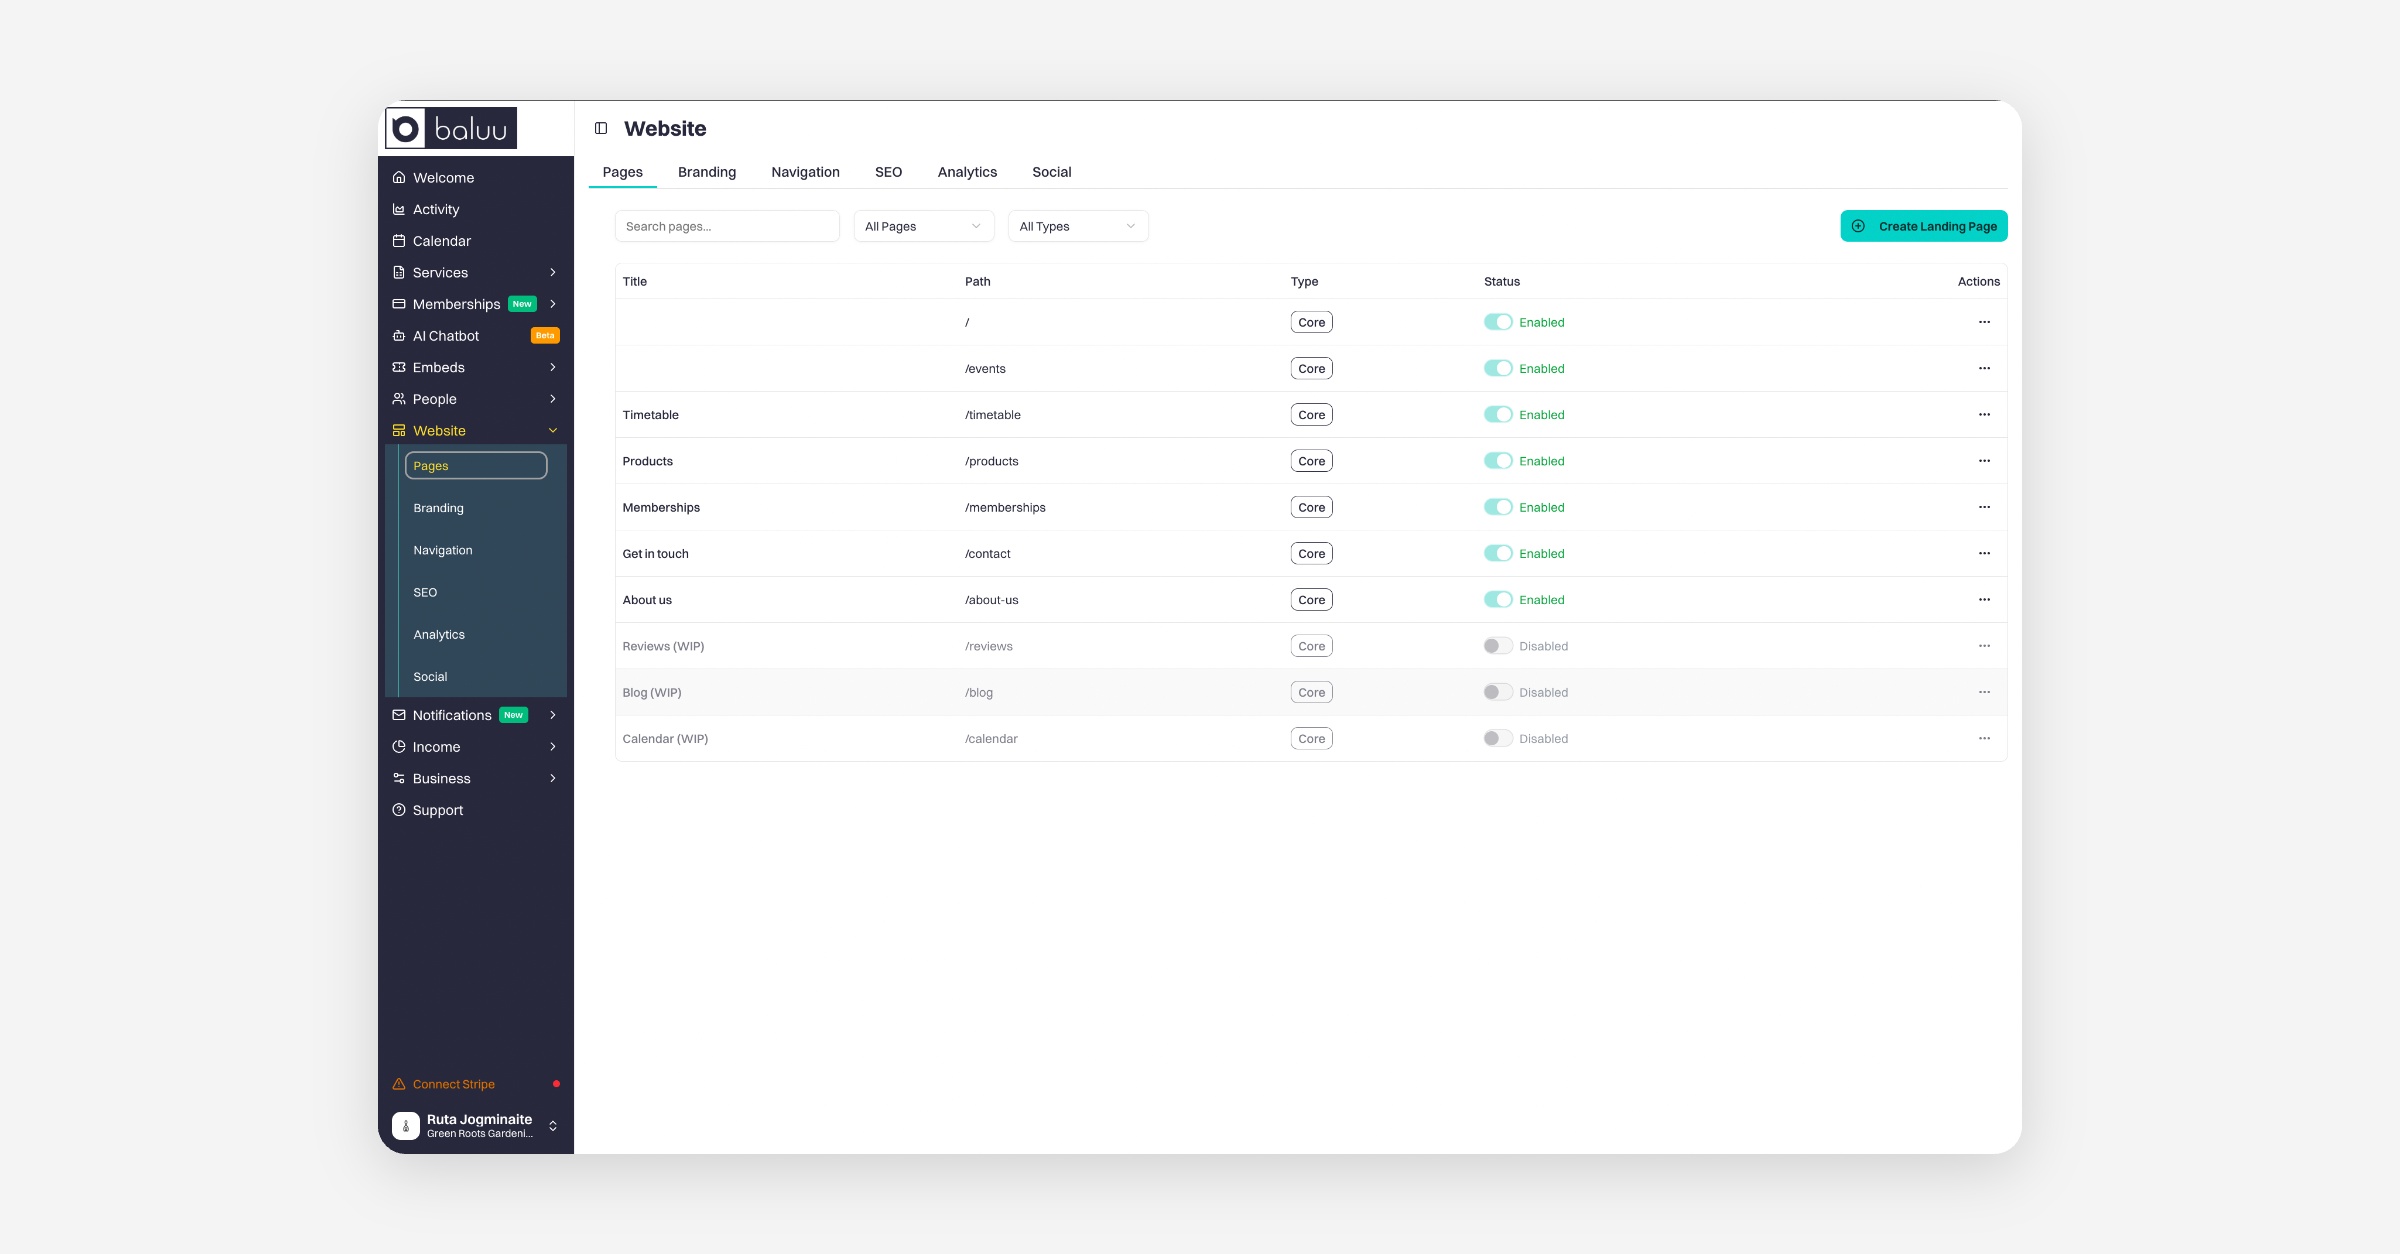
Go to Website → Pages.
You’ll see core pages (usually enabled by default): Events, Timetable, Products, Get in touch (Contact), About us.
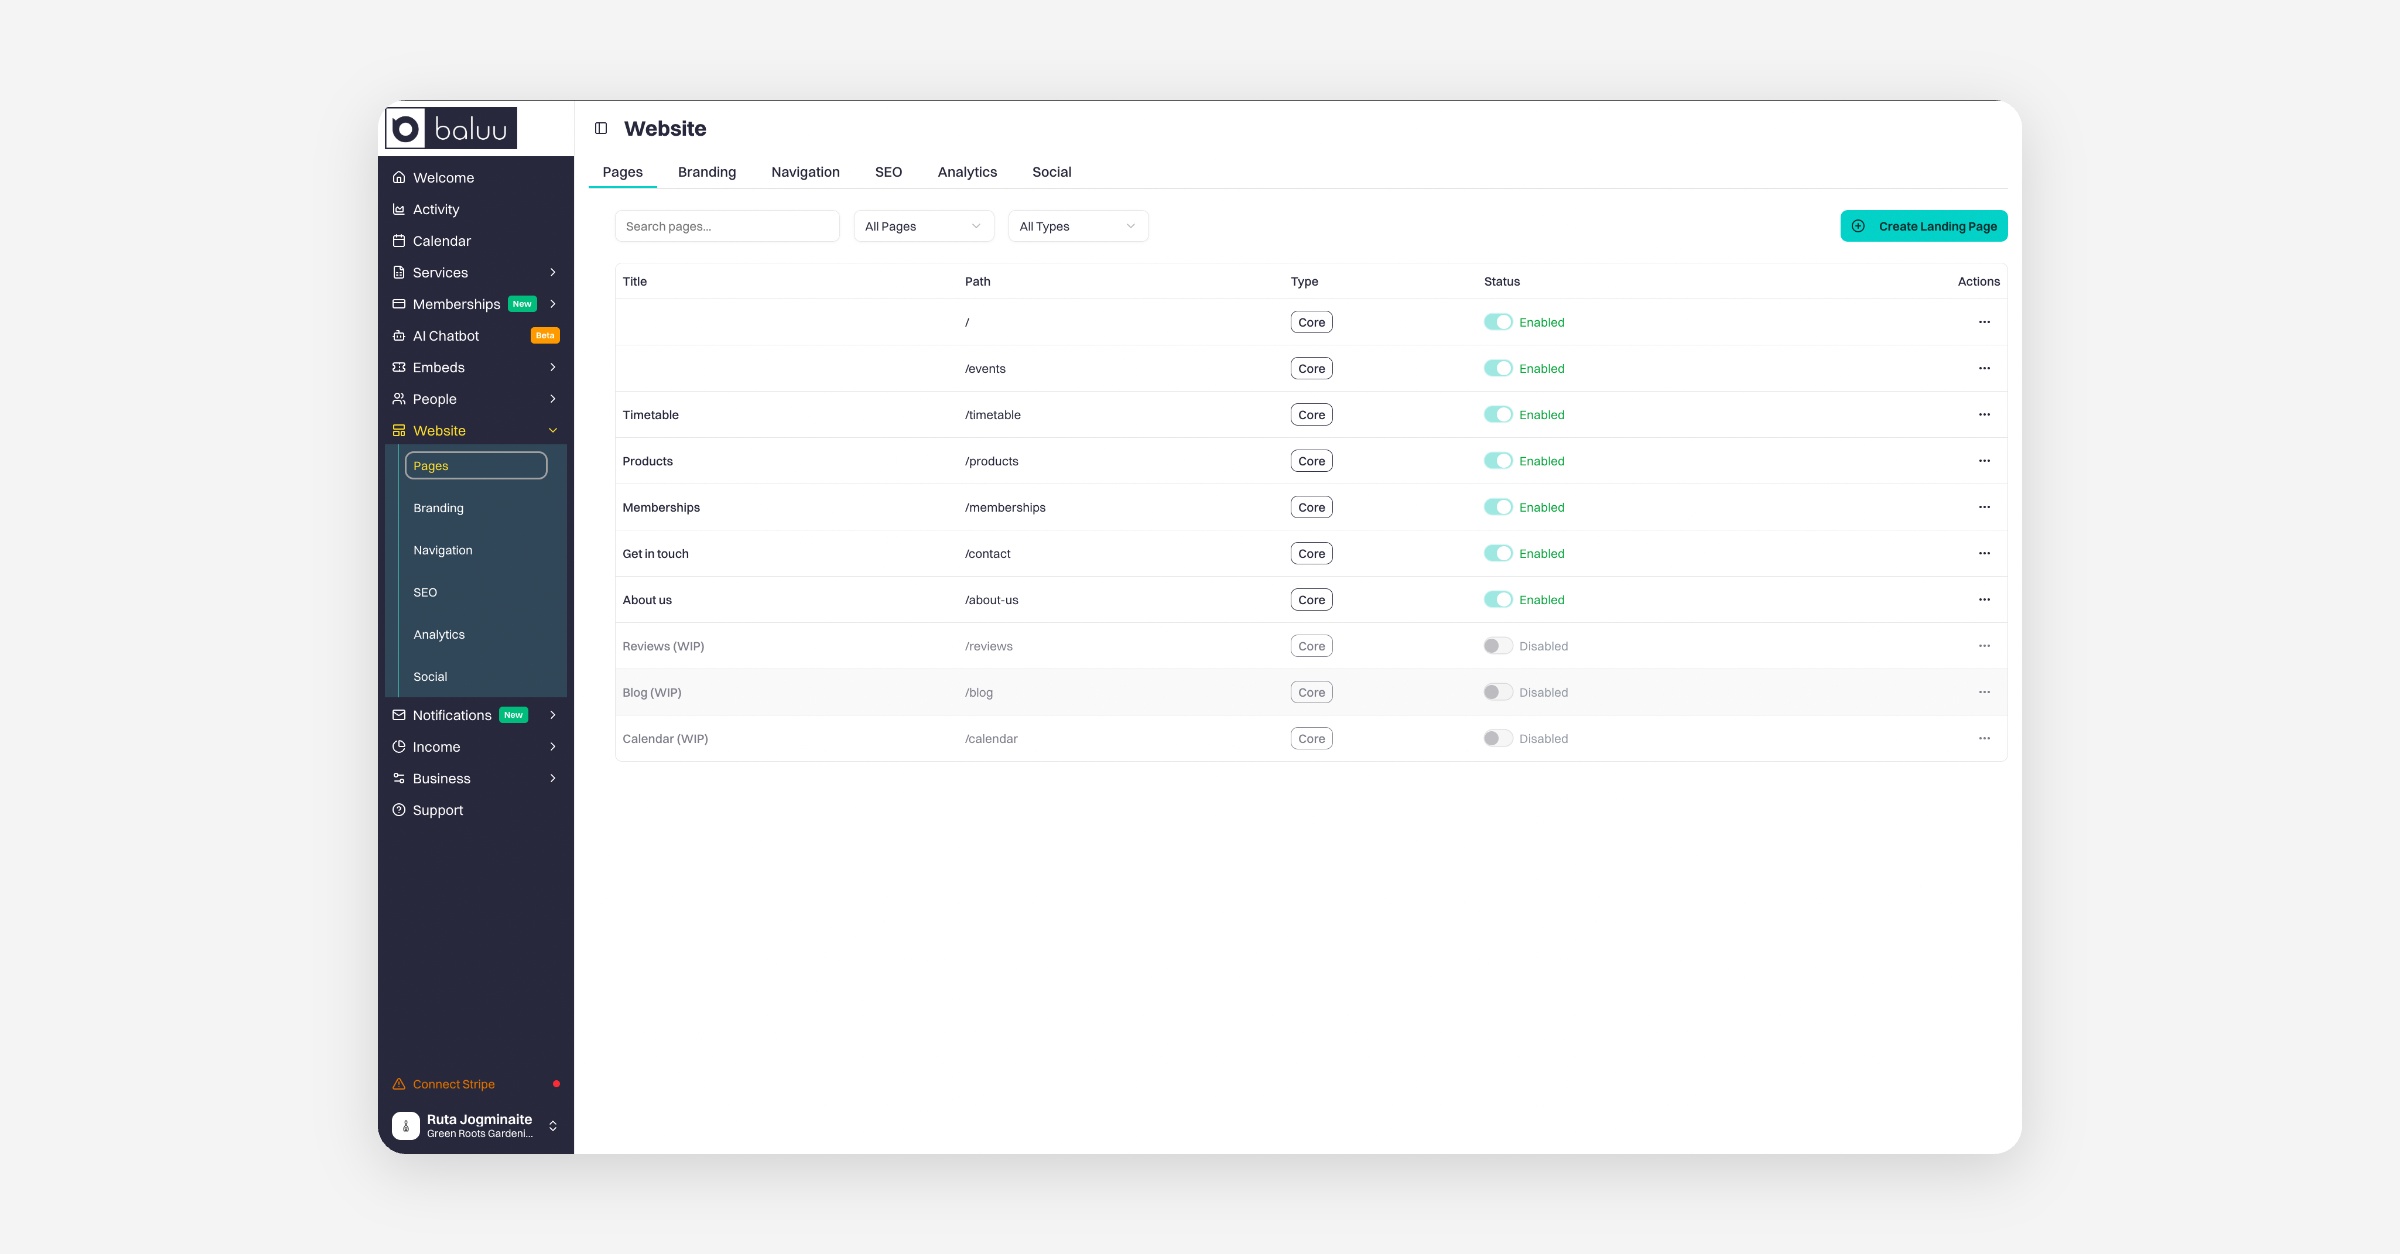
4) Customise each page - click the three-dot menu next to the page in the Pages management section, then select Edit.
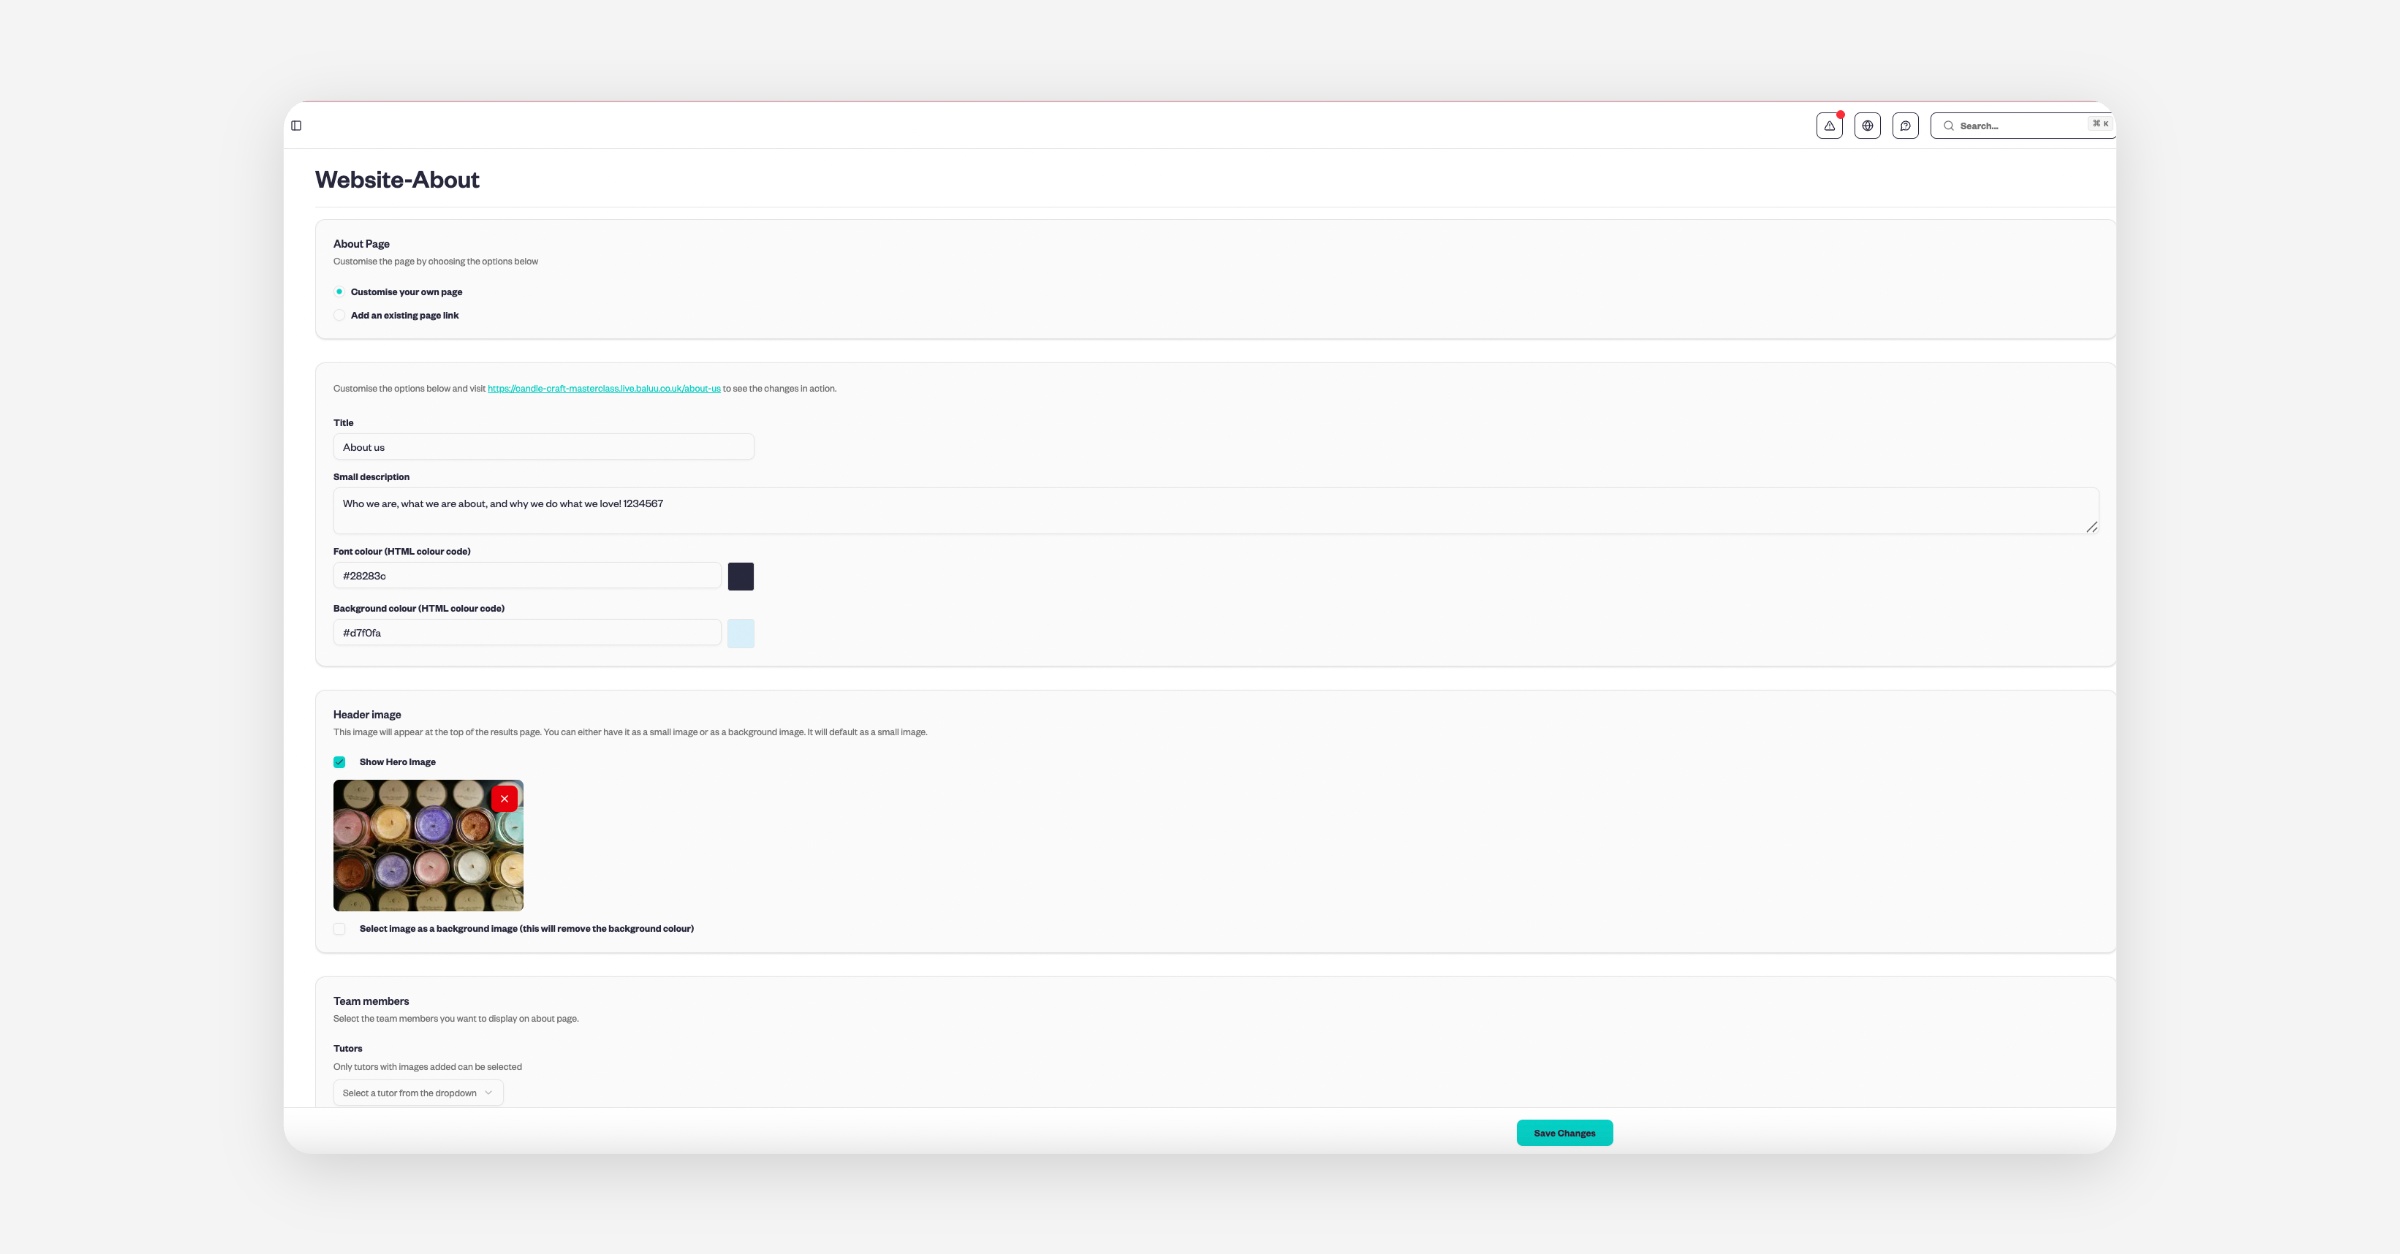
About us Page
Add a title
Add a short description
Edit colours
Add a header image
Select the team member(s) you want to display on the About Us page
Click Save
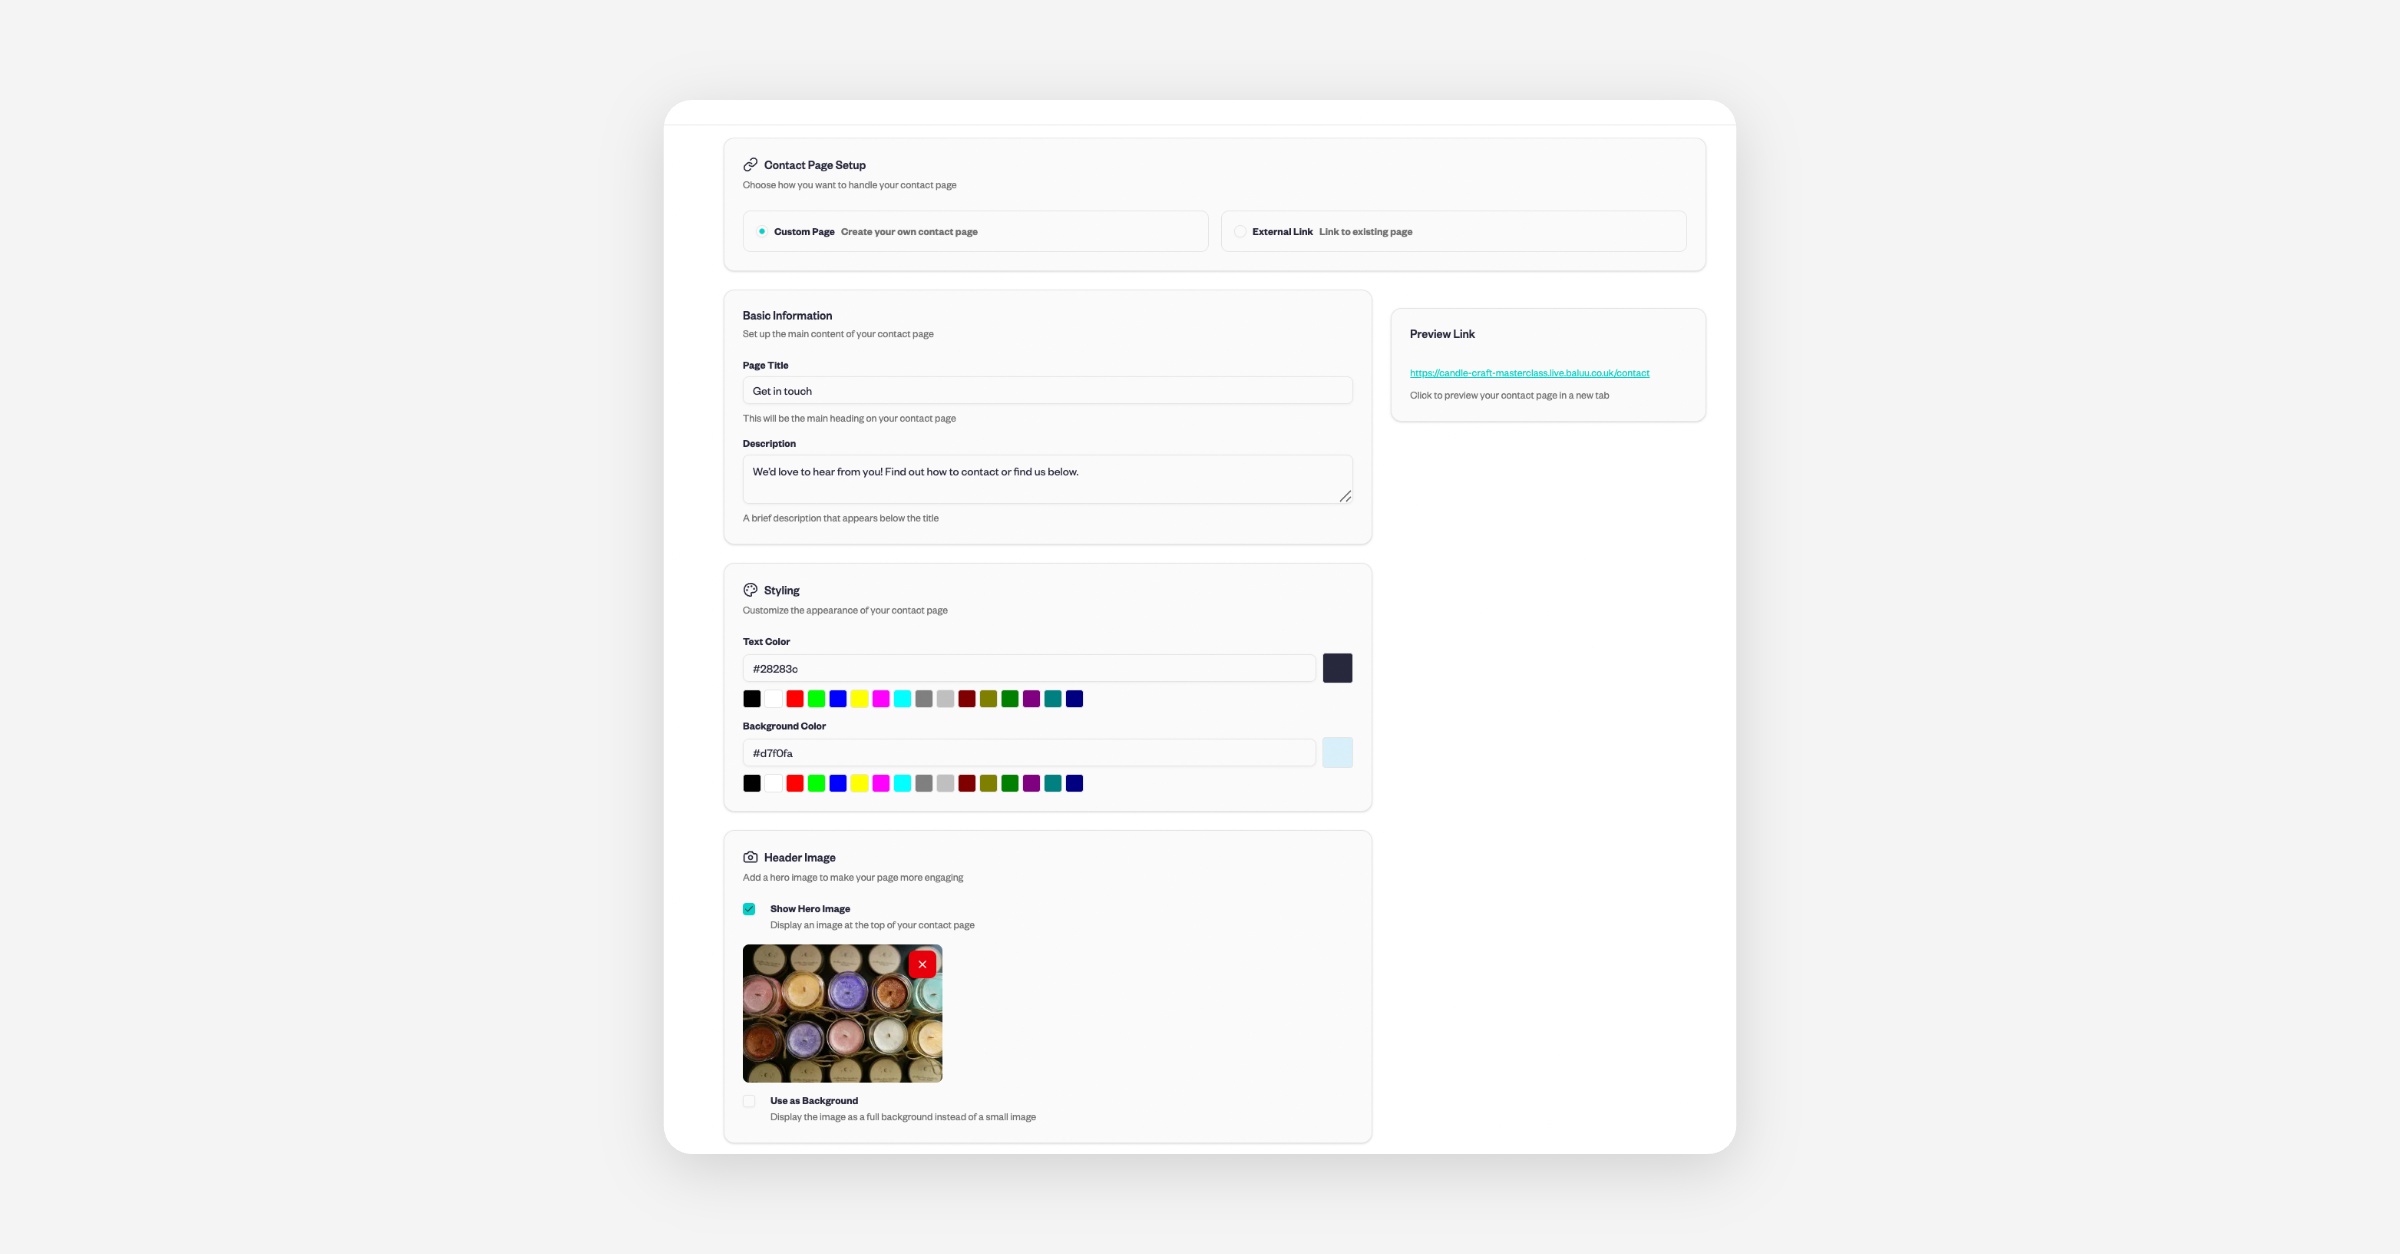
Contact / Get in touch
Change the page title and add a short description.
Add colours
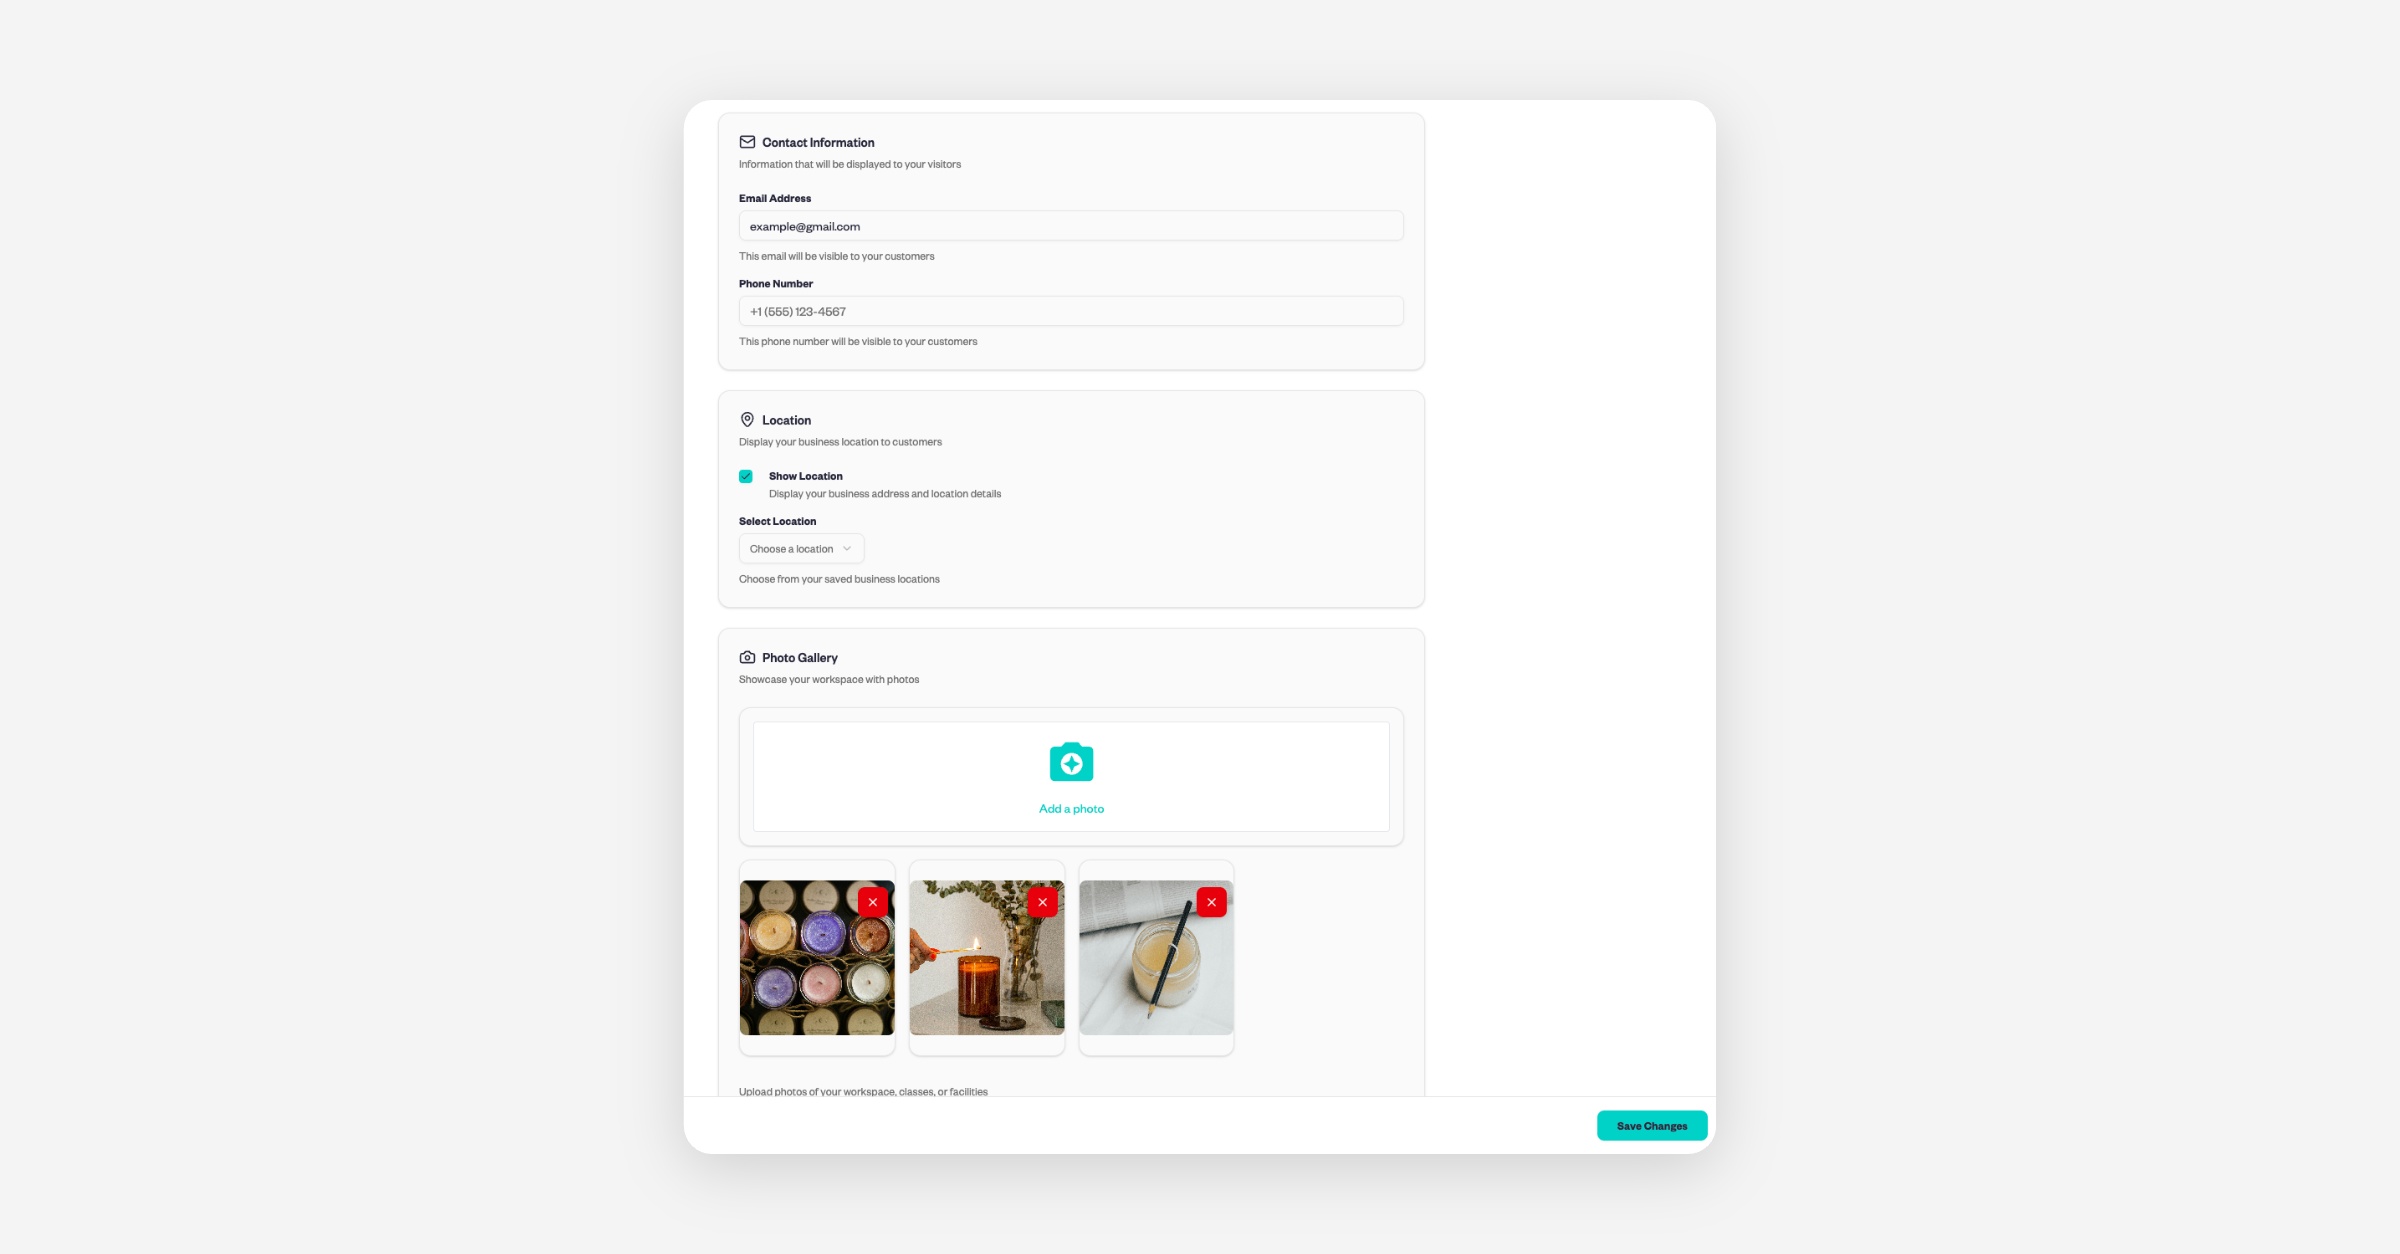
Add phone and email.
Choose to show/hide a header image.
Add your location:
First, go to Services → Settings → Locations → Add location.
Return to the Contact page and select your location from the dropdown.
(Optional) Add a photo gallery.
Save.
Timetable page
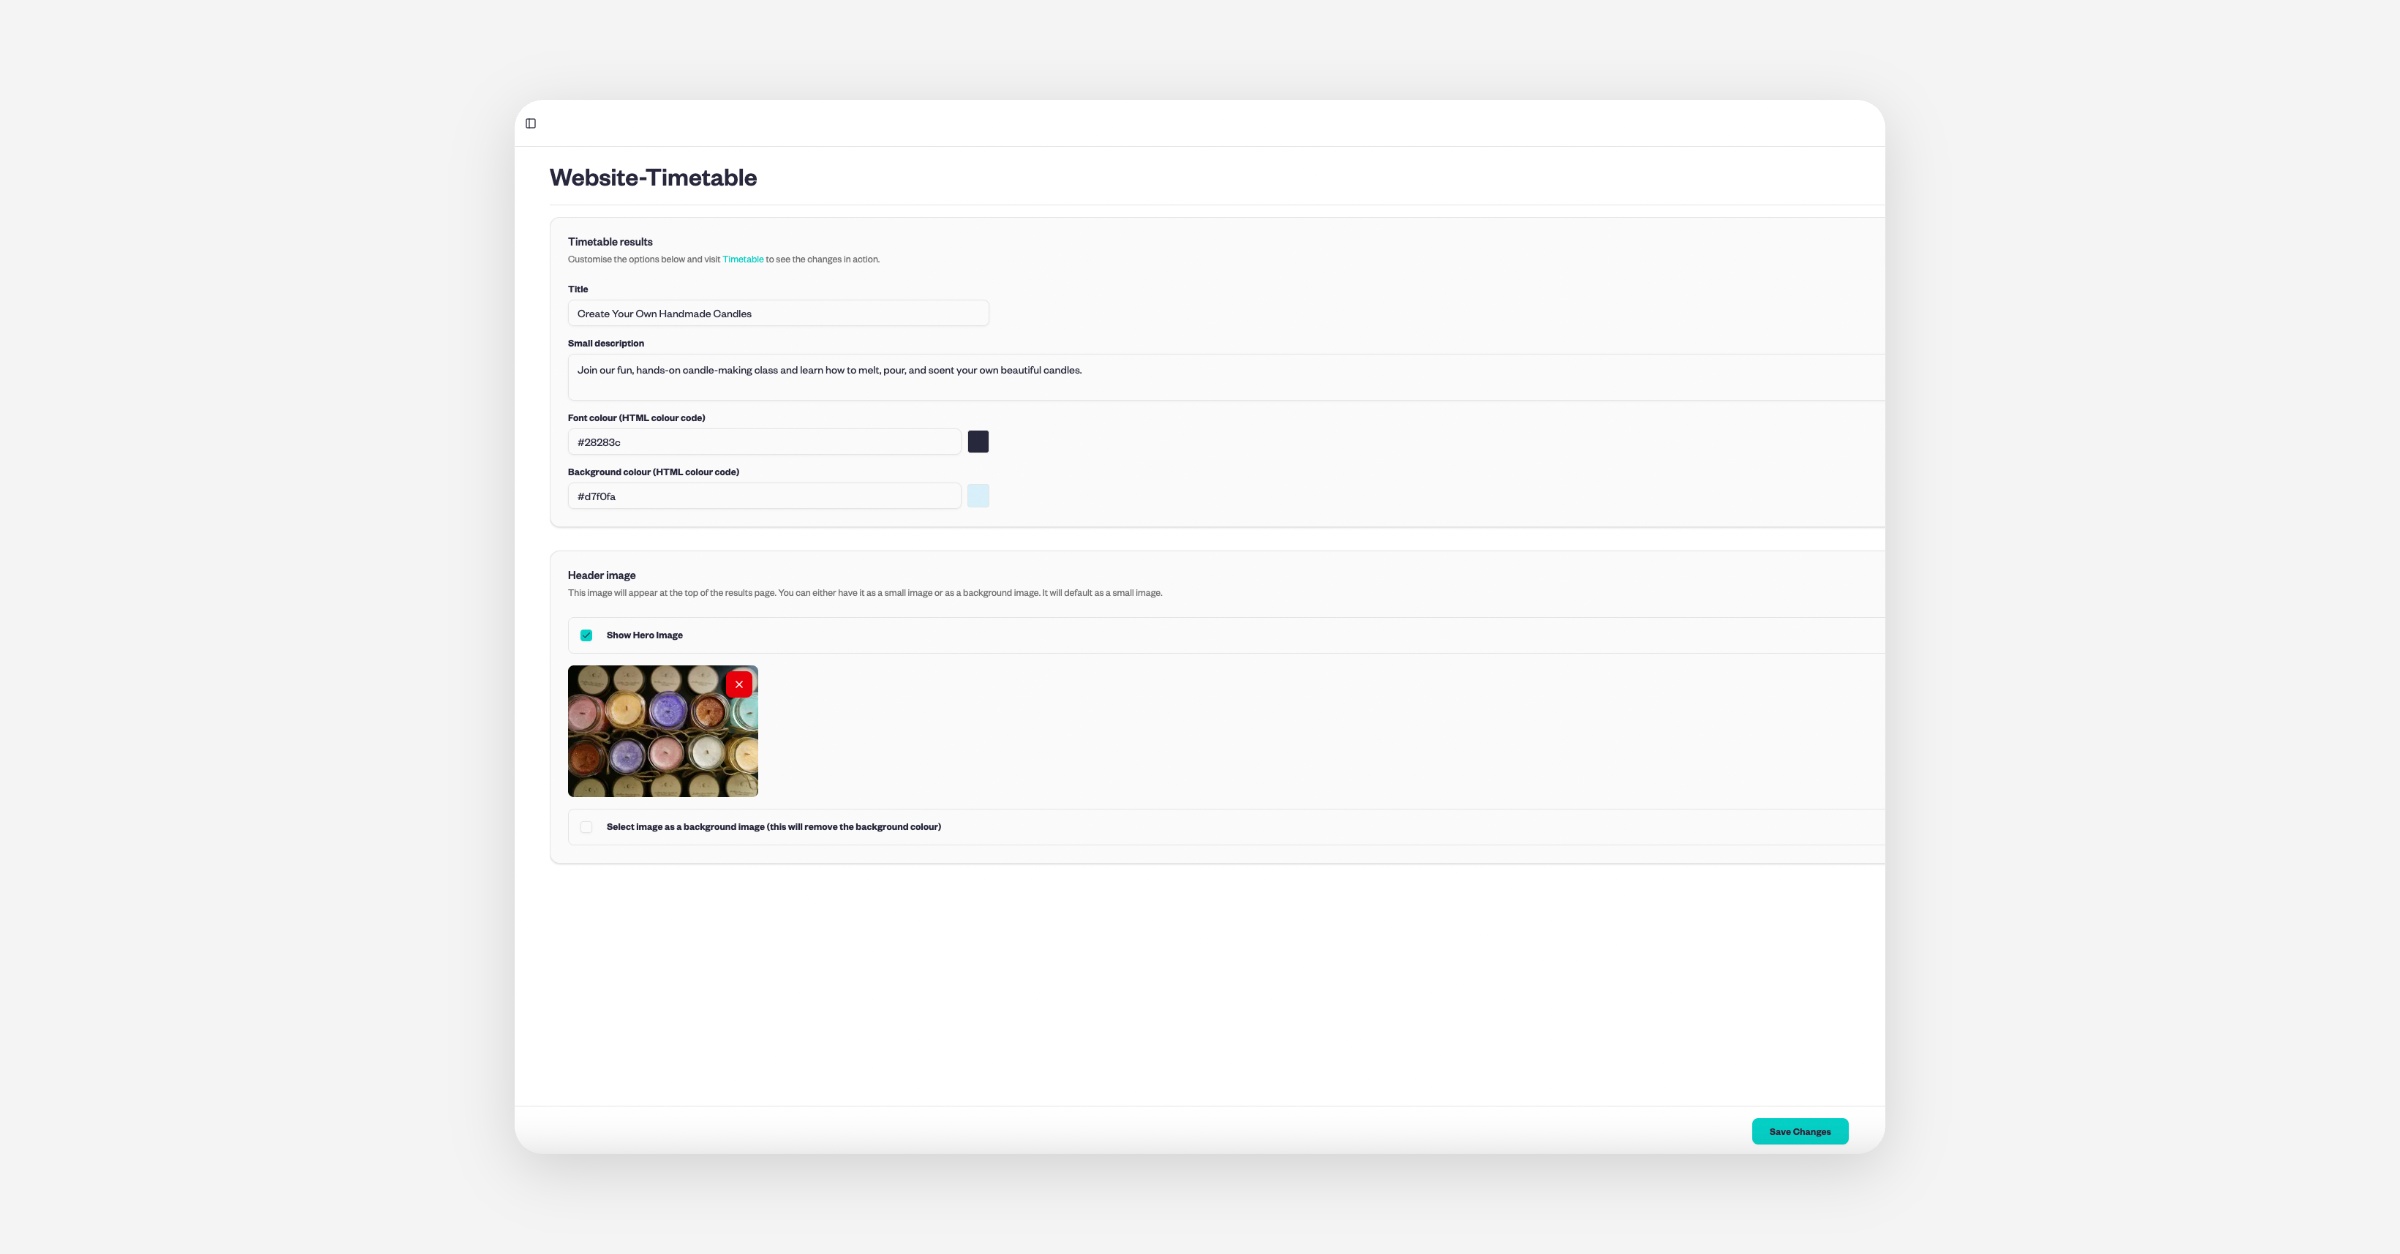
Add title
Add small description (what visitors will see)
Pick colours
Upload a header image
Save
Events page
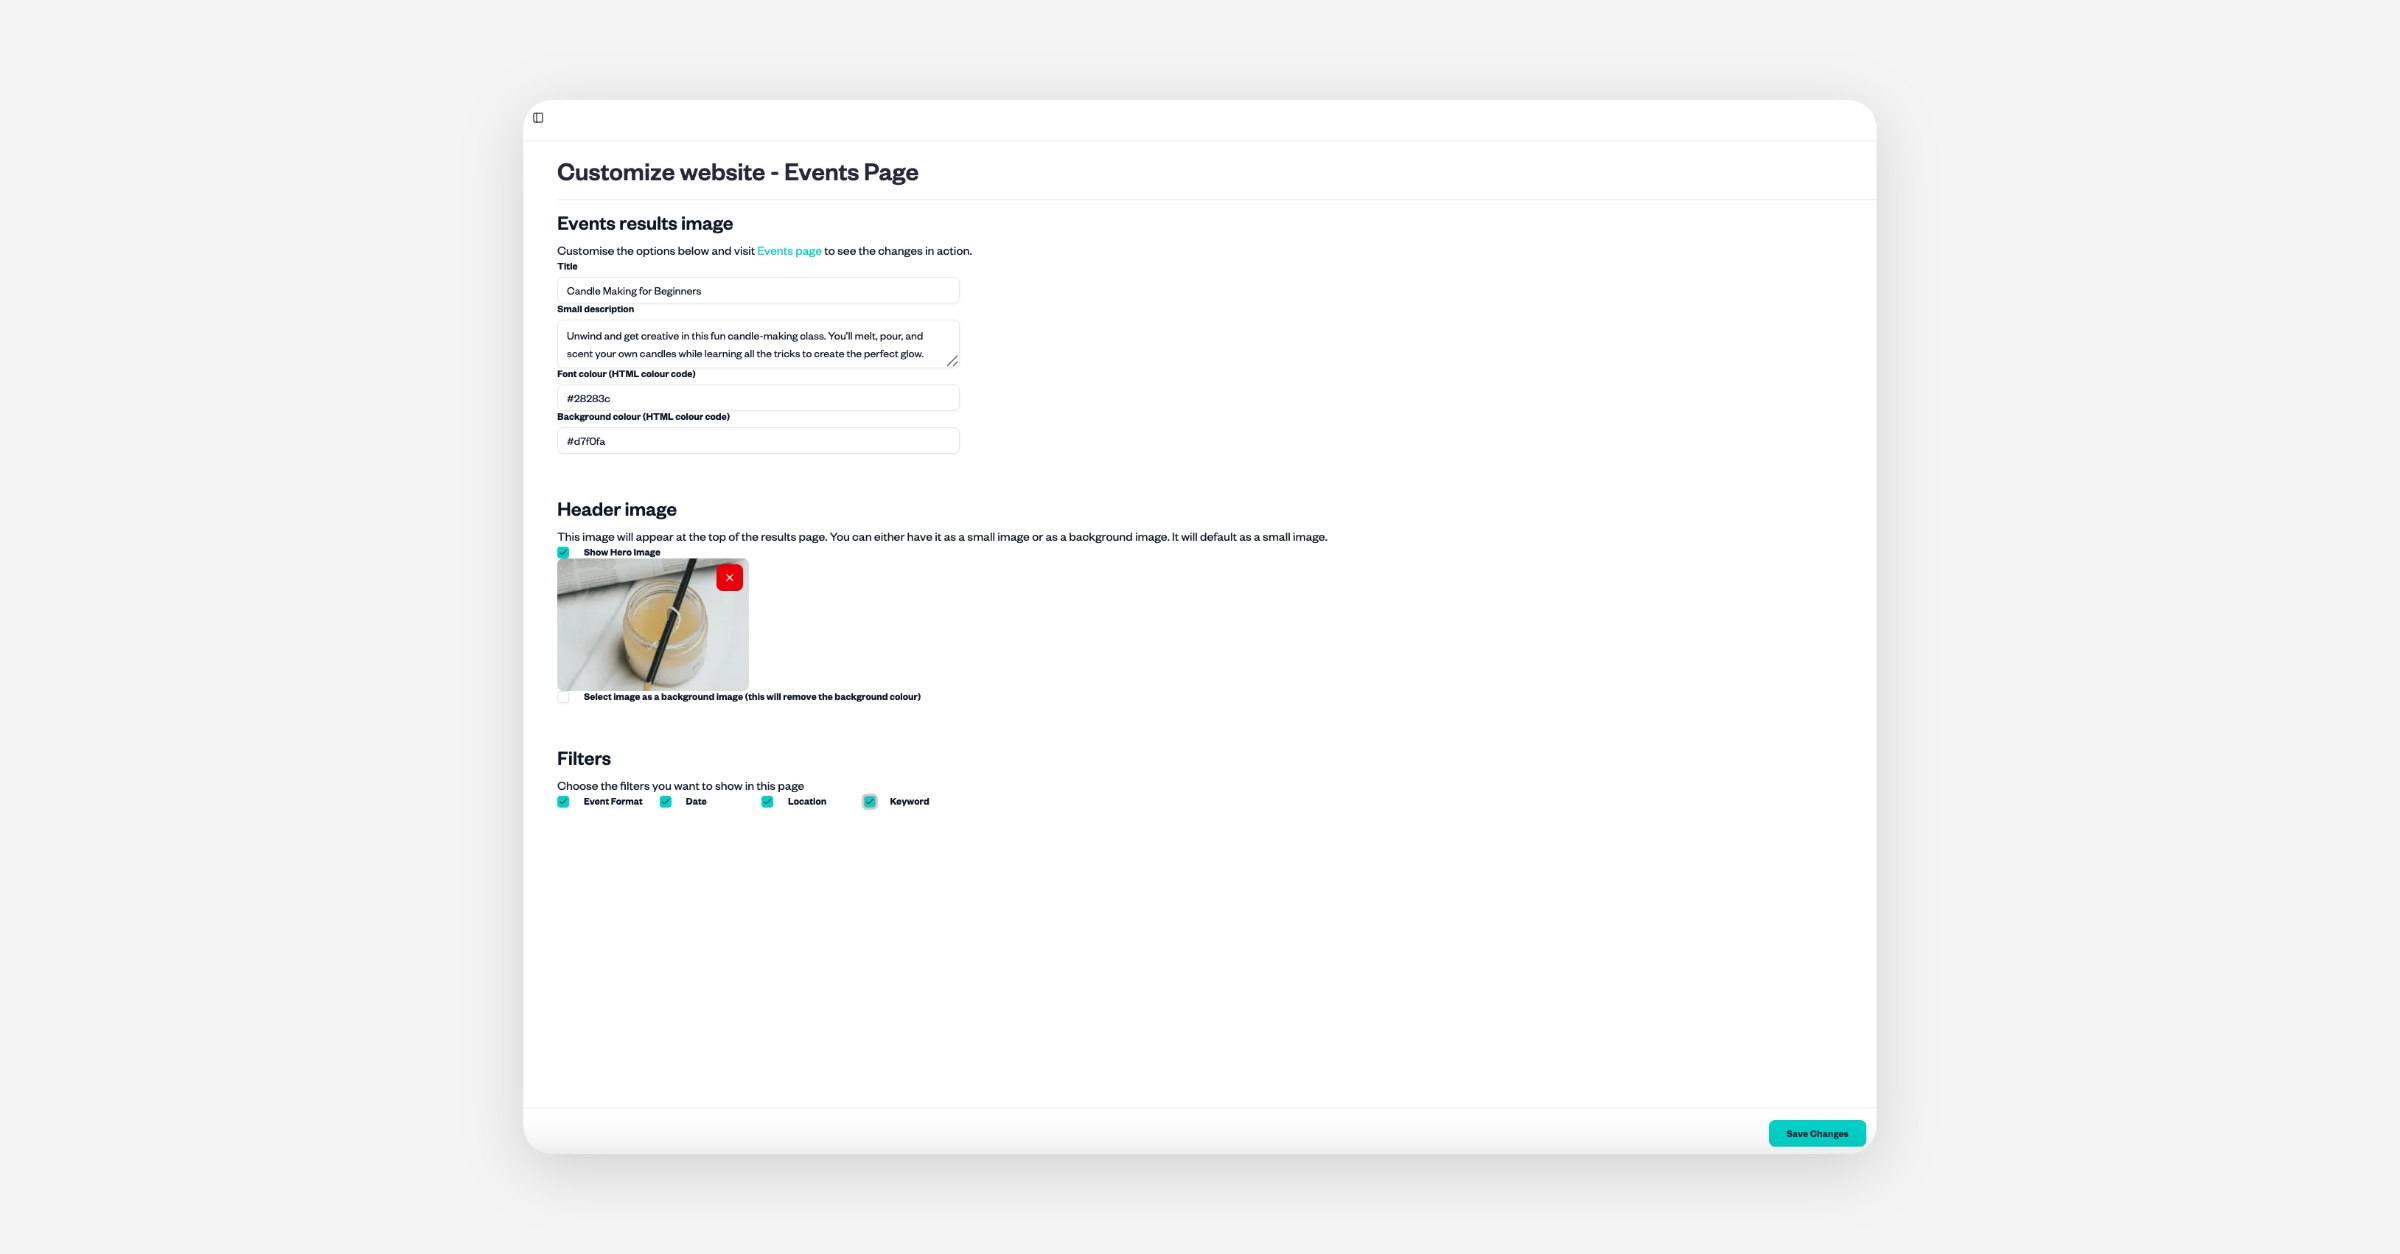
Add title/description, colours, and a header image.
Choose which filters to show (e.g., event format, date, location, keywords). Save.
Want sections like “Adults only” or “Kids only”?
Create a Landing Page in Website → Pages, name it (e.g., “Kids”), and include events by tag so only relevant listings show.
5) Tune your Website settings (branding & navigation)
Go to Website → Branding:
Here you can update your company logo
Customize the favicon that will be used across the whole site
SEO
Metadata title: how your site appears in Google (e.g., “Candle Craft Masterclass”).
Metadata description: short SEO summary.
Navigation
Toggle Show navigation bar on.
Tick which pages you want visible (Events, Memberships, Products, Timetable, Contact, About, etc.).
Social
Add links for Facebook, Instagram, Twitter so they appear on your site/widget.
Analytics
This section lets you add Google Tag Manager or other analytics to your Baluu website. Please note, we cannot validate the code you place here. Incorrect code may break your site, slow it down, or pose security risks. Test carefully, and if you need help, contact us.
Save when done.
6) Preview your pages
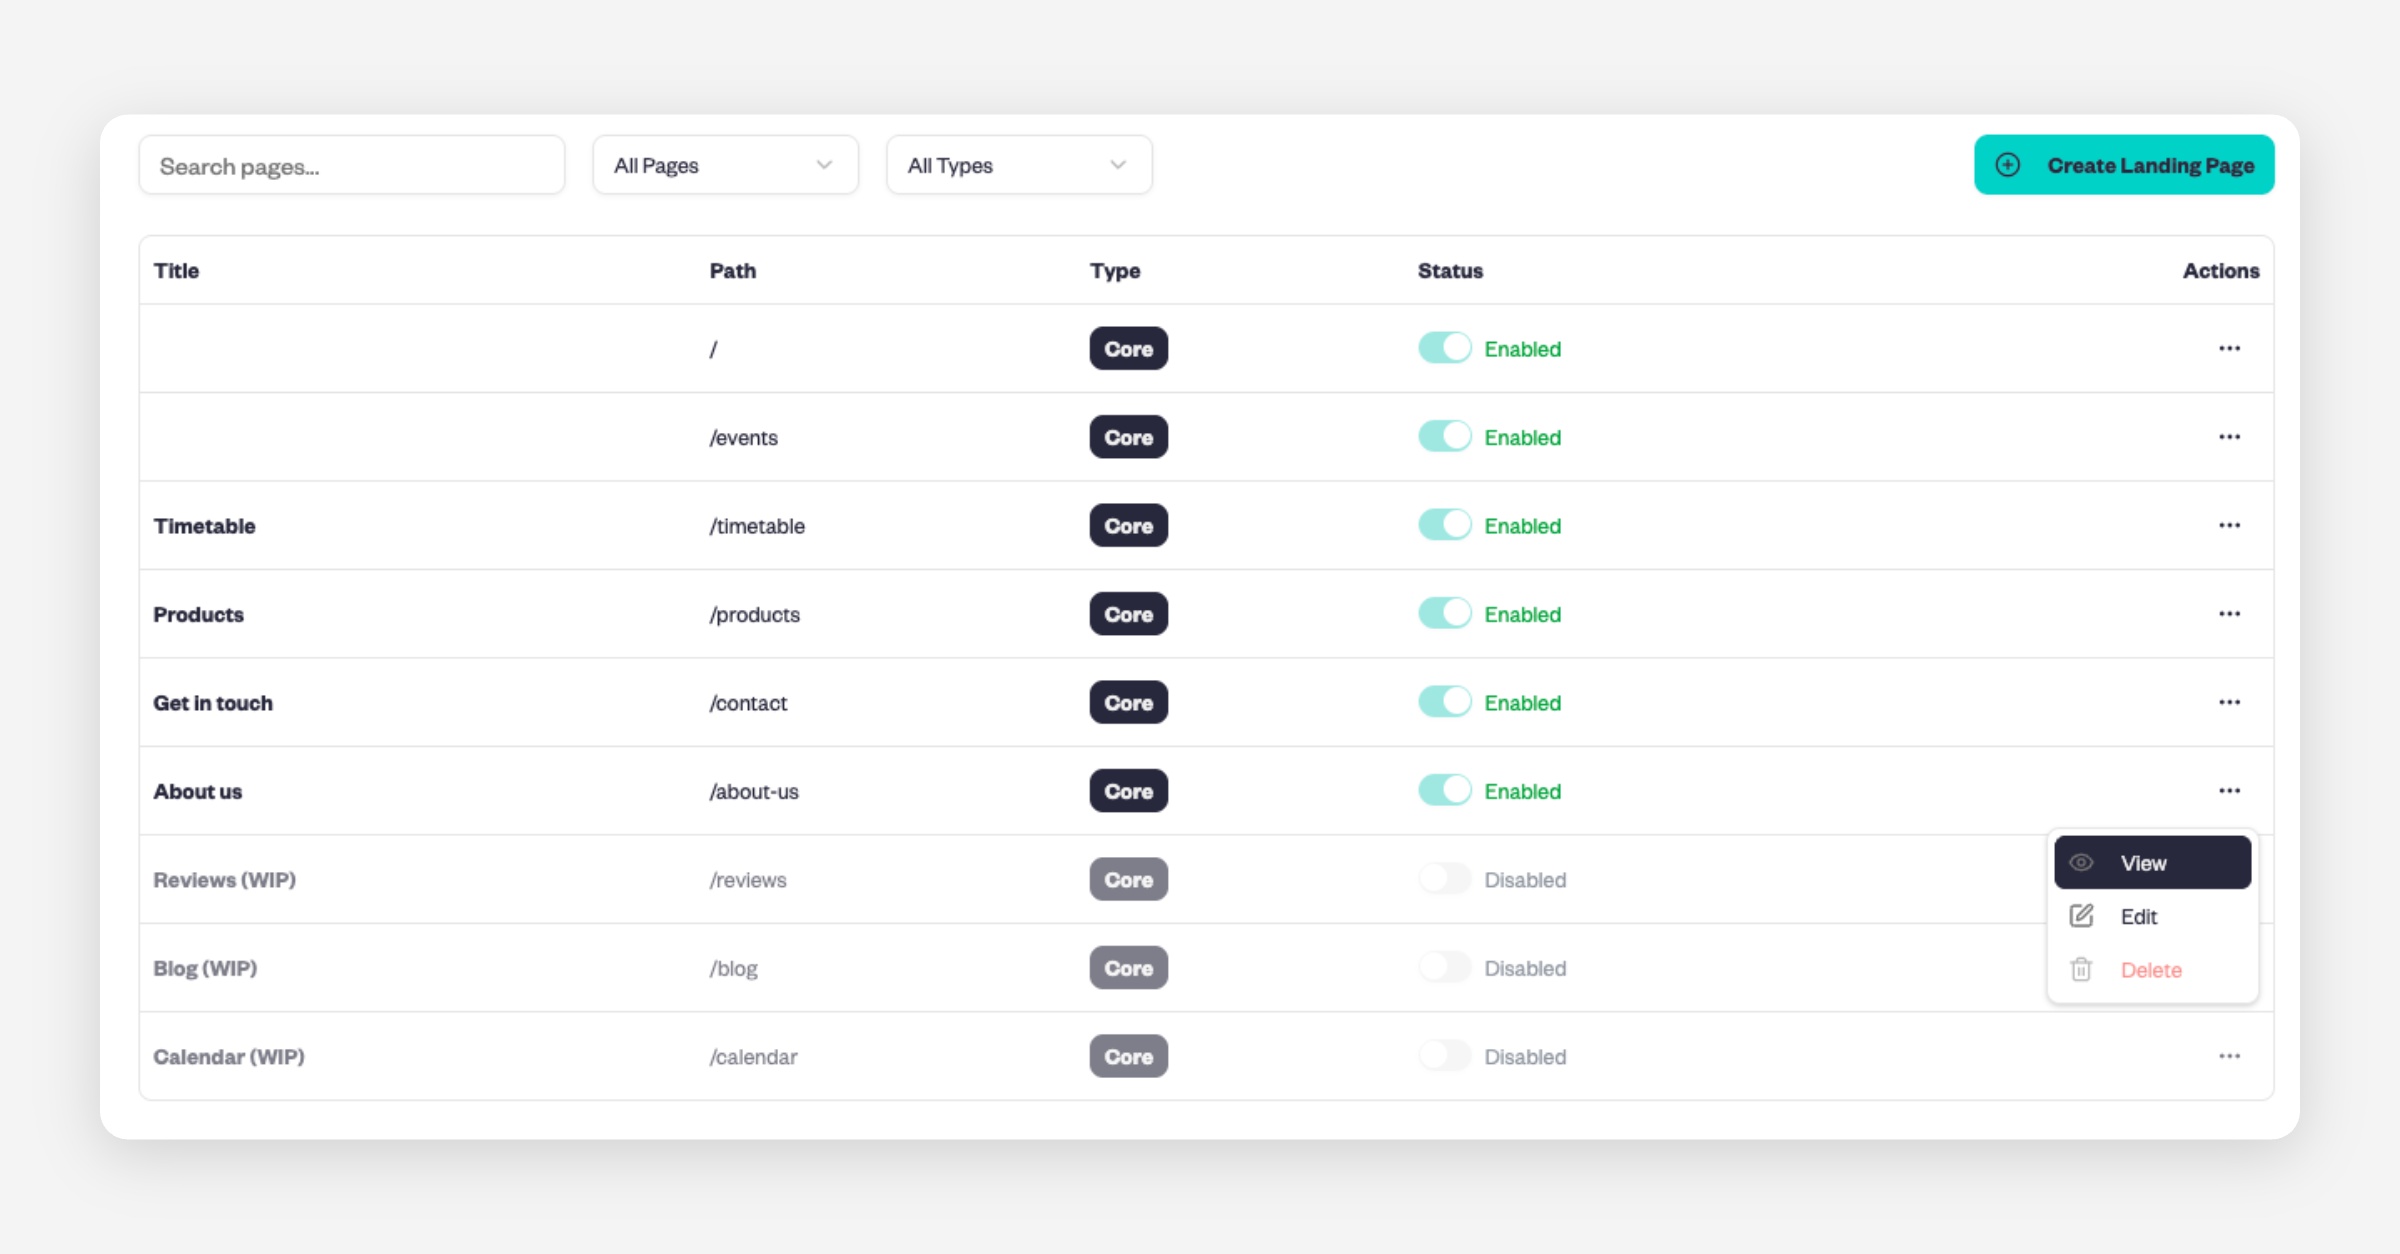
In Website → Pages, click the ⋯ (three dots) → View next to any page to open a live preview.
7) Share your website (and specific pages)
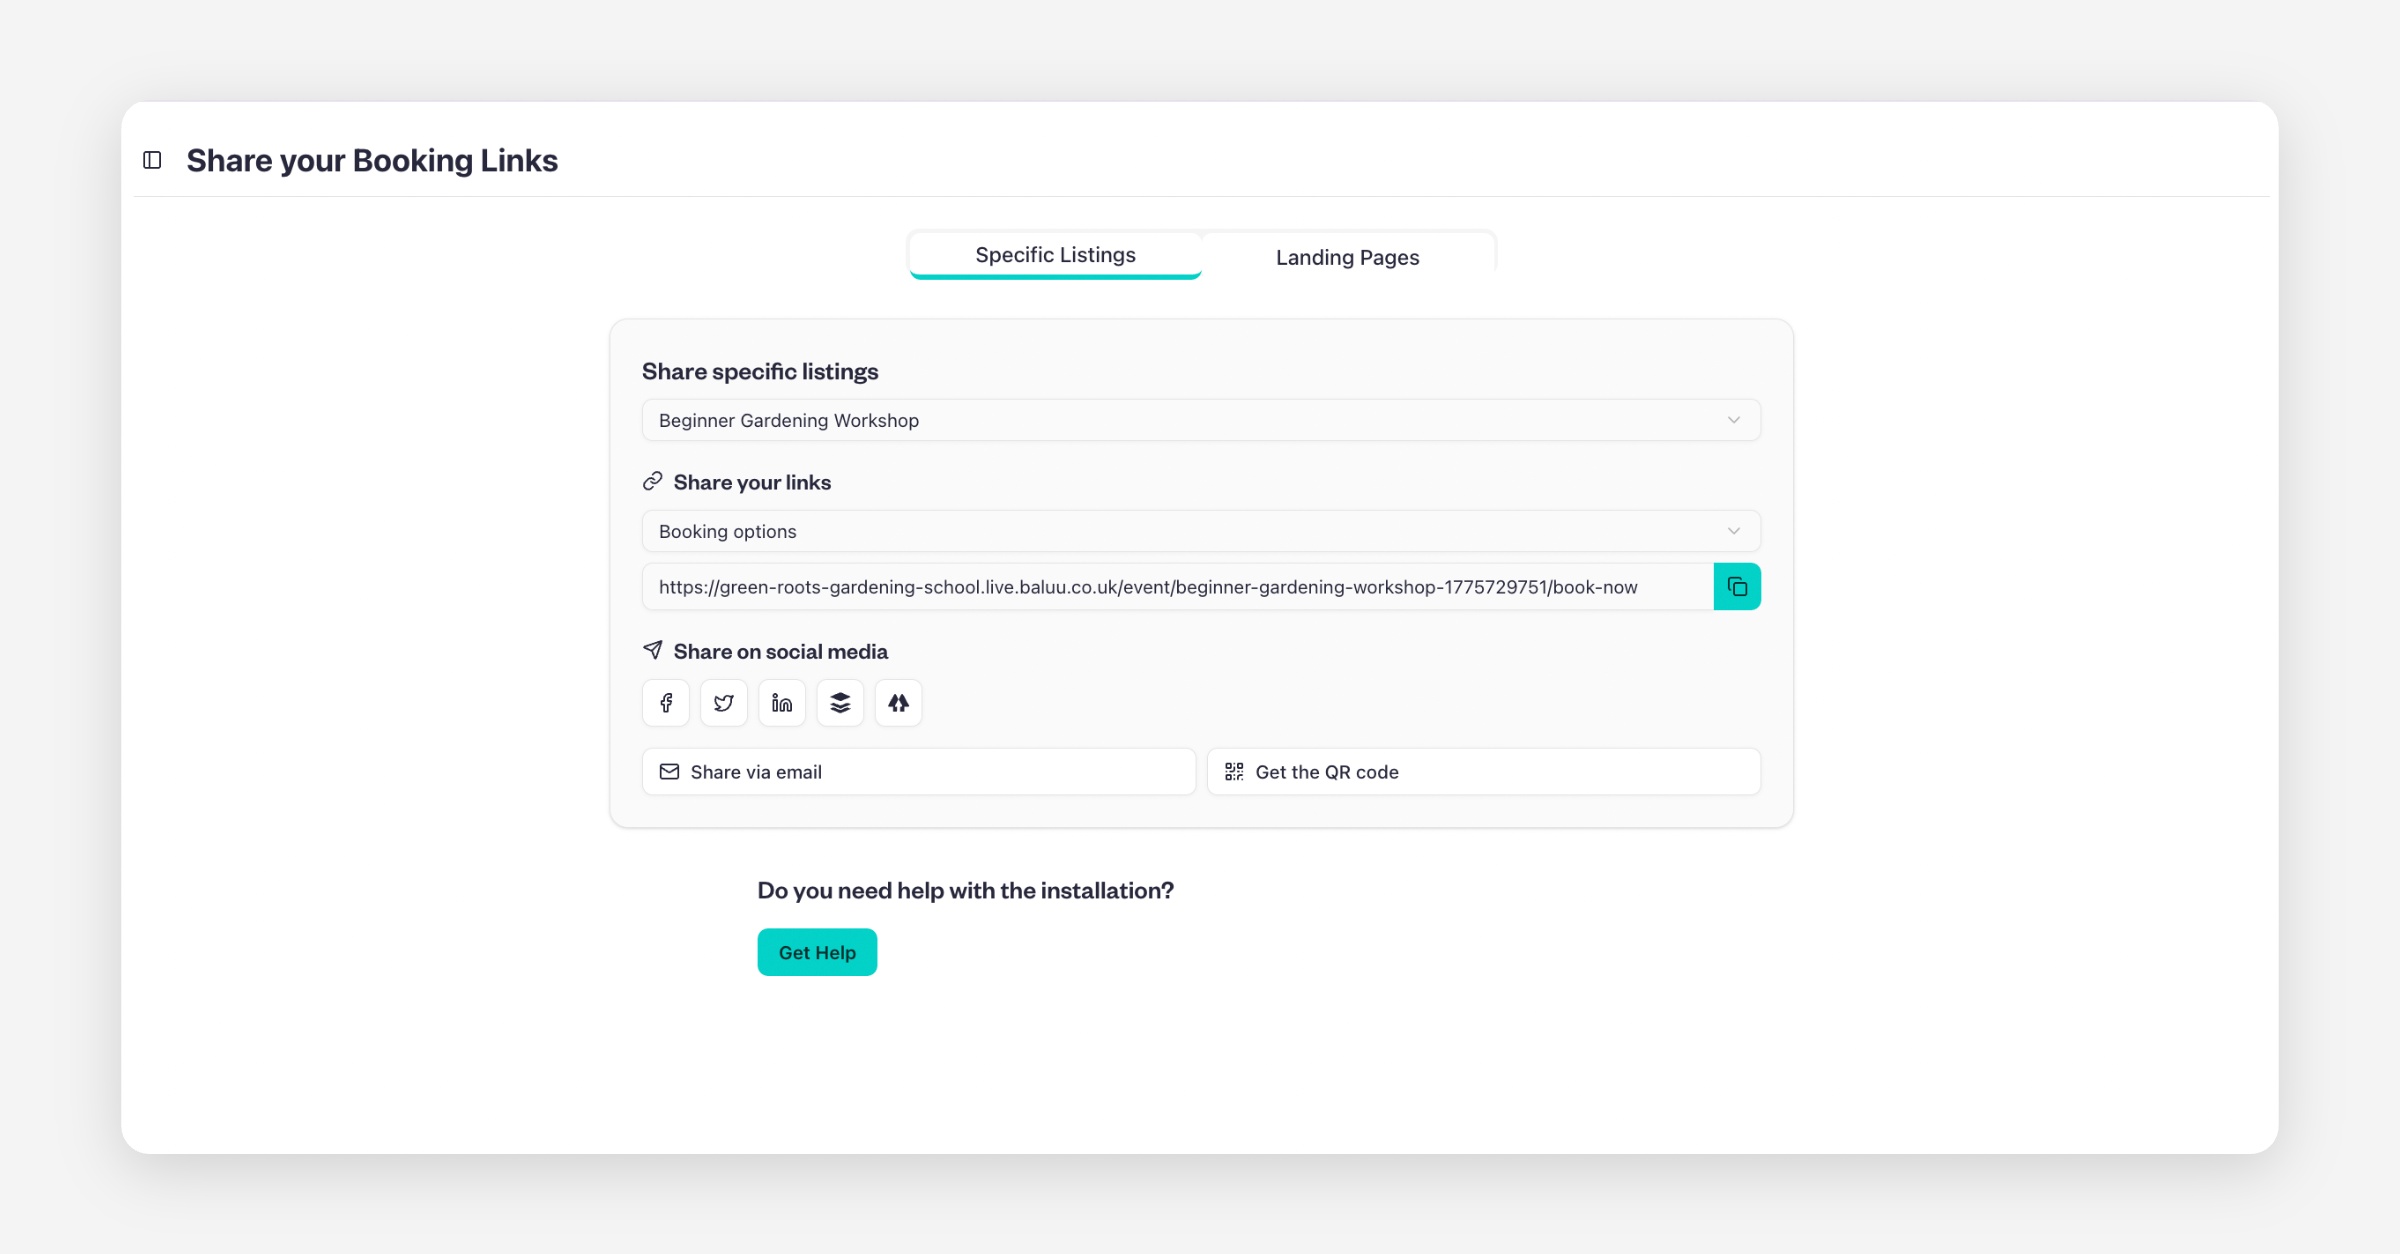
Go to Embeds → Sharing links.
Copy your main website link, or share a specific listing or landing page.
Download a QR code for posters, flyers, or venue signage.
Create a Landing Page
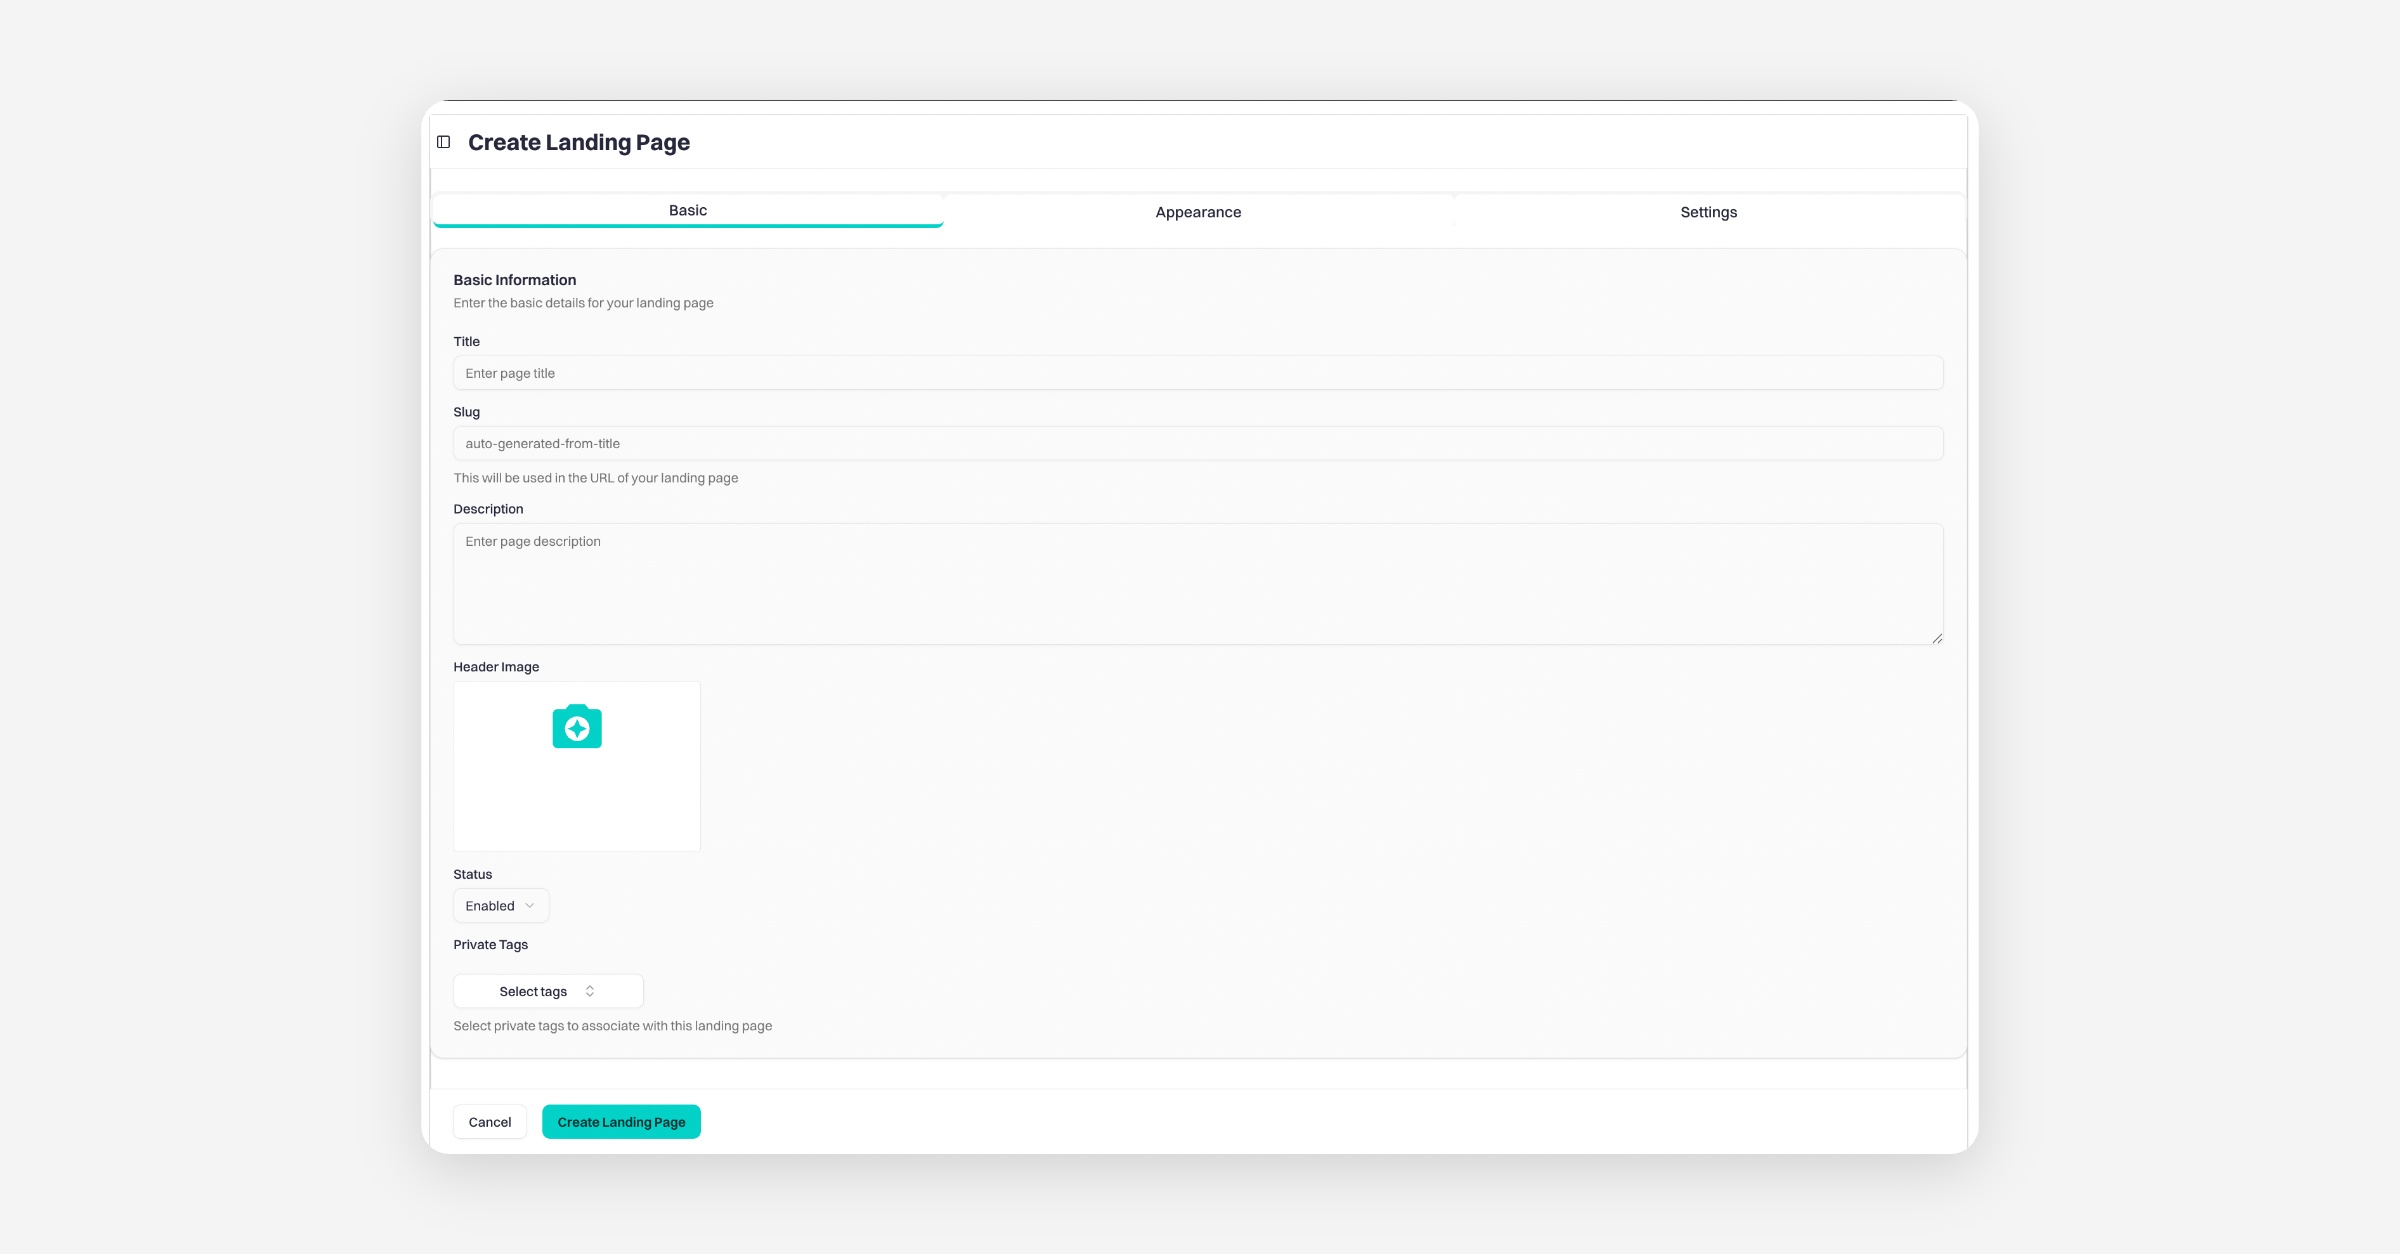
Go back to Pages and click Create Landing Page
Enter the basic details for your landing page
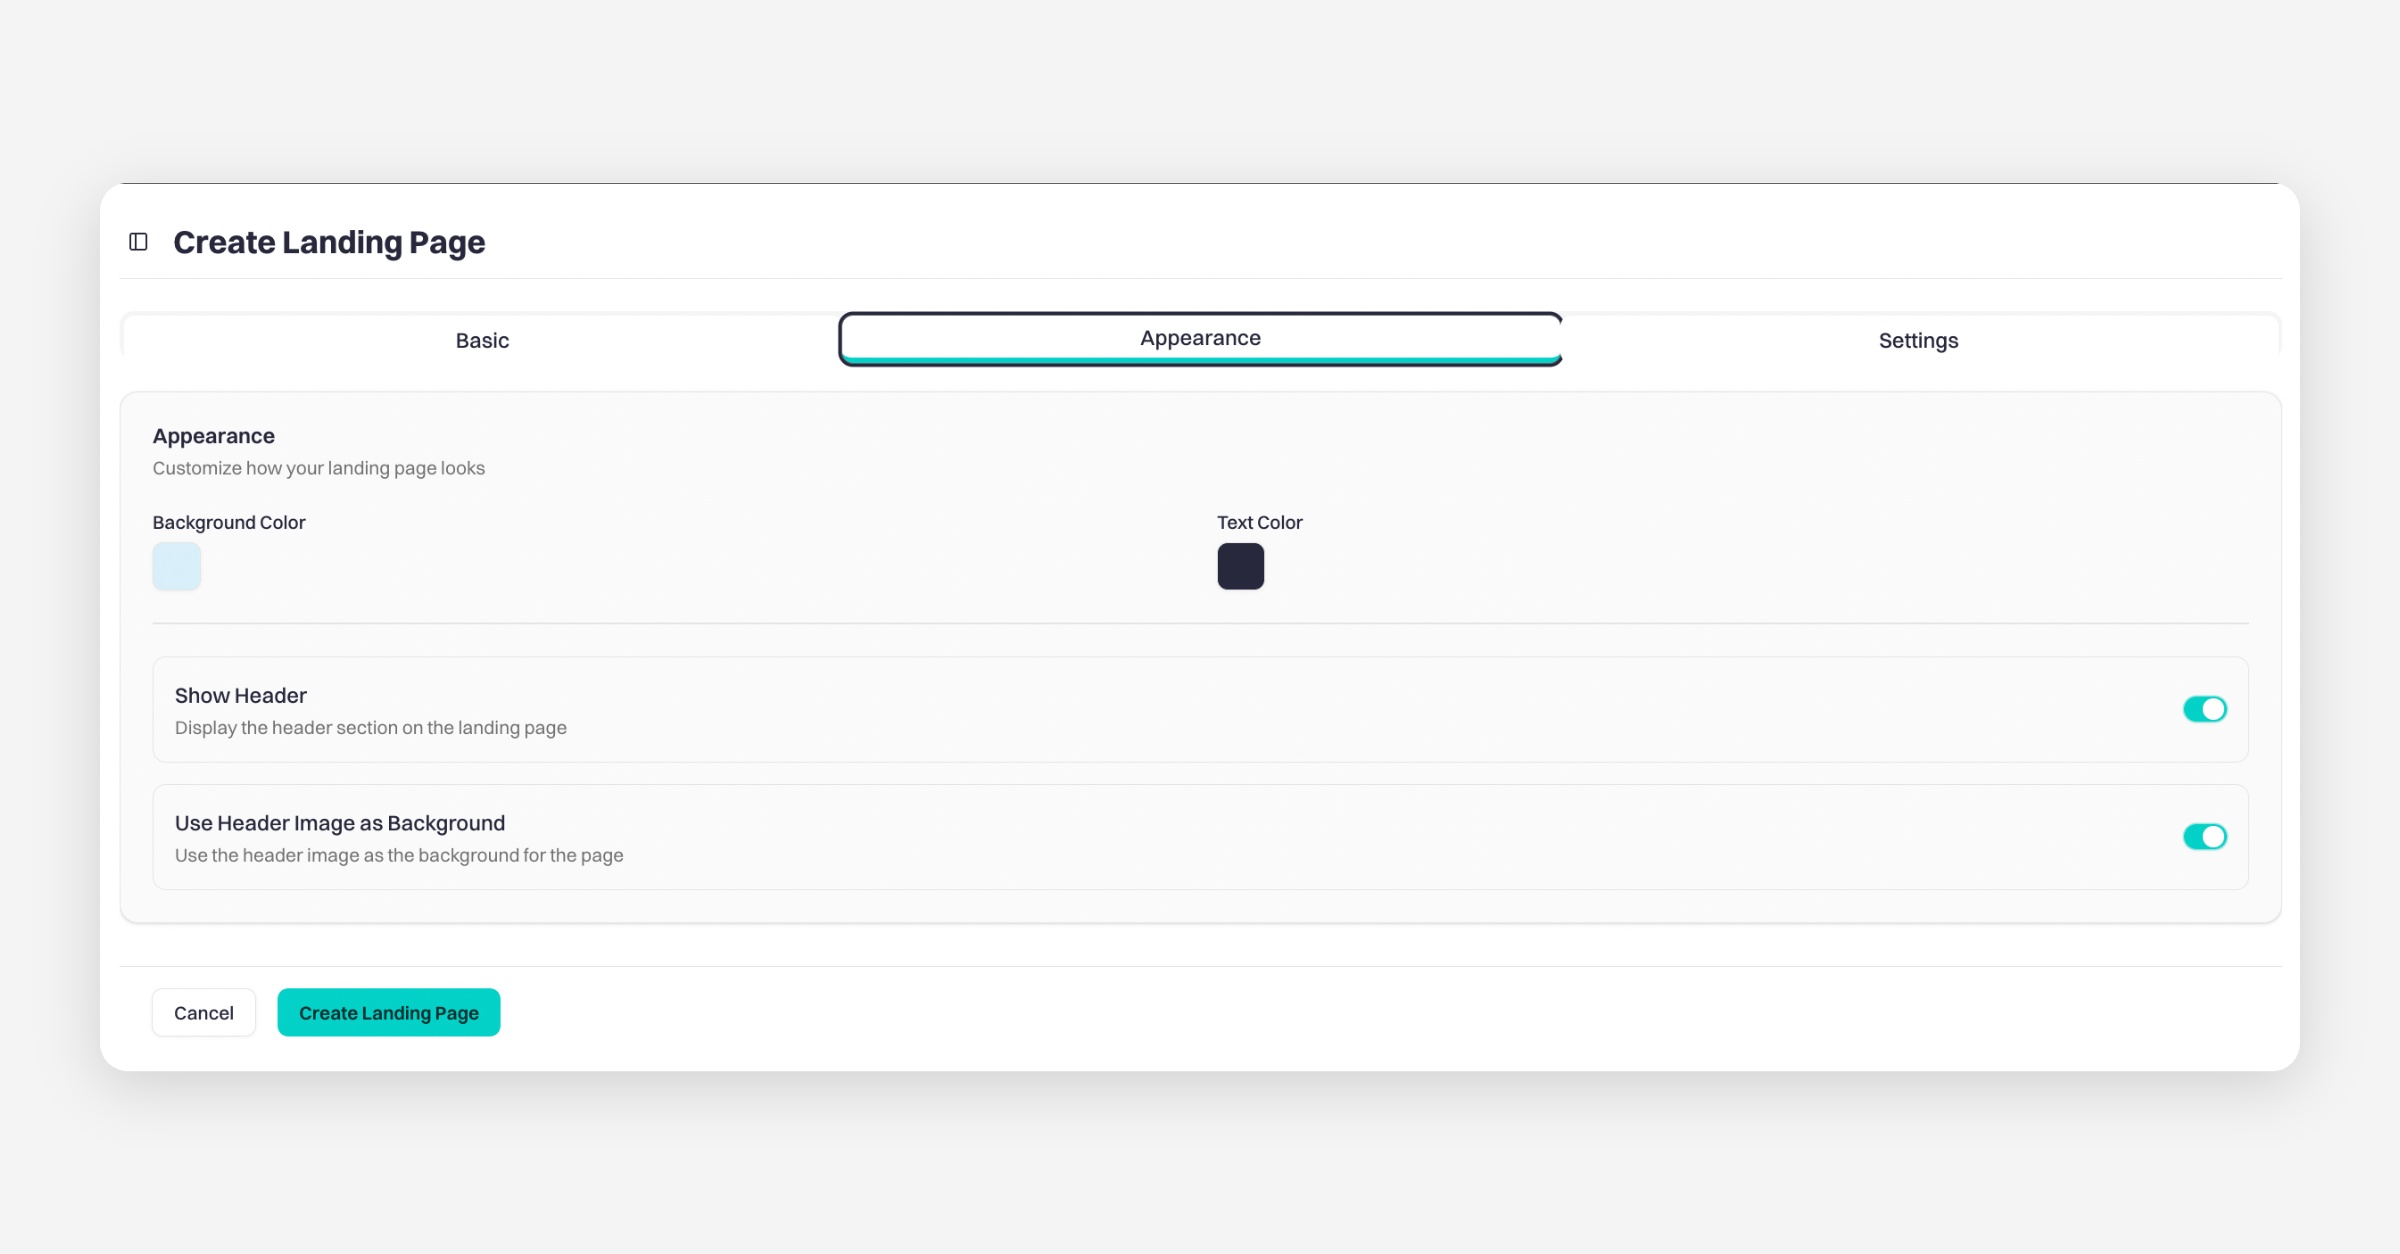
Customise the appearance to control how your landing page looks
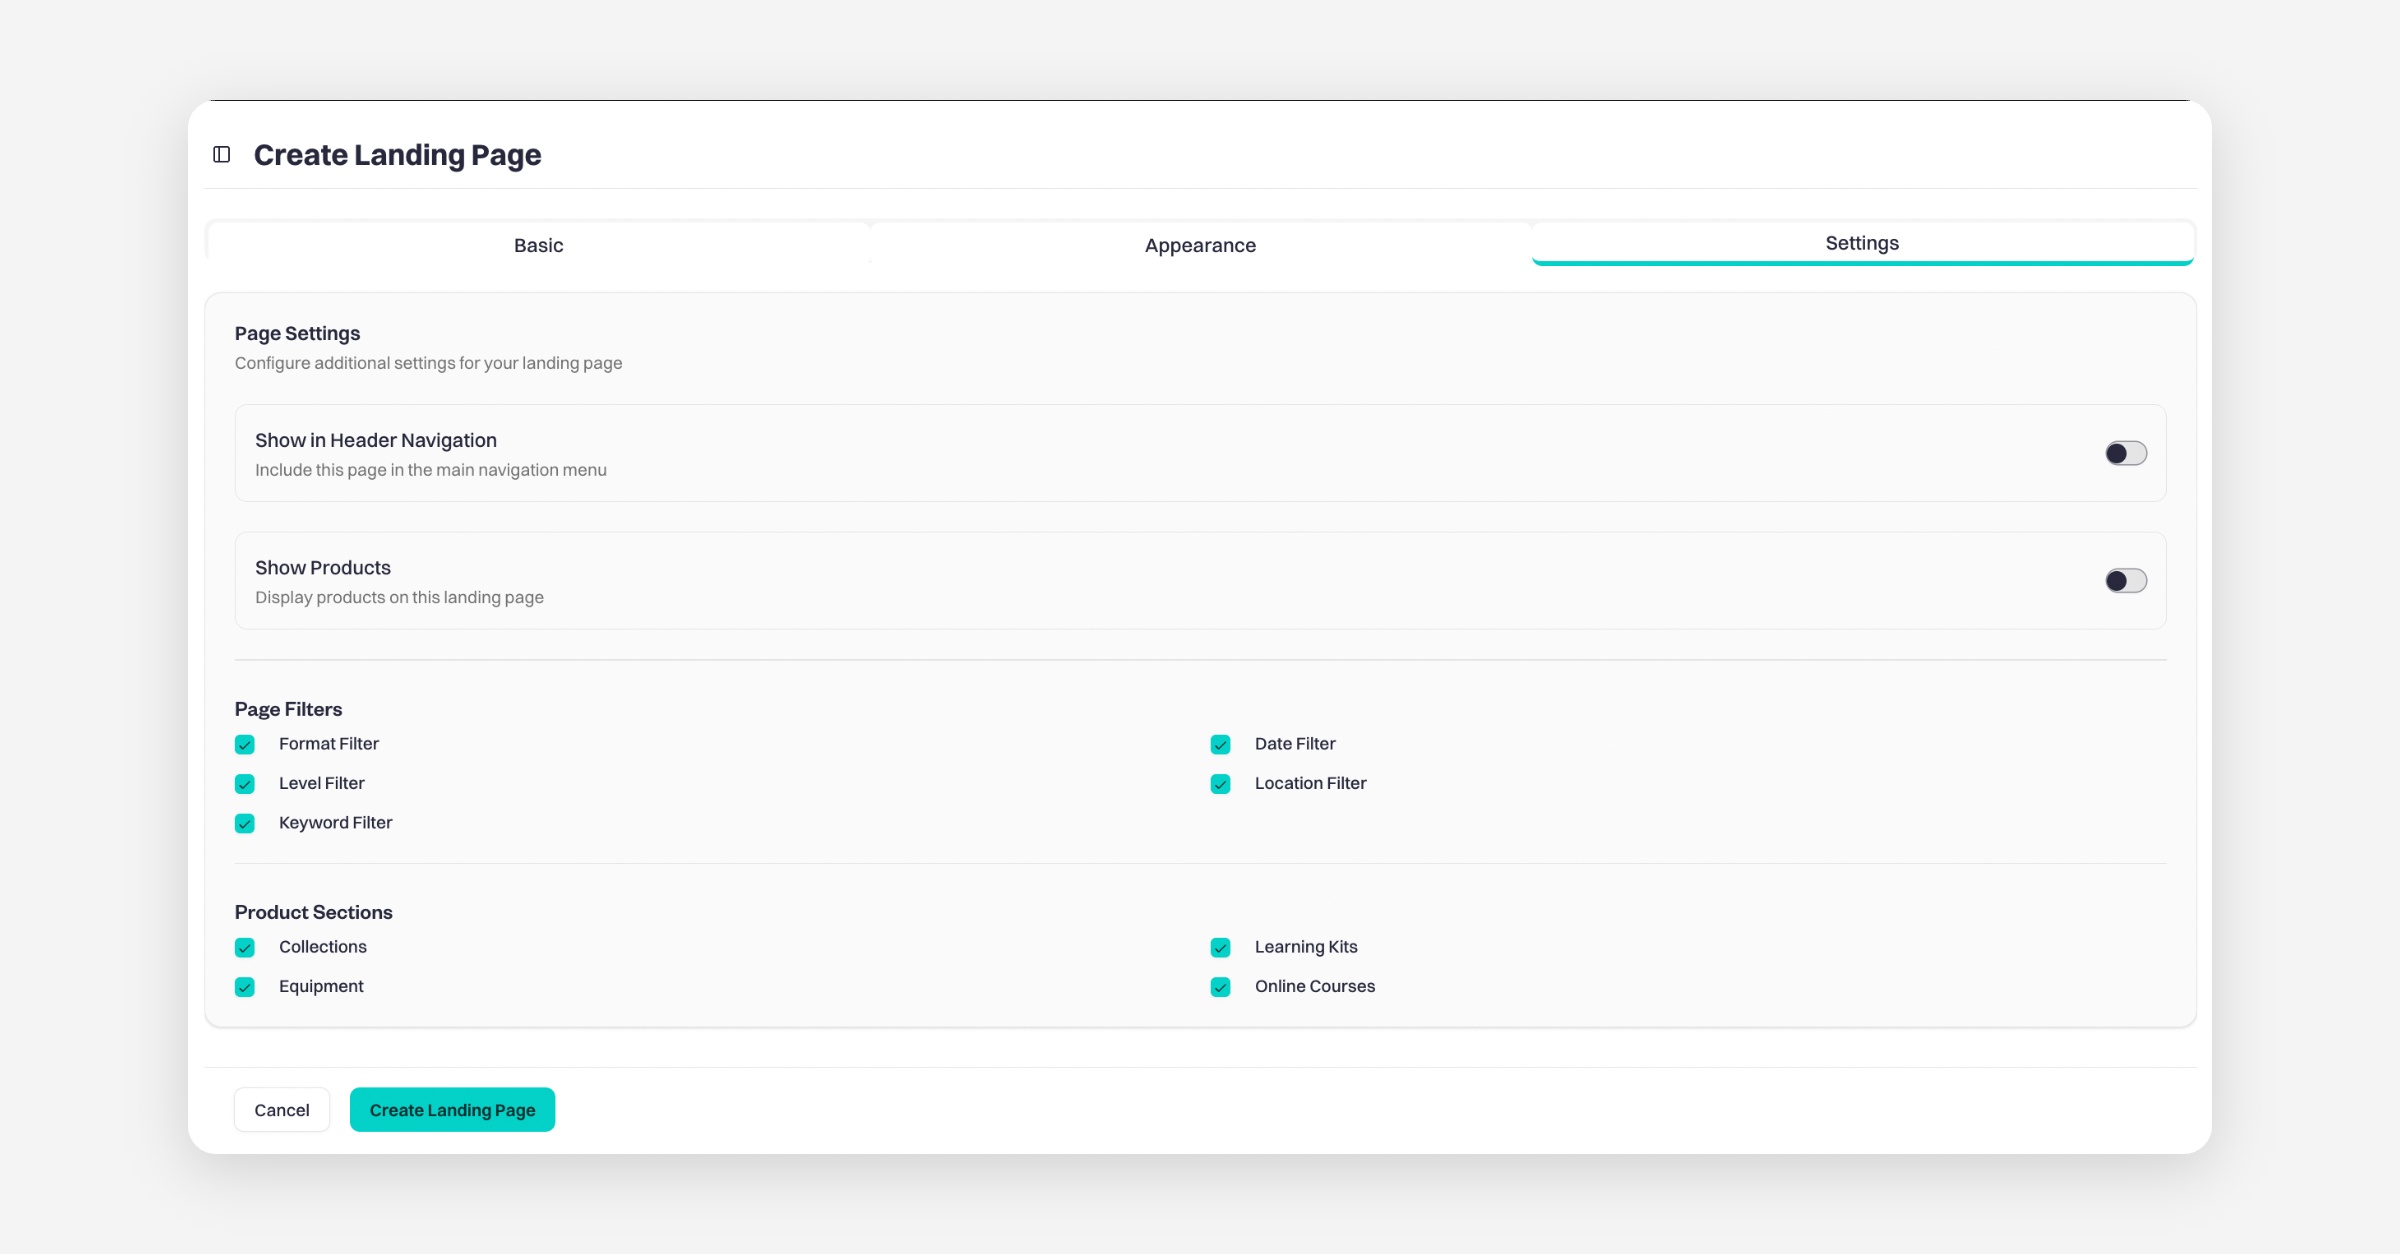
Configure any additional settings for your landing page
Using Tags to Group Listings
With landing pages, you can group your listings by tags
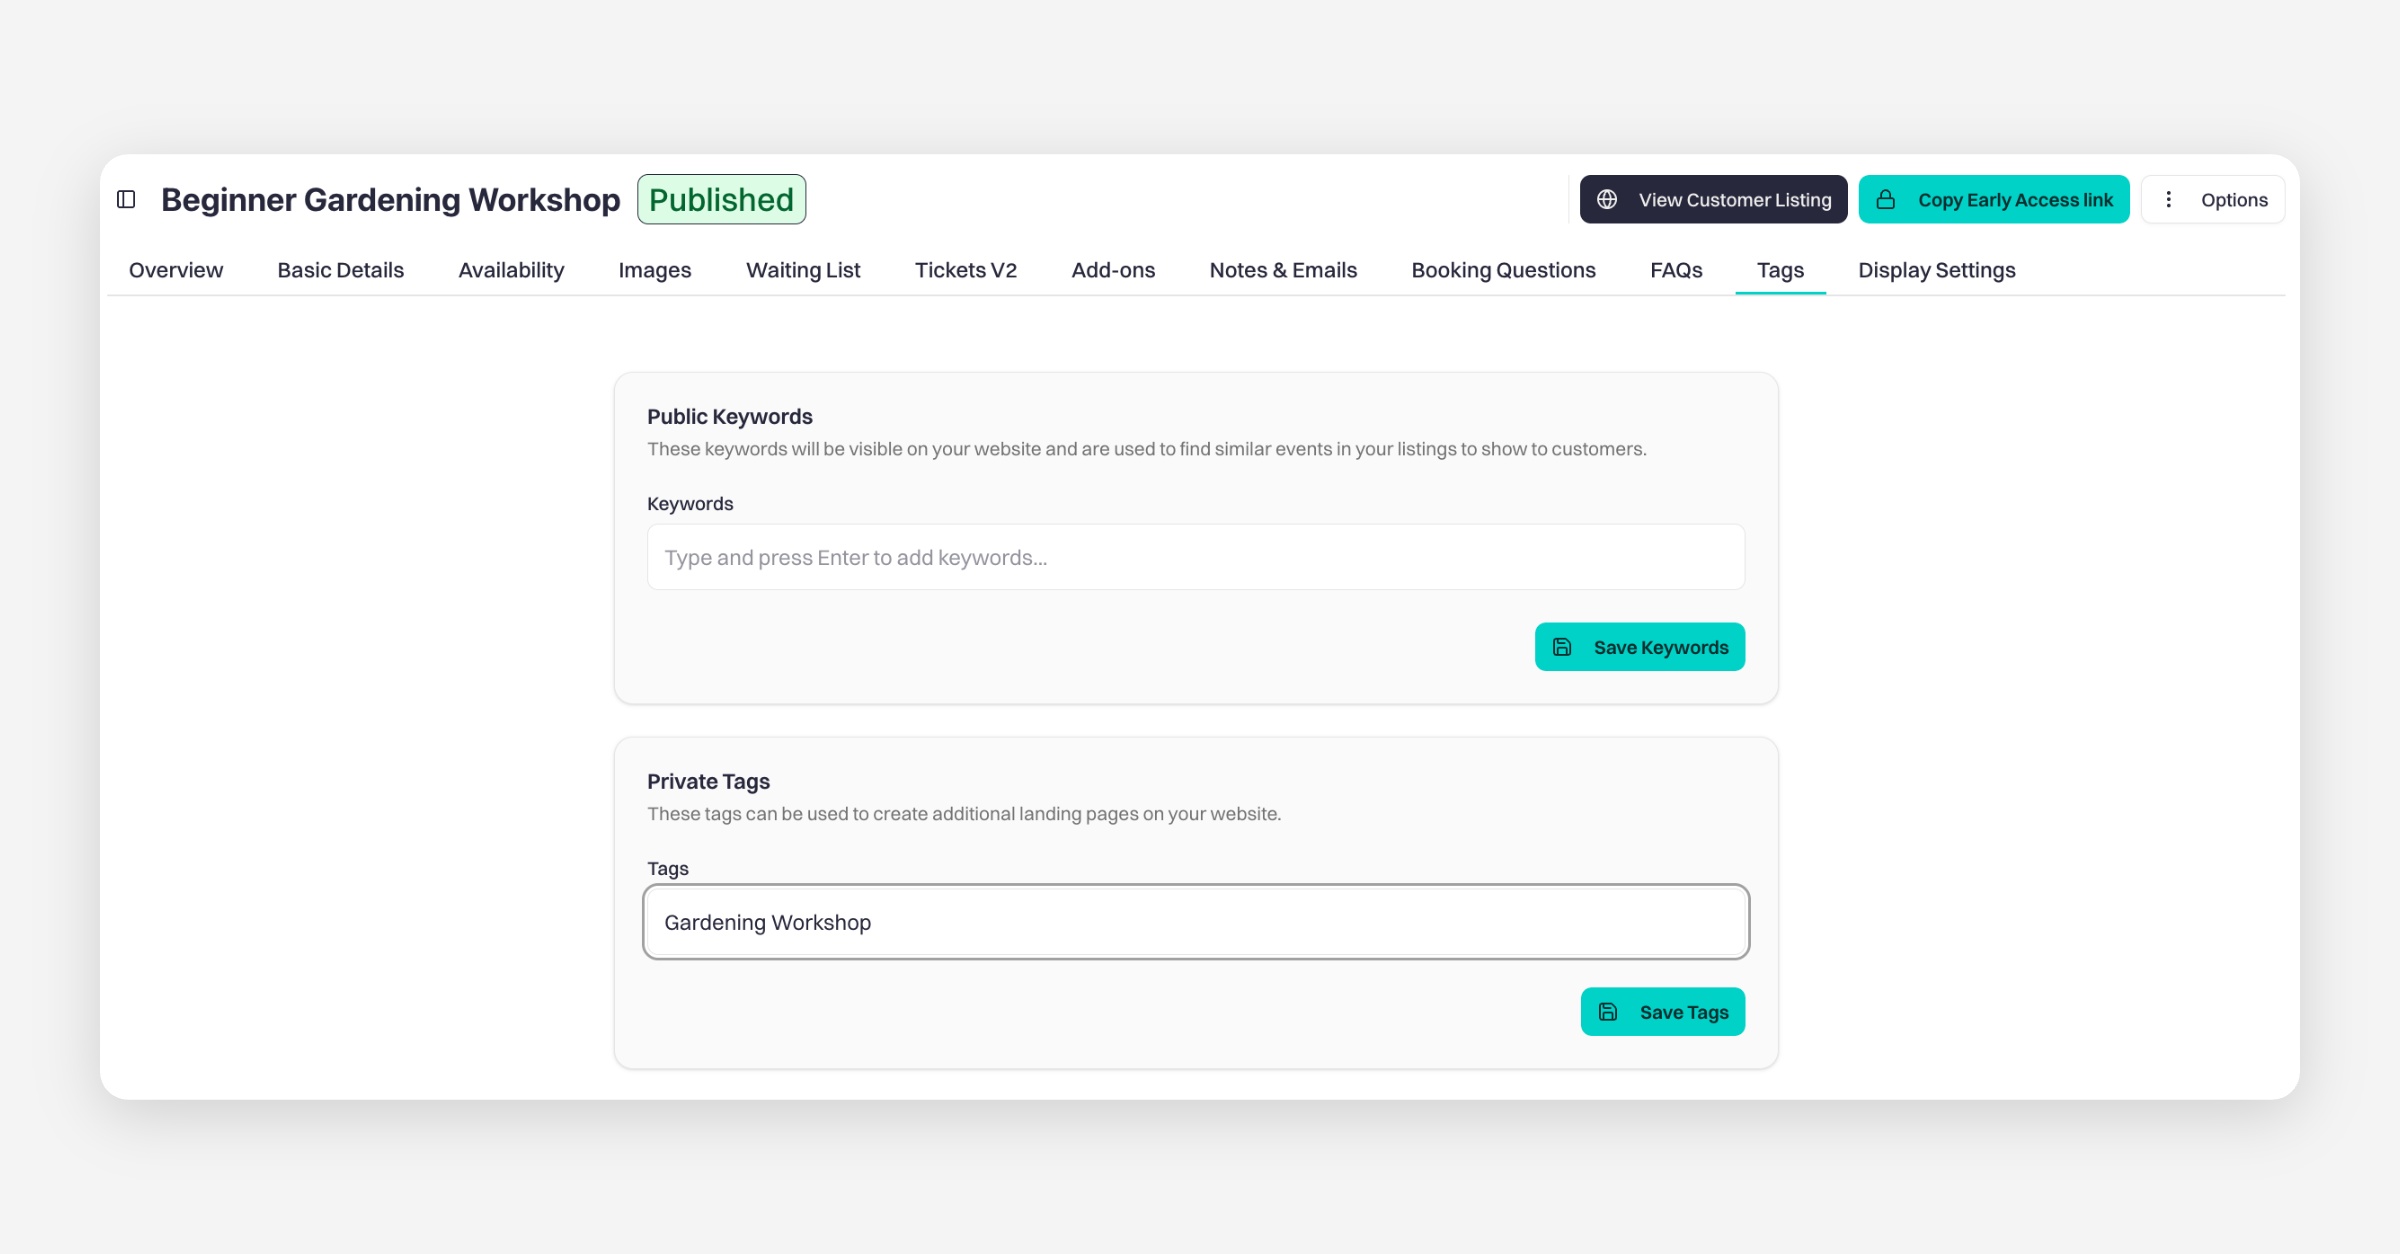
Go to your listing, click on Tags, and add a private tag, then click Save Tags
When creating your landing page, go to Basic Details and add the same tag
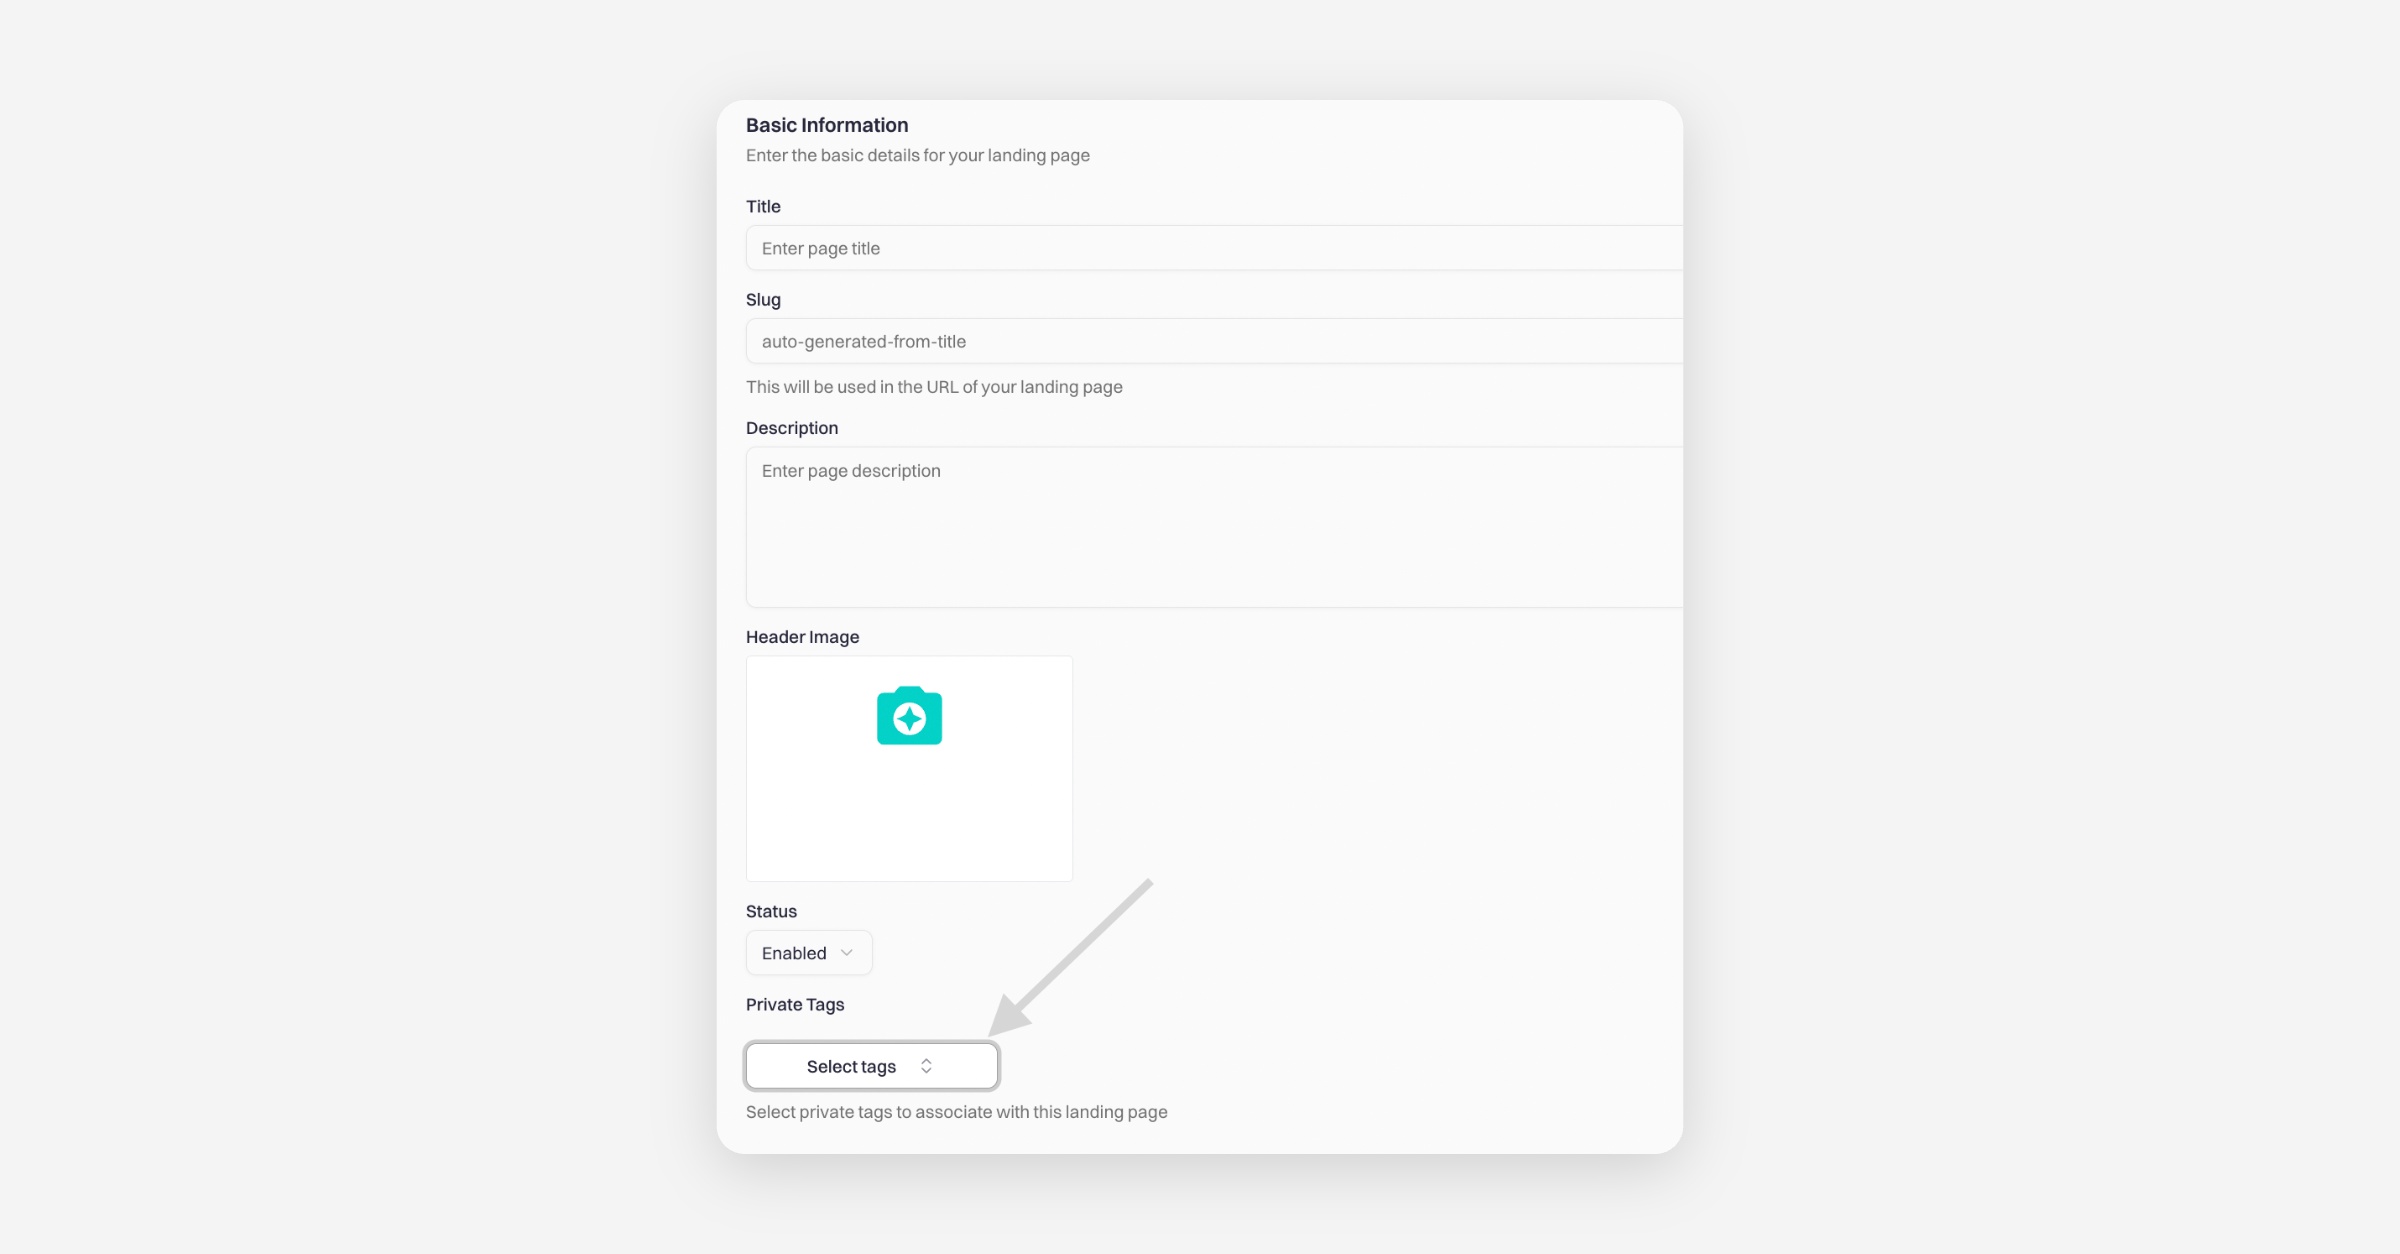
This ensures that the listing will appear on that landing page
Was this helpful?